

Go live: move a Data App to production, test it and roll back
This page is for the moment you take a Data App live, and every release after that. It explains what Astrato does when you publish, gives you a checklist to run before each release, and shows how to go back to an earlier build when a release goes wrong.
Two facts shape everything below:
- A Data App has one address, and publishing again replaces what it serves. There is no separate development or production copy of an app, and no promote button. Each publish swaps the app’s files in place, at the same URL, for everyone who opens it.
- Astrato does not keep a deploy history for published apps. To roll back, you publish an earlier build again. Where that earlier build comes from depends on how you built the app: App Builder keeps source versions for you, while a CLI project relies on your own source repository.
Before you start
Section titled “Before you start”-
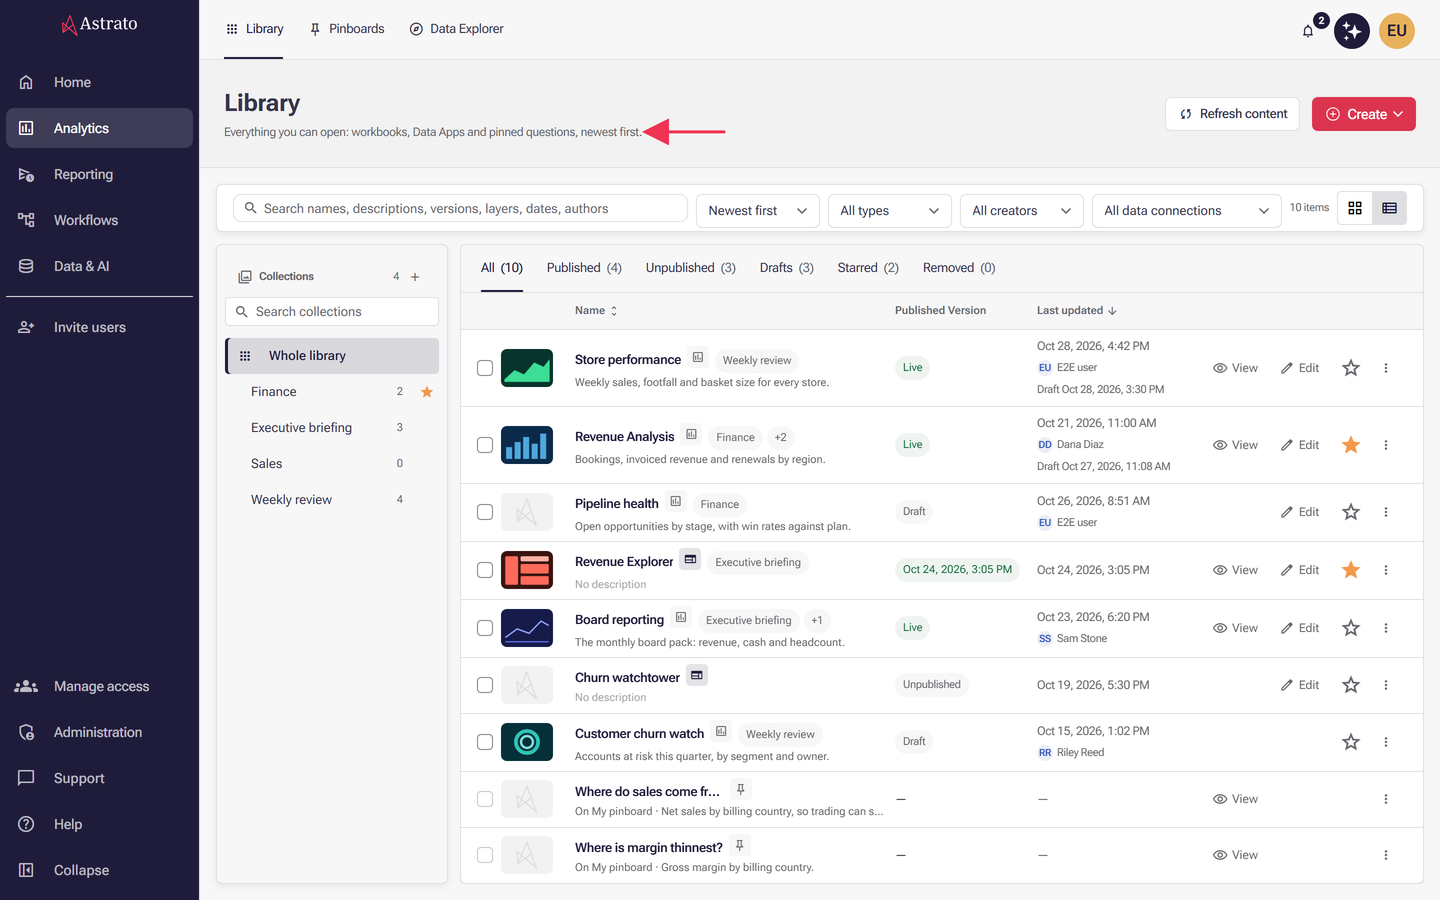
Publishing is in preview and works only in environments where it is switched on. To check, open Analytics → Library: where it is on, the subtitle under Library names Data Apps. Where it is off, the subtitle names only workbooks and pinned questions, and Data Apps are missing from the Create menu and the Library. Astrato switches it on; see Check which preview features you have for how to ask.
-
You need Publish permission on the app. Creating the publication also needs publication Create permission: with the CLI that is
astrato publications create, and in App Builder it is the app’s first publish. To check, open the app’s action menu in the Library: a published app shows Unpublish only to people who can publish it. Someone with Manage access on the app, or your Astrato administrator, can grant it; see Manage resource access.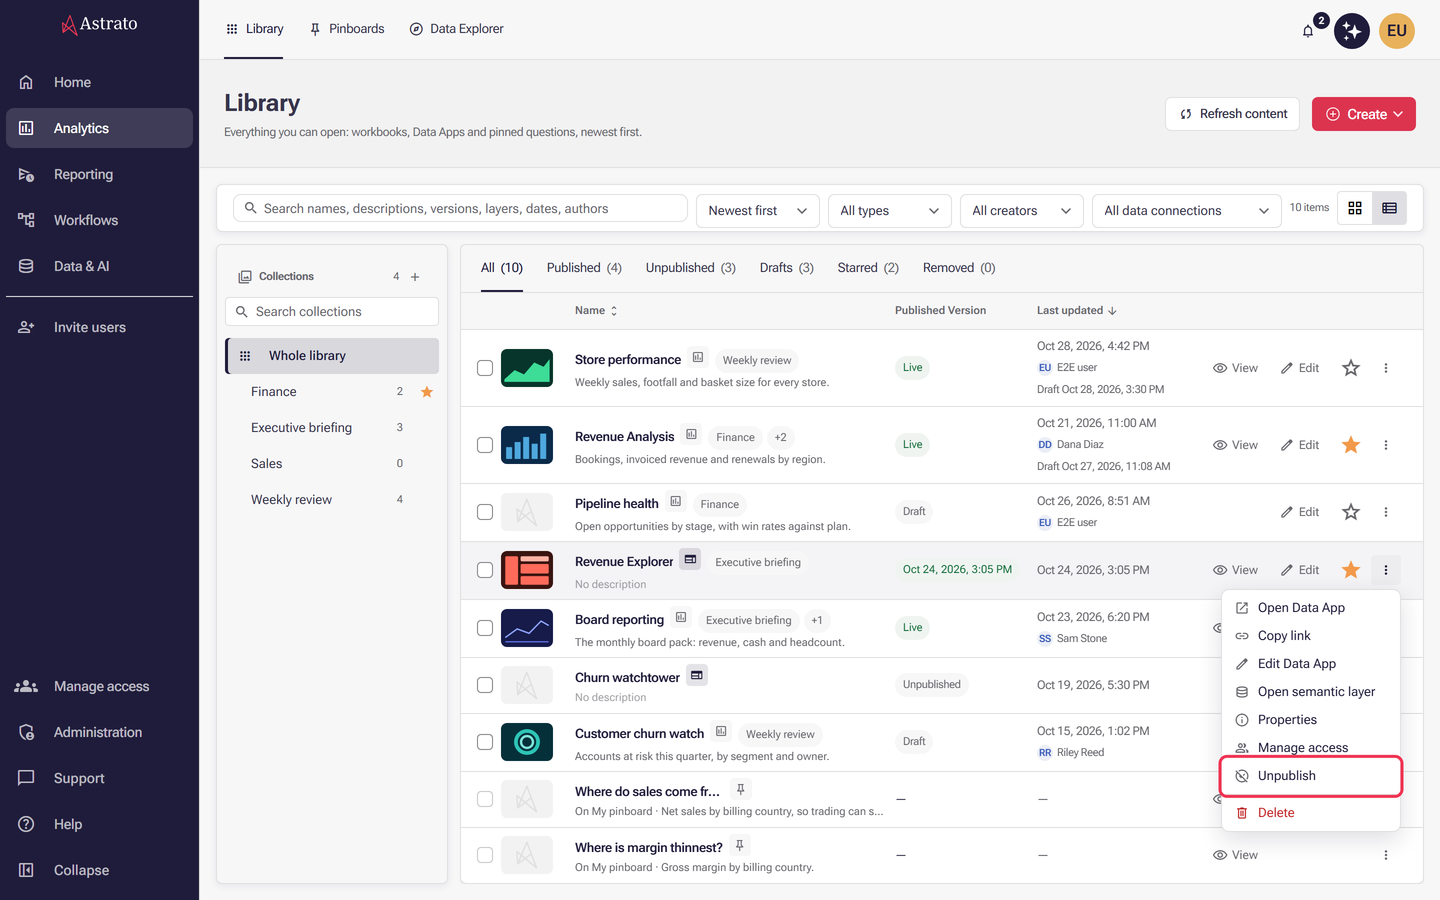
-
The app’s semantic layer must be published. A Data App reads only the published layer, never the draft. See Publish your semantic layer.
-
You should already have built the app, in App Builder or with the CLI. If you have not, start with Your first Data App.
Three things called “version”
Section titled “Three things called “version””You will meet the word in three places. They are different features.
| Where you see it | What it is | Can you roll back with it? |
|---|---|---|
The Published Version column in Analytics → Library, and v3 in CLI output |
A counter on the publication. It goes up with every accepted change — a publish, an unpublish, a rename, a label change, or an audience, expiry, embedding or location change. Granting or revoking access does not move it. The CLI’s --expected-version and MCP’s expectedVersion use it so two people cannot overwrite each other’s change; a stale value fails with version_conflict. |
No. It is a change counter, not a saved copy of the app. |
| Versions in App Builder | The saved history of a Builder app’s source files. The status line reads Published source version n after a publish, naming the source version that went live. | Yes, for App Builder apps. See Roll back. |
| Versions in the semantic layer editor | The history of a semantic layer: its tables, joins, dimensions and measures. See How versioning works in the semantic layer. | Only for the semantic layer. It does not roll back an app. |
Restoring a semantic-layer version never changes a Data App’s files, and restoring an App Builder source version never changes the semantic layer.
What labels do
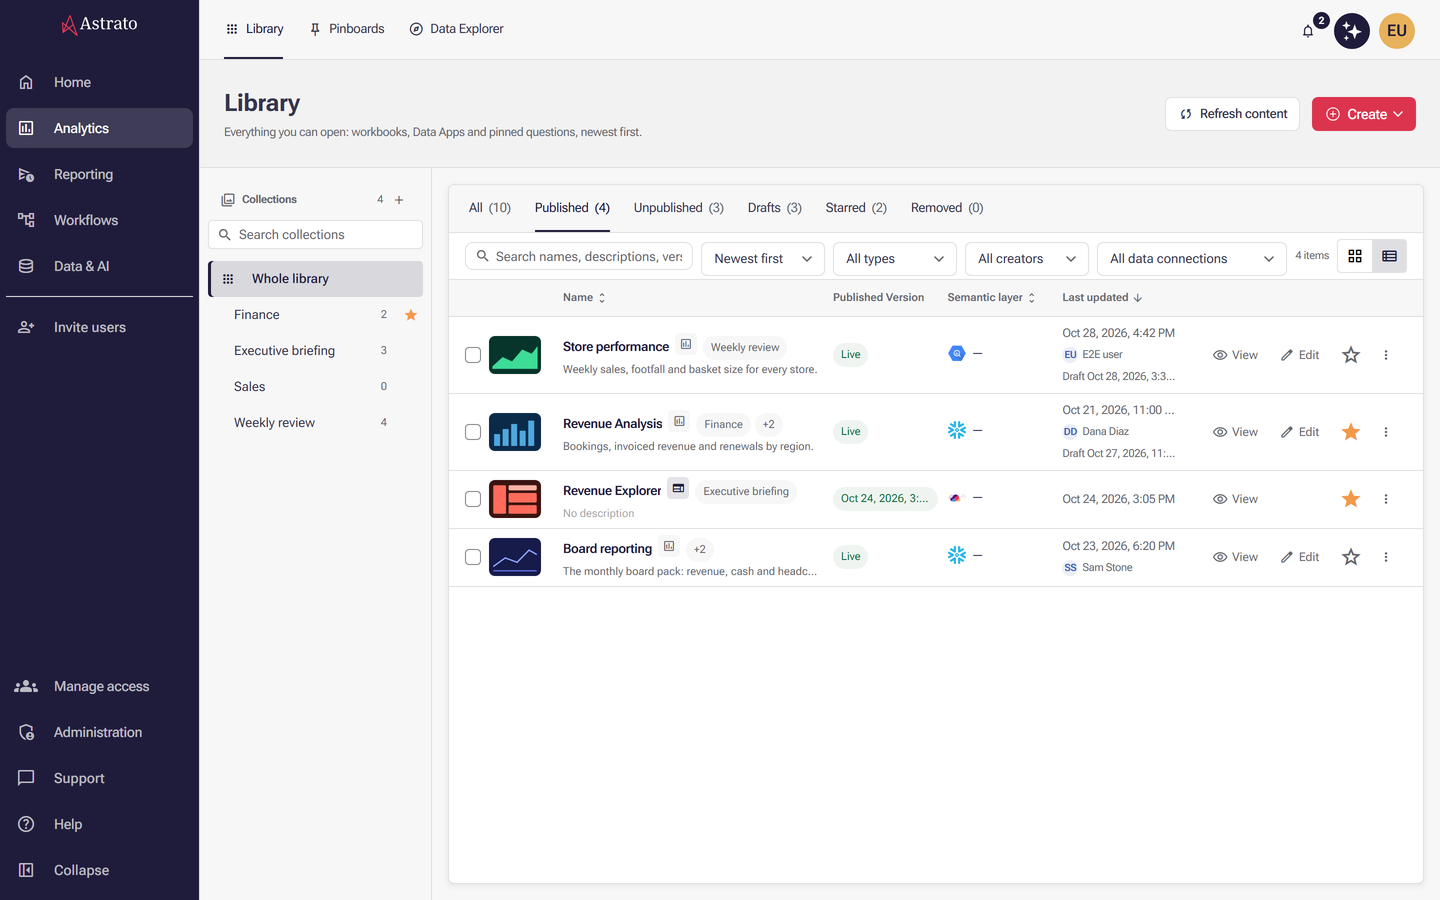
Section titled “What labels do”Labels are free-text tags on a Data App, such as development, testing or production. They help
people find and recognise apps. They do not change anything about the app: not its address,
not who can open it, and not which data it reads. Adding a production label does not make an
app production, and there is no fixed list of values.
To set labels:
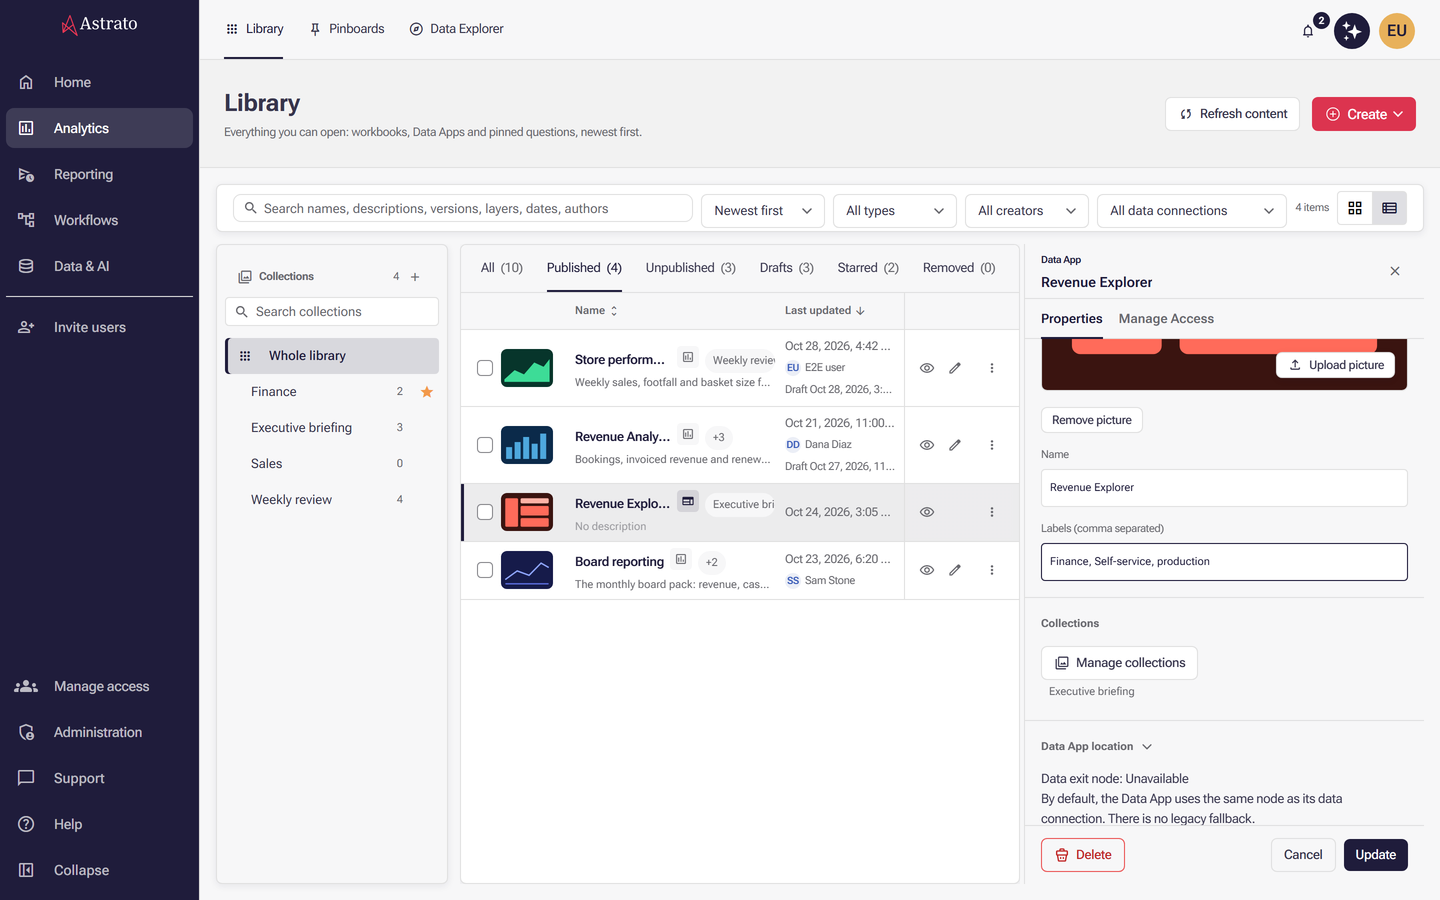
- Open Analytics and select the Library tab.
- Open the action menu at the end of the app’s row and select Properties.
- In the Properties tab, type the labels into Labels (comma separated), for example
sales, production. - Select Update.
You need Manage permission on the app. An app can have up to 20 labels, each 1 to 50 printable
characters; repeated labels are kept once. Agents set the same field with labels on
astrato_dashboard_freeform_update (see MCP tools). The CLI’s
publications update command has no labels option.
Test a release before it reaches your viewers
Section titled “Test a release before it reaches your viewers”Because publishing replaces the live app, test a release somewhere your viewers are not looking first. Astrato has no built-in staging environment, so the reliable pattern is a test copy: a second Data App with its own address, that only your testers can open. For a CLI project the test copy is a second publication of the same project; for an App Builder app it is a second app.
A test copy for a CLI project
Section titled “A test copy for a CLI project”-
Create the test copy once:
Terminal window astrato publications create ./my-app --name "Sales app (test)" --idempotency-key sales-app-test-create-1Note the Publication ID it prints. A new publication is unpublished and has no content yet. To find the ID later, run
astrato publications list. It prints one line per Data App, with its ID, status, version and name:<publication-id> <status> v1 Sales app (test) -
In Analytics → Library, open the test copy’s Properties, give it a
testinglabel and select Update. Then use Manage access to grant it only to the people who will test it: under Add access, choose Users or Groups, find each tester, give them View, and select Update. If the panel warns Can open this app without access to its data, that tester also needs access to the semantic layer before the app’s charts load for them. See Manage Data Apps.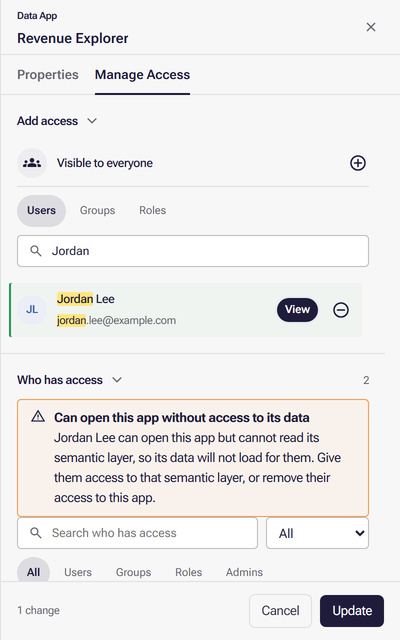
-
For every release, read the test copy’s own version and publish the build to it first:
Terminal window astrato publications get <test-publication-id>astrato publish ./my-app --publication-id <test-publication-id> --expected-version <version> --idempotency-key sales-app-test-2026-11-04The test copy has its own version number, so take it from this
get, not from the live app. -
Check the test copy with the pre-release checklist, and only then publish the same source commit to the live app, as in Go live with the CLI.
Both copies read the semantic layer named in astrato.json, so they show the same data. To test
against other data, see Keep development and production data apart.
A test copy for an App Builder app
Section titled “A test copy for an App Builder app”App Builder publishes a project to the publication its first publish created and has no step for choosing a different target. Preview shows a release to you alone. To let other people test it before your viewers see it, keep a second App Builder app as the test copy.
App Builder has no duplicate action, so ask an AI assistant connected to Astrato to copy the source
for you; see Connect an AI assistant. It needs the workspace:read and
workspace:write scopes, and you must own both apps.
- Ask the assistant to create the test copy, for example “Create an App Builder app called Sales
app (test) on the same semantic layer as Sales app”. It uses
astrato_app_builder_openwith a name, the semantic layer and an idempotency key, and gives you the new app’s address. Open that address while signed in, so App Builder prepares the app and connects editing. - Ask it to copy Sales app’s saved source into the test copy. It reads the files with
astrato_app_builder_readand writes them withastrato_app_builder_edit. An edit that changes the dependencies inpackage.jsonwithout a matchingpackage-lock.jsonis refused, so the assistant copies both files in the same edit, or installs the app’s packages with an npm command throughastrato_app_builder_execute. - In the test copy, check Preview, then select Publish. Its first publish creates its own publication, separate from the live app’s.
- In the Library, give the test copy a
testinglabel and use Manage access to grant it only to your testers, as in step 2 of A test copy for a CLI project.
Example: the request and what comes back
Section titled “Example: the request and what comes back”You can make steps 1 and 2 one request. The wording is yours; this is one that works:
Create an App Builder app called "Sales app (test)" on the same semantic layer as my app"Sales app", and give me its link. Once I have opened it, copy every source file from Sales appinto it, including package.json and package-lock.json, and tell me the revision you end on.The assistant finds Sales app with astrato_app_builder_list and creates the copy with
astrato_app_builder_open. That call returns the new app’s ID, its address and whether App Builder
has it open yet:
{ "appId": "<new-app-id>", "url": "https://<your-astrato-address>/web/app-builder/<new-app-id>", "status": "waiting_for_browser", "revision": null, "generation": null}waiting_for_browser means no App Builder tab has prepared the app yet, so the assistant asks you to
open the url. Once you have, it reads Sales app’s files and writes them into the copy. Each
astrato_app_builder_edit returns the copy’s new revision, for example
{ "appId": "<new-app-id>", "revision": 2, "generation": 1 }. You are done when the assistant
reports the files copied and the revision, and the test copy’s Preview in App Builder shows the
same app as Sales app.
For each release, save the change in the live app’s project (saving does not change what is published), have the assistant copy the saved source to the test copy again, publish the test copy and test it, and then publish the live app. See External agents using App Builder.
Test as one of your viewers
Section titled “Test as one of your viewers”Your own preview and your own visit show the app with your access. Your viewers may see less: a semantic layer’s security rules restrict rows by the email address or the groups of whoever is asking. To check what a viewer will see, grant the test copy to a colleague or a test account in the same groups as that viewer, and ask them to open it and work through the checklist.
Keep development and production data apart
Section titled “Keep development and production data apart”A Data App reads one semantic layer, and a semantic layer reads one data connection. The layer is
fixed when the app is created: astrato publications create takes it from the project’s
astrato.json, and an App Builder app keeps the layer chosen in its creation form. There is no
setting to move an existing Data App to another layer, and labels do not change which data an app
reads. So to run an app on development data and the live app on production data, use two
semantic layers, one on each data connection:
-
Build the layer on your development connection, and the app on that layer.
-
Make the production layer from it. In the development layer, open the Dev tab (drawn as a
<>icon near the right end of the editor’s tab bar), select Export, then Export YAML. The file downloads to your computer.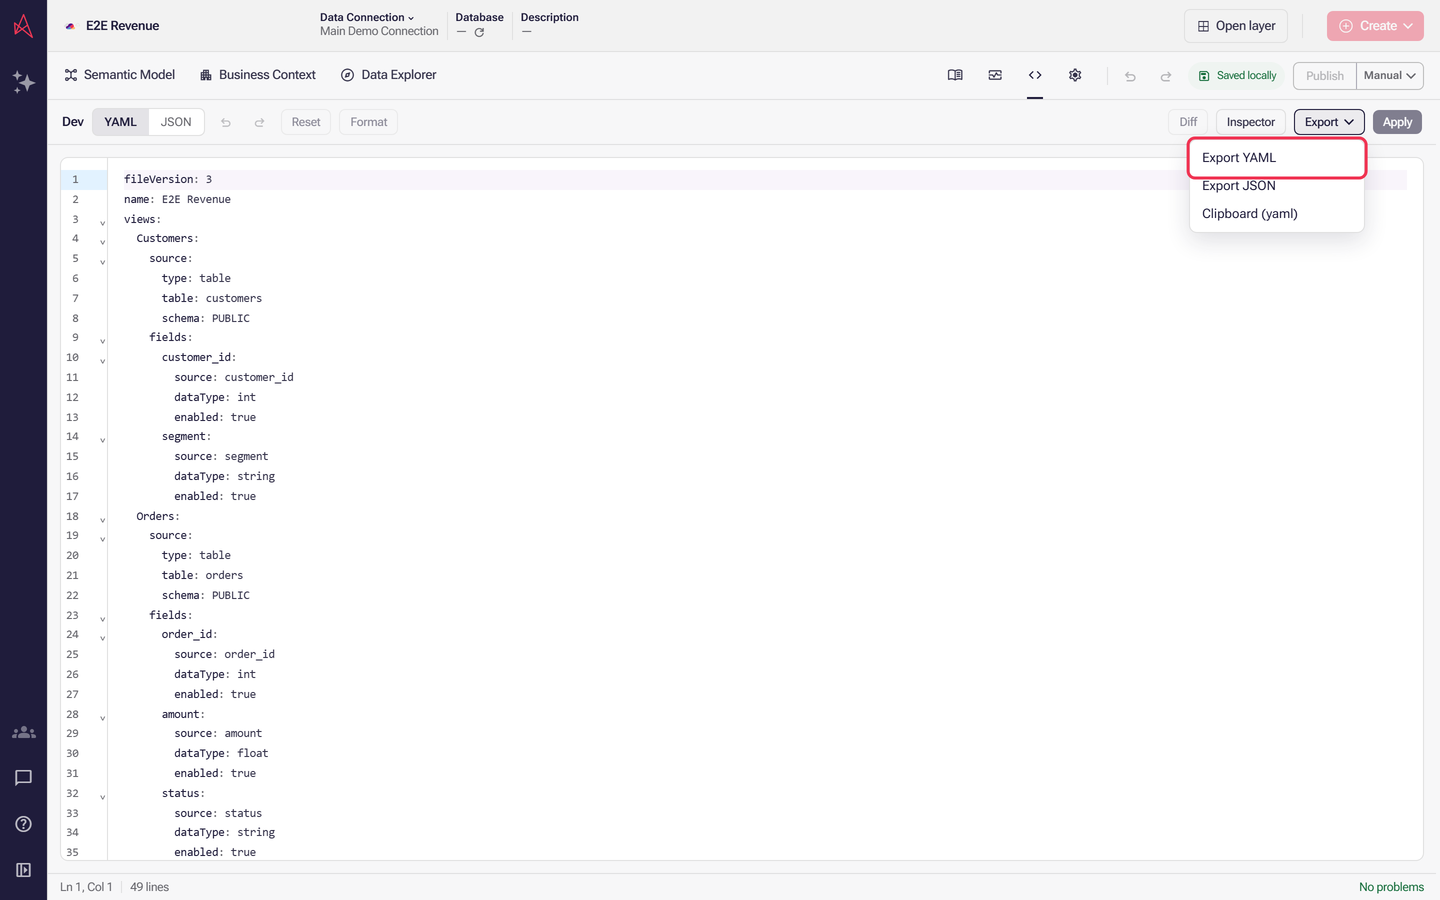
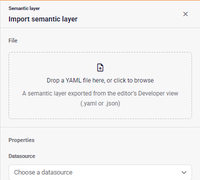
Then, in Data & AI, select Create, then Semantic Layer (YAML), choose the production connection as the Datasource, and select Import. The new layer looks for the same tables on that connection, so check its sources once it is made. See Import a layer from a YAML file. Duplicate does not do this: a duplicate stays on the original’s data connection.
-
Publish the production layer. See Publish your semantic layer.
-
Make the live app on the production layer:
- CLI: set
semanticLayerIdinastrato.jsonto the production layer, then create the live app’s publication withastrato publications createand publish to it.astrato publishrefuses a publication on another layer with “The publication uses a different semantic layer from astrato.json.”, so set the value to match the publication before each publish. - App Builder: create the production app on the production layer and copy the source into it, as in A test copy for an App Builder app.
- CLI: set
Promote a later model change to production
Section titled “Promote a later model change to production”Importing a newer export creates another layer rather than updating the production one, and an app on it would be a new Data App with a new address. To move a model change from the development layer to the production layer you already have, replace the production layer’s document instead. The production layer keeps its ID, so its apps keep their addresses. Repeat these steps for every change:
-
Make and check the change in the development layer.
-
In the development layer’s Dev tab, select YAML, then Export, then Clipboard (yaml) to copy the whole document. Export YAML saves the same text as a file, which you can keep in your source repository as a record of each release.
-
Open the production layer, select its Dev tab and select YAML. Select all the text in the editor, paste the development layer’s document over it, and change the
name:line back to the production layer’s name, which the pasted text would otherwise replace. Select Diff to review what will change. -
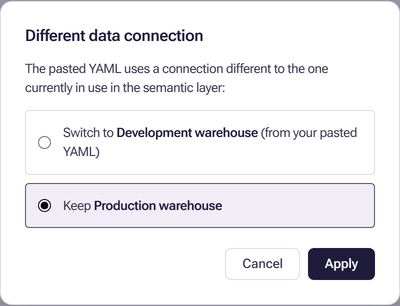
Select Apply. Because the pasted document names the development connection, a Different data connection dialog asks which connection to use. Choose Keep with the production connection, then select Apply. The layer’s model is replaced and its data connection stays the same. A document that names no connection, or the same one, applies without asking.
-
Check the production layer’s sources. Apply does not look at the production connection, so a table or column added in development may not exist there. Changing the model starts a source check; select Check now, the source status glyph in the editor header, to run a fresh one. A table or column the check confirms missing blocks publishing until you repair it, but one it reports as Sources unverified does not, so resolve both before you publish. See When your database schema changes.

-
Publish the production layer. This stops every Data App on it until each is published again, so follow When the semantic layer is published again.
The production layer’s Versions now show the replacement as a new revision, so you can compare it with the one before, or restore the earlier revision if the change turns out wrong. See How versioning works in the semantic layer.
Pre-release checklist
Section titled “Pre-release checklist”Run through this before every release. Each line says what success looks like and what to do if it fails.
| Check | Looks right when | If it fails |
|---|---|---|
| The semantic layer is published, with nothing waiting | Every layer change the app relies on is published. Leaving the editor with changes still waiting warns You have unpublished changes. | Publish the layer first. See Publish your semantic layer. Then publish the app again — the app needs that new revision. |
| You know what you will roll back to | App Builder: the version that is live now appears in Versions. CLI: the commit that is live now is tagged or noted in your repository. | Record it before you publish. Astrato cannot give you the previous build afterwards. |
| The build works where your viewers are not looking | The test copy, or App Builder’s Preview, opens, its charts show data, and its filters change the charts. | Fix it before publishing. For empty charts, see My chart is empty or shows an error. |
| You hold the app’s current version (CLI) | astrato publications get <publication-id> prints Version: and the number you will pass to --expected-version. |
Read it again just before you publish. Someone else’s change since your last read fails the publish with version_conflict. |
| The right people can open the live app | Manage access on the live app lists the people and groups who should see it. | Grant access before you share the link. See Manage resource access. |
| Nobody is about to publish the semantic layer | Whoever edits the layer knows a release is in progress, and has Manual publishing selected in their browser. | Agree an order: layer first, then the app. A layer publish after your release stops the app until it is published again. |
Go live
Section titled “Go live”Go live from App Builder
Section titled “Go live from App Builder”-
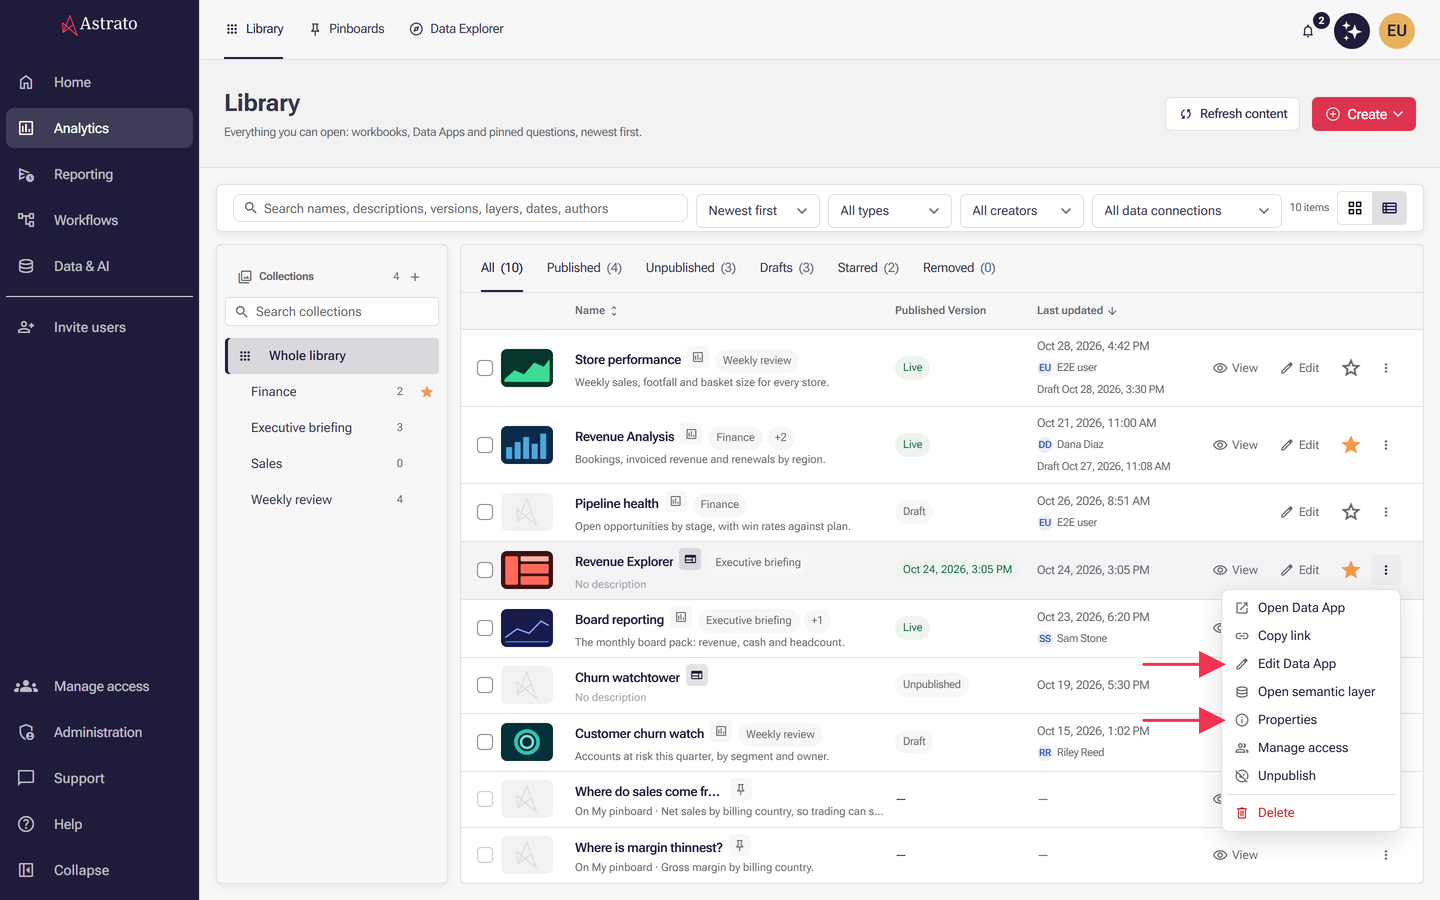
Open the app in App Builder. From the Library, open the row’s action menu and select Edit Data App.
-
Check the app in Preview.
-
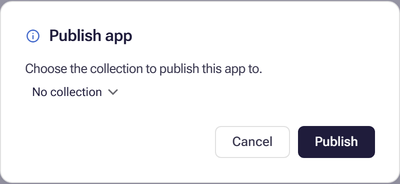
Select Publish. If you are asked to choose a collection, choose one or No collection. Keep the tab open until publishing finishes.
-
You are done when the status reads Published source version n. Write down n: it is the source version to come back to if a later release goes wrong. To keep it with the app, add it as a label such as
rev-5in the app’s Properties, as in What labels do. If you did not note it, see Find which version is live.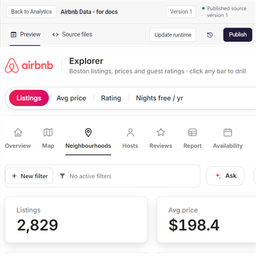
If publishing fails, App Builder shows the reason. Fix it, for example by publishing the semantic layer or asking for the missing permission, and select Publish again. Your earlier published app stays live while you do. See Publishing from App Builder.
Go live with the CLI
Section titled “Go live with the CLI”-
Make sure your working copy is the exact commit you tested, and tag or note it.
-
Read the live app’s current version:
Terminal window astrato publications get <publication-id> -
Publish, passing that version and a new idempotency key for this release:
Terminal window astrato publish ./my-app --publication-id <publication-id> --expected-version <version> --idempotency-key sales-app-release-2026-11-04 -
You are done when the CLI prints a line such as
Published Sales app (v2). Artifacts verified and activated; application loading and data queries have not been checked.followed by the app’s address.
If the command fails, the previous build stays live. Retry an interrupted publish with the same command, the same key and the same build output; if you change anything, start again from step 2 with a new key. See Recovering an interrupted publish and the error codes.
Check that the release worked
Section titled “Check that the release worked”A successful publish means Astrato checked and switched over the files. It does not open the app or run its queries, so check those yourself:
-
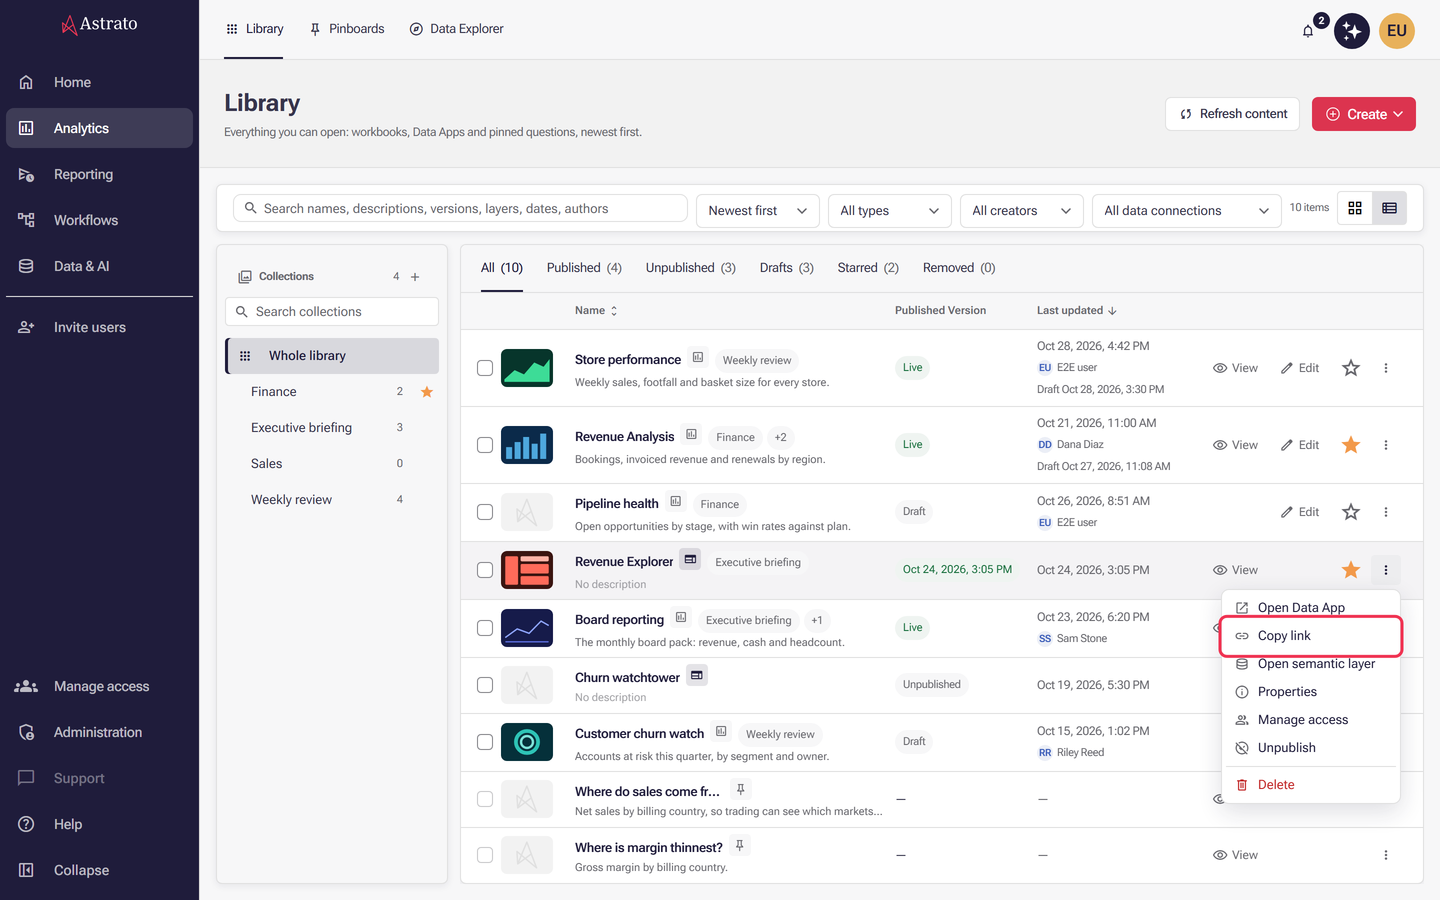
Open the live address. In the Library, use Open Data App or Copy link from the row’s action menu.
-
Confirm the change you released is there, the charts show data, and the filters work.
-
Confirm the Library lists the app as published.
People who already had the app open get the new build when the page reloads. An app built on a runtime newer than 0.2.1 reloads itself on its next data request after the change; on older runtimes, viewers reload the page themselves. See Reload after an app changes.
Find which version is live
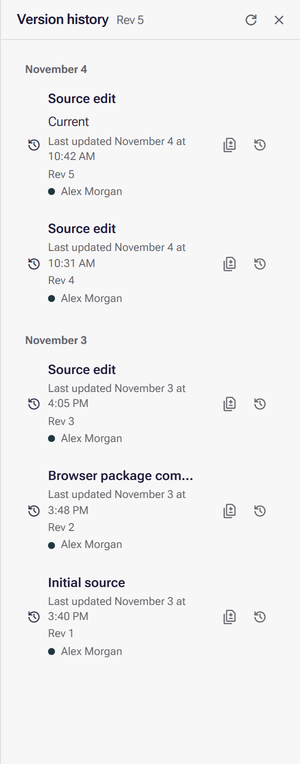
Section titled “Find which version is live”The Versions panel marks only the newest source version, Current, not the one that is published, and the status line shows Published source version n only right after a publish. To work it out later, compare the time of the last publish with the version times:
-
Read when the app was last published. With the CLI, run
astrato publications get <publication-id> --jsonand readpublishedAt. Over MCP,astrato_dashboard_freeform_getreturns the same field. Both also returnsemanticLayerRevision, the semantic-layer revision the app is pinned to."publishedAt": "2026-11-04T10:45:12.000Z","semanticLayerRevision": 7, -
In App Builder, open Versions. Each row reads Last updated with a date and time, and Rev n.
publishedAtis in UTC, while the panel shows your local time. -
The live version is the newest Rev saved before
publishedAt. App Builder always publishes the saved version that is current at that moment, and refuses to finish if the source changes while it builds.
For a CLI app, publishedAt tells you when, and your repository’s tag or note for that release
tells you which commit.
Roll back
Section titled “Roll back”Rolling back means publishing an earlier build again. It is an ordinary publish, so it replaces the live app in the same way and moves the publication’s version on, never back.
Roll back an App Builder app
Section titled “Roll back an App Builder app”-
Open the app in App Builder with Edit Data App, and save or discard any unsaved source edits. Only one browser tab edits an app at a time, and restoring needs that tab. If yours shows Viewing app, another tab is editing: close that tab, and yours takes over editing. If editing was paused, select Resume editing. See App Builder.

-
Select Versions. Each version is listed as Rev n, newest first, with Current on the latest; find the one that was live before, for example the number you wrote down at the last good release. Select a version to compare its files with the current ones.
-
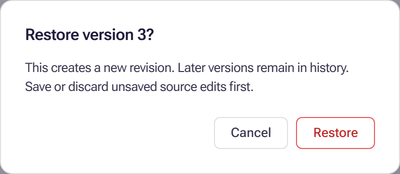
Select the restore icon on that row (its tooltip reads Restore this version), then Restore in the confirmation. This creates a new source version with the earlier files; later versions stay in history.
-
Check the restored app in Preview.
-
Select Publish. You are done when the status reads Published source version n for the new version.
Restoring alone does not change the live app; only step 5 does. Restoring also does not bring back the conversation, live data or semantic-layer changes. See Version history.
Roll back a CLI app
Section titled “Roll back a CLI app”- In your source repository, check out the commit that was live before.
- Read the current version with
astrato publications get <publication-id>. - Run
astrato publishwith that version and a new idempotency key. Do not reuse the key from the bad release: the rebuilt files are different content, and a reused key fails withinvalid_request. - Check the release as in Check that the release worked.
Take the app offline while you fix it
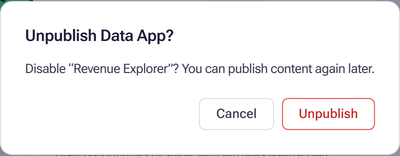
Section titled “Take the app offline while you fix it”If you need the bad release gone before you have a good build, unpublish the app: Unpublish in
the row’s action menu in the Library, or
astrato publications unpublish <publication-id> --expected-version <version> --yes. Unpublishing
stops the app being served but keeps the publication, its address and its access, so you can
publish to it again. Files a viewer already opened can stay available for up to five minutes.
Do not delete the app to stop it: deleting disables its address for good and you cannot publish to it again.
When the semantic layer is published again
Section titled “When the semantic layer is published again”Each time you publish a Data App, it is pinned to the semantic layer’s published revision at that
moment. Draft changes to the layer do not affect it. But publishing the semantic layer again
stops every Data App built on it. Their start-up, model reads and data requests fail with
409 app_unavailable and the message “This app needs to be republished before it can load its
data. Ask the app’s owner to republish it.” until each app is published again.
This catches people out in two ways: an editor with Delayed or Instant publishing selected publishes the layer on their own after an edit, and restoring a semantic-layer version and publishing it counts as a new publish too.
To release a semantic-layer change safely:
-
Make sure everyone who edits the layer has Manual publishing selected while apps depend on it. The choice is remembered per browser, not stored on the layer. See Choose when publishing happens.

-
List the apps on the layer: the Library’s published Data Apps show each app’s semantic layer.
-
Publish the layer.
-
Publish each of those apps again straight away, from App Builder or with
astrato publish, with no source change needed. -
Open each app and check that its charts show data.
If something goes wrong
Section titled “If something goes wrong”| What you see | What it means | What to do |
|---|---|---|
409 app_unavailable, “This app needs to be republished…” |
The semantic layer was published after the app. | Publish the app again. See When the semantic layer is published again. |
version_conflict from the CLI |
The app changed since you read its version, for example someone renamed it. | Run astrato publications get again, check what changed, and publish with the new version. |
| The publish failed part-way | Nothing was switched over; the previous build is still live. | Retry with the same key and build output. See Recovering an interrupted publish. |
| The release is live but wrong | Publishing worked; the build is the problem. | Roll back, or take the app offline first. |
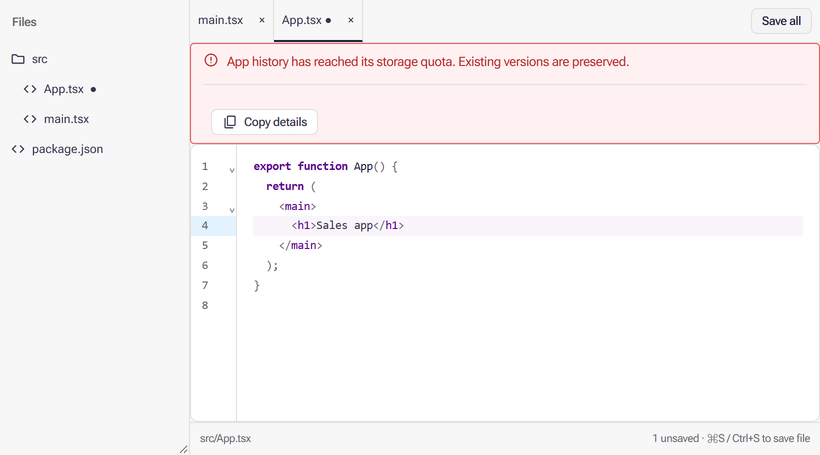
| App Builder refuses to save a new version, “App history has reached its storage quota” | The app’s source history is full. Existing versions and the published app are unaffected. | Continue the work in a new app project. See Version history. |
| Charts are empty after the release | Often a data or permission problem rather than the release. | See My chart is empty or shows an error. |
What next
Section titled “What next”- Manage Data Apps — access, public links, hosting and the full publication reference.
- Publishing from App Builder — what the Publish button checks.
- Publish an app with the CLI — every
publishandpublicationsoption. - How versioning works in the semantic layer — the layer’s own history, which is separate from your app’s.
- Publish your semantic layer — publish modes, and what blocks a publish.