

Administrator or above
Set up single sign-on with Okta
This guide covers the Okta side of single sign-on: creating an app integration for Astrato, collecting its credentials and assigning the people who will use it. It then hands back to the Astrato steps, which are the same for every provider.
Before you start
Section titled “Before you start”- You meet the requirements in Set up single sign-on, and have read Do not lock yourself out.
- You can sign in to the Okta Admin Console and create app integrations.
- The people who will sign in have an email address in Okta. Astrato identifies people by email.
Values you will bring back to Astrato
Section titled “Values you will bring back to Astrato”| Astrato Setup field | Where it comes from in Okta |
|---|---|
| Issuer URL | Your Okta domain with https:// in front, for example https://example.okta.com |
| Scope | Optional. Leave it empty unless your setup needs extra scopes |
| Client ID | Client ID under the app integration’s Client Credentials |
| Client secret | Client secret under the same Client Credentials |
| Identity provider domains | The email domains your people sign in with, for example example.com |
Copy the callback URLs from Astrato
Section titled “Copy the callback URLs from Astrato”-
In Astrato, open Administration → Enterprise Connection and stay on Login connections.
-
Select Add connection and choose Okta in Select a Login provider.
-
Leave the Configuration tab open. It lists two callback URLs, the sign-out redirect URL and the scopes
openid profile email.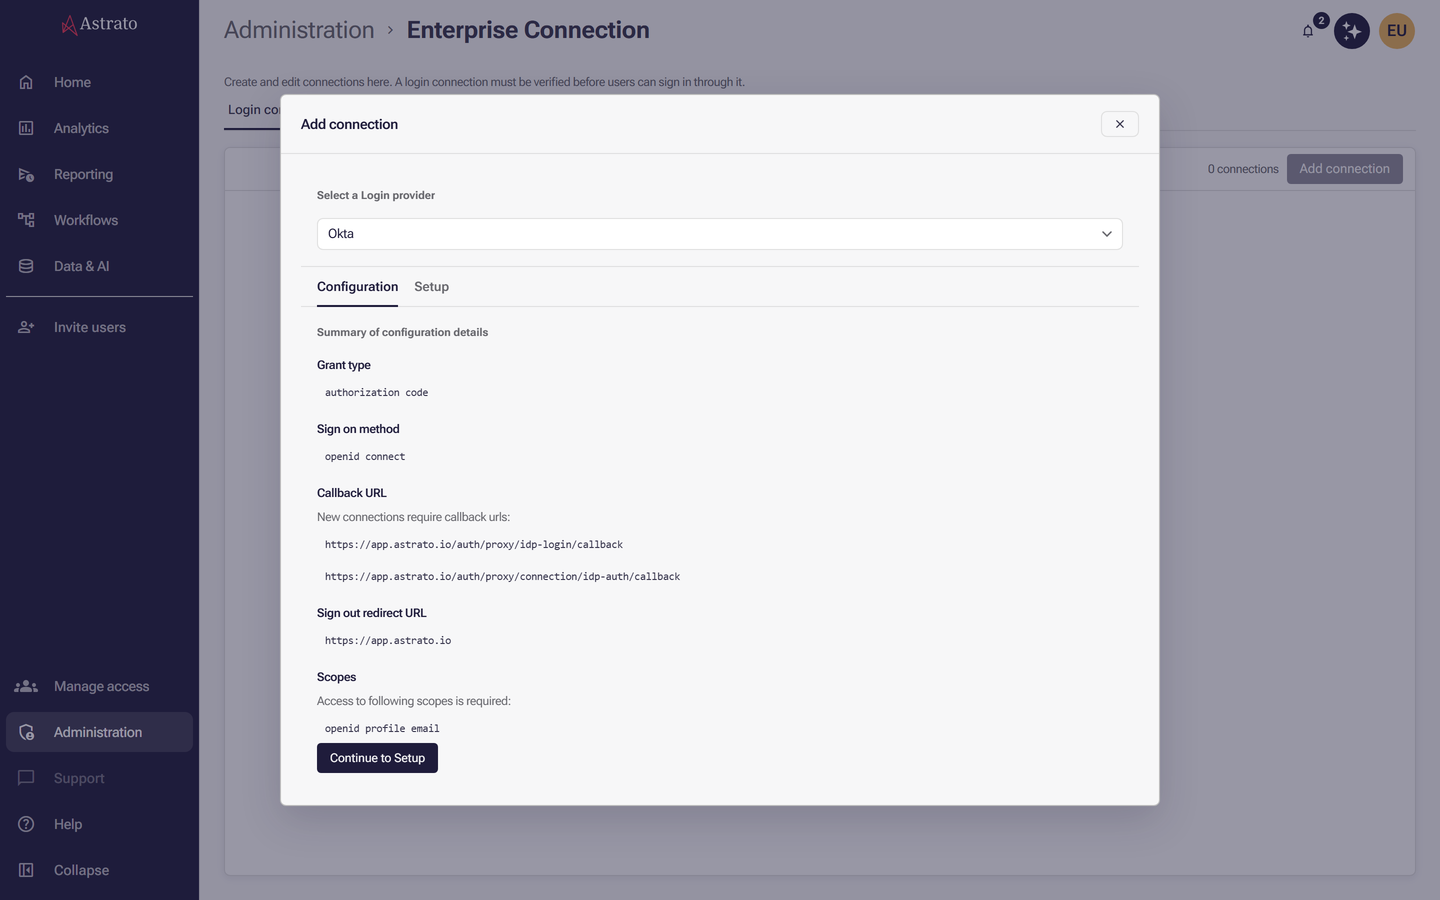
Choose Okta rather than Open ID Connect: the Okta entry adds the optional Scope field.
Create the app integration in Okta
Section titled “Create the app integration in Okta”- In the Okta Admin Console, open Applications → Applications and select Create App Integration.
- Choose OIDC - OpenID Connect as the sign-in method and Web Application as the application type, then select Next.
- Enter an App integration name, such as
Astrato. - Under Grant type, keep Authorization Code.
- In Sign-in redirect URIs, add both callback URLs from Astrato’s Configuration tab.
- In Sign-out redirect URIs, add the sign-out redirect URL from the same tab.
- Under Assignments, choose under Controlled access who can use the app: everyone in your organisation, selected groups, or nobody yet if you will assign people afterwards.
- Select Save. Okta opens the new app integration.
- Copy the Client ID and Client secret from Client Credentials.
Okta’s own guide to these screens is Create OIDC app integrations.
Assign people to the app
Section titled “Assign people to the app”Only people assigned to the app integration can sign in through it. On the app integration’s Assignments tab, select Assign and add the people or groups who should use Astrato.
Finish in Astrato
Section titled “Finish in Astrato”Go back to the Add connection dialog and select Continue to Setup. Fill in the values from the table above, then follow the rest of Set up the connection, Verify the connection and Test a normal sign-in.
If sign-in fails
Section titled “If sign-in fails”| What you see | Likely cause | What to do |
|---|---|---|
| Okta reports that the redirect URI is not allowed | A callback URL is missing from Sign-in redirect URIs, or differs from Astrato’s | Add both callback URLs from Astrato’s Configuration tab, exactly as shown |
| Okta says the user is not assigned to the client application | The user is not assigned to the app integration | Assign the user, or a group they are in, on the app’s Assignments tab |
For errors on the Astrato side, see Common errors.
What next
Section titled “What next”- Test a normal sign-in before you clear Allow users outside the identity provider domain to sign in without SSO.
- Sync groups and roles from your provider