

Invite users
People allowed to invite can select Invite users in the sidebar to add members to the workspace. By default each person receives an email invitation; if you tick Skip invitation email, none is sent. Either way they appear as pending in Administration → People until they accept.
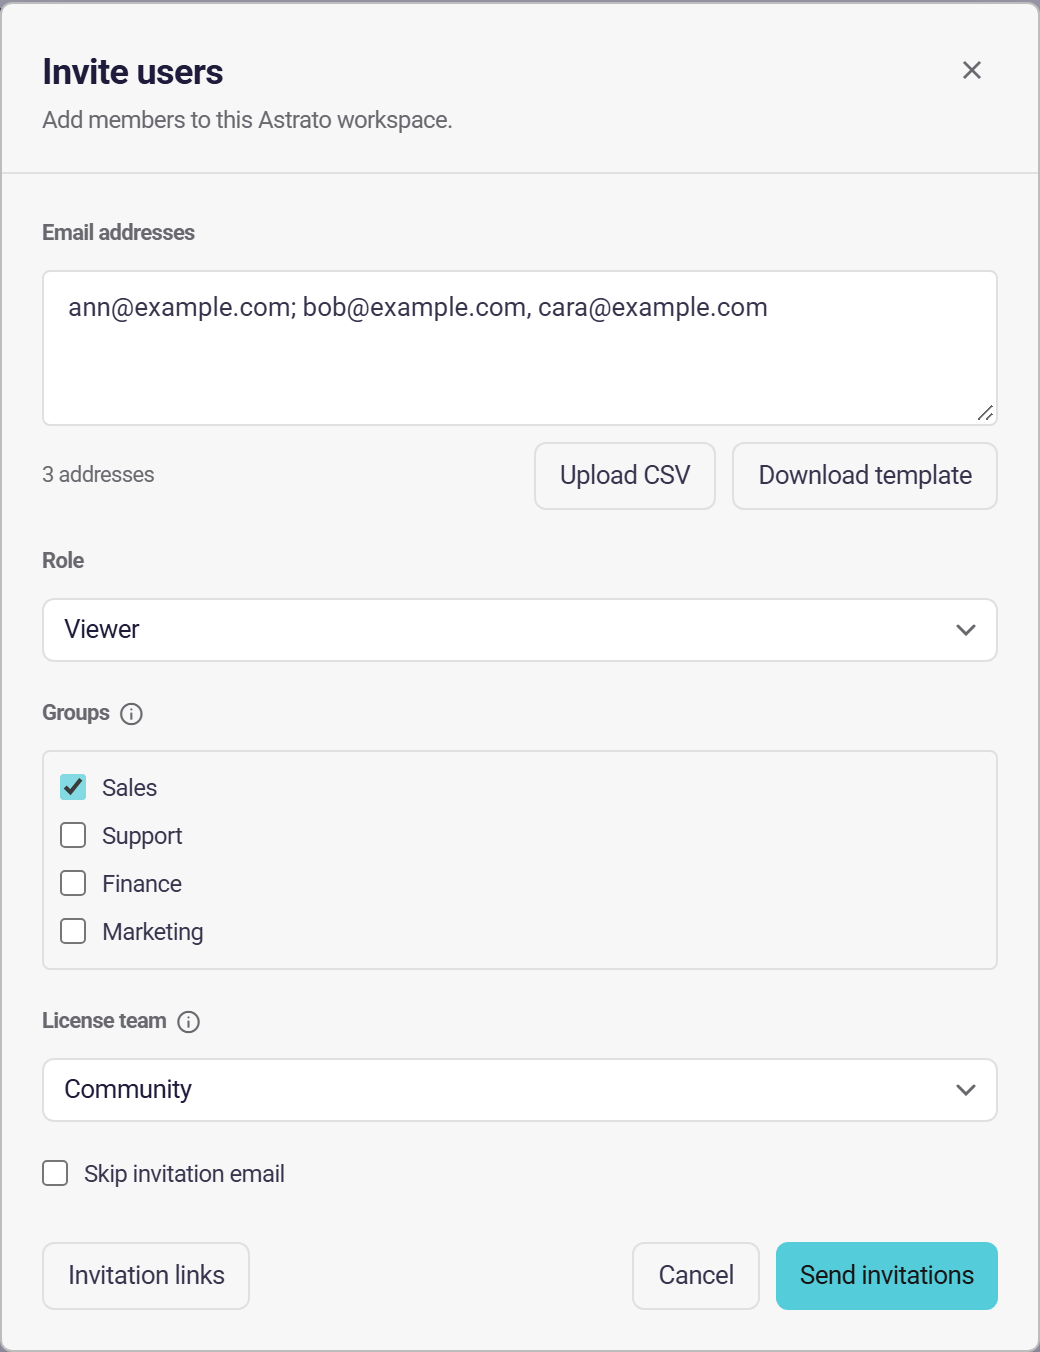
Invite by email address
Section titled “Invite by email address”- Enter one or more addresses in Email addresses. Separate them with commas, semicolons, spaces or new lines. Repeated addresses are counted once, and you can invite up to 200 people at a time.
- Choose the Role they receive: Viewer, Designer, Creator or Administrator.
- Optionally tick one or more Groups. Groups control what people have access to, such as the content shared with them. The groups you tick apply to everyone you are inviting.
- Check the License team. It is optional to change: it sets which license team the people are counted against and does not change their experience or permissions.
- Select Send invitation (or Send invitations when there are several).
Anything that is not a valid email address is named under the field, and the invitation is not sent until you remove it. To create the accounts without sending the email, tick Skip invitation email. The people are still added as pending and the confirmation says no email was sent.
If someone is already a member or already has a pending invitation, they are left out and the confirmation names them; everyone else is still invited. If the invitations are sent but a group cannot be assigned, the message says so and you can add the people from Administration → Groups.
Invite many people with a CSV file
Section titled “Invite many people with a CSV file”Select Download template to get invite-users-template.csv, fill it in, then select
Upload CSV. The addresses are added to Email addresses, so you can review or add to them
before sending.
The template has three columns:
| Column | Required | What to enter |
|---|---|---|
email |
Yes | The person’s email address. |
role |
No | viewer, designer, creator or administrator. Leave it blank to use the role chosen in the dialog. |
groups |
No | Group names exactly as they appear in the Groups list, separated by semicolons, for example Sales;Support. Leave it blank for no extra groups. |
A row’s groups are added to any groups you tick in the dialog. A row with an invalid address, an
unknown role or a group name that does not exist is skipped and listed under the field with its
row number; the other rows are still loaded. The example rows in the downloaded template use
example.com addresses and, when your workspace has groups, the names of your first two groups,
so replace them before you upload.
Invitation links
Section titled “Invitation links”To let people join with a shared address instead of individual invitations, select Invitation links in the dialog. It opens Administration → Invitation Links, where you can view, create and revoke links. See Invitation links.