

Create a semantic layer
In Data & AI → Semantic Layers, select Create at the right of the toolbar. The menu is shown if you can create content, and it offers four ways to start a layer:
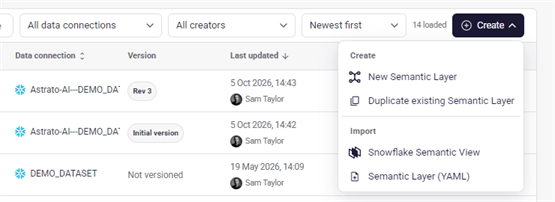
| Section | Entry | What you get |
|---|---|---|
| Create | New Semantic Layer | An empty layer on the data connection you choose. |
| Create | Duplicate existing Semantic Layer | A copy of a layer you can edit. |
| Import | Snowflake Semantic View | A layer built from a Snowflake semantic view. Listed only when your workspace has a Snowflake connection. |
| Import | Semantic Layer (YAML) | A layer built from a file exported from the editor’s Developer View. |
Each entry opens a panel beside the list. Only one panel is open at a time.
Start an empty layer
Section titled “Start an empty layer”- Select Create, then New Semantic Layer.
- Choose the Datasource the layer reads from.
- Optionally enter a Name. Left empty, the layer is called Untitled followed by the date, the time and your name.
- Select Create. The empty layer opens in the editor, ready for tables, joins, dimensions and measures.
Duplicate a layer
Section titled “Duplicate a layer”-
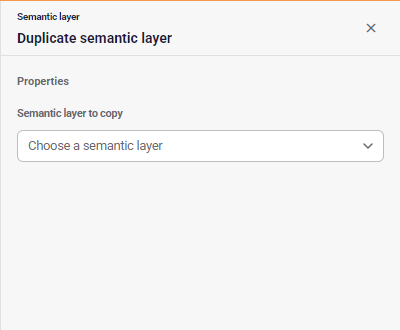
Select Create, then Duplicate existing Semantic Layer.
-
In Semantic layer to copy, choose the layer. The list holds the layers you can edit.
-
Select Duplicate.
The copy has everything the original has, its business questions included, on the same data
connection. Astrato names it after the original with the time it was made, for example
Sales-copy (2026-10-19 13:15:00). The copy appears in the list with its properties open, so you
can rename it straight away.
You can also duplicate a layer from the actions menu on its row.
Import a Snowflake semantic view
Section titled “Import a Snowflake semantic view”Select Create, then Snowflake Semantic View, choose the Snowflake connection and the semantic view, and review what comes across before you select Import. See Import a Snowflake semantic view for the steps and for what the warnings mean.
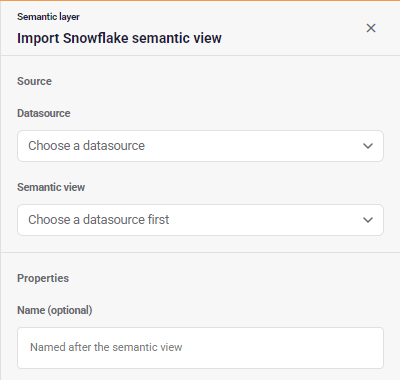
The entry is listed only when your workspace has at least one Snowflake data connection.
Import a layer from a YAML file
Section titled “Import a layer from a YAML file”Use this to bring in a layer exported with Export YAML or Export JSON in the editor’s Developer View, for example to make a layer in another workspace from a saved file.
-
Select Create, then Semantic Layer (YAML).
-
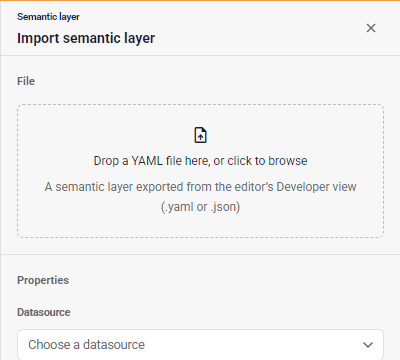
Drop the file on the panel, or select the panel to browse for it. YAML and JSON files are accepted. The panel shows what the file holds: its tables, joins, dimensions, measures and business questions.
-
Check the Datasource. The connection the file was exported from is chosen for you when your workspace has it; otherwise choose one. On a different connection, the layer looks for the file’s tables there, so check its sources once it is made.
-
Optionally change the Name. It defaults to the name in the file. If another layer already has that name, Astrato adds a copy suffix.
-
Select Import. The new layer opens in the editor with the file’s whole model, business questions included.
The file is checked before anything is created. A file that is not valid YAML, or that does not hold a semantic layer in the format Developer View exports, is refused with the problems listed. An Apache Ossie export is a different format and cannot be imported here.
Let an AI assistant do it
Section titled “Let an AI assistant do it”An AI assistant connected over MCP creates an empty layer or a copy of one with
astrato_semantic_layer_create, and imports a Snowflake semantic view with
astrato_semantic_layer_import_snowflake_view. There is no MCP tool that takes a YAML file. See
Semantic layer workflows.
Related
Section titled “Related”- Find a semantic layer — search, filter and sort the list the new layer joins.
- How versioning works — what happens to your edits once the layer is open.