Astrato Writeback - Atomic Input Form
Introduction
Section titled “Introduction”An atomic input form is a group of input controls on a sheet with a button that writes their values back to a live database table. Each control stores its value in a workbook variable, and the button’s writeback action inserts those values as a new row.
The writeback action sends all of the form’s fields as one row in a single INSERT statement, so the row is written with every field or, if the statement fails, not at all. If the write fails, the viewer sees the error message as a notification and can try again, unless the writeback block is inside a Try block, whose catch branch then handles the error instead.
Example: a budget-submission form captures region, period, planned spend, justification and approver. When the viewer saves, the whole row lands in the table, or the viewer gets an error and nothing is written.
For data models and use cases, see Write-back 101. To change existing rows instead of adding new ones, see Writeback Update Action.
The example below builds a form from several types of input.
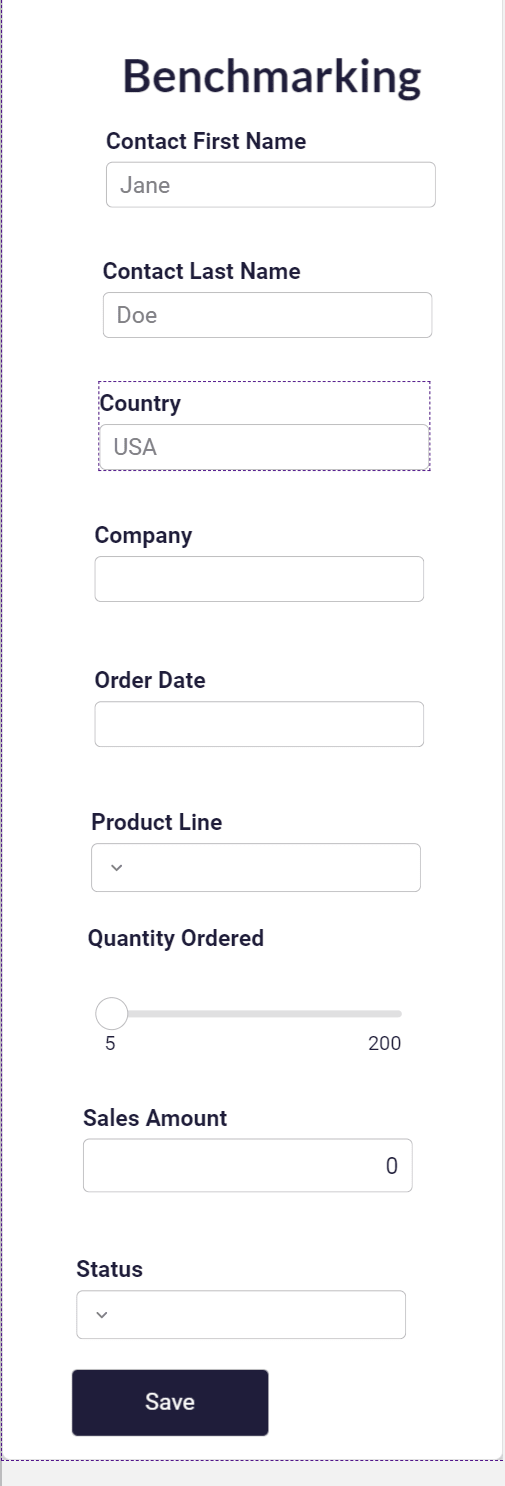
To first use the Input Form:
Section titled “To first use the Input Form:”-
Create variables to hold the inputs, and give each variable the type its input needs. See Creating variables to use with objects.
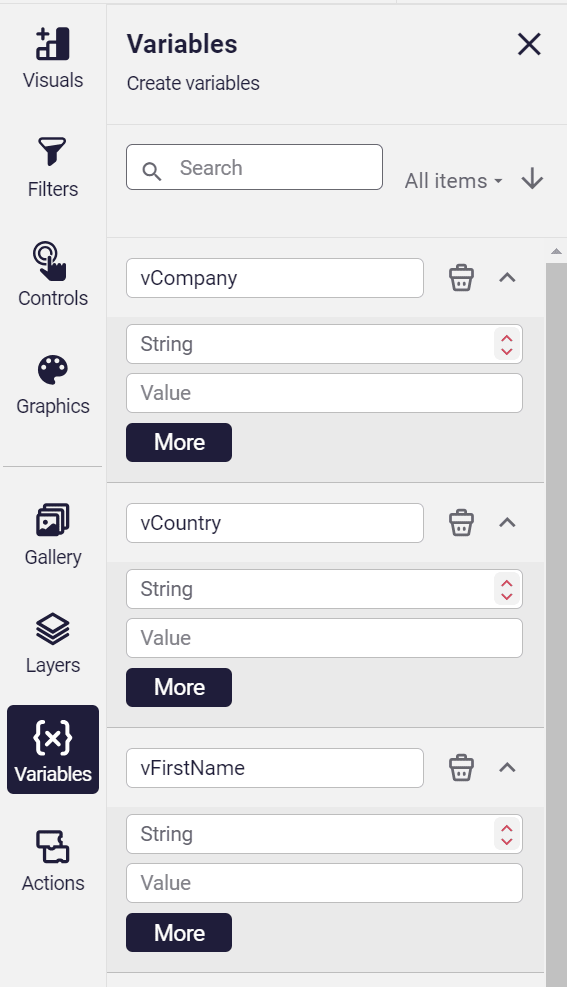
-
In the Controls section of the left side panel, select the type of control you want to use.
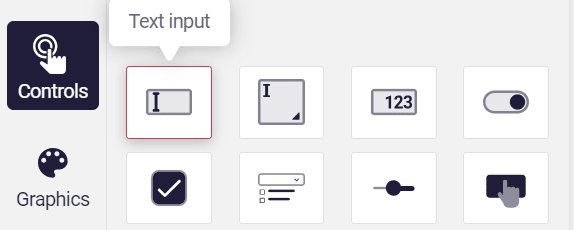
The available controls are:
- Text input: short text, best for one-word inputs such as names.
- Text area input: a larger area for long text, such as comments.
- Numeric input: numbers only, with an optional range for the expected input.
- Toggle input: a true/false input that works only with boolean variables.
- Checkbox input: another boolean input.
- Dropdown input: accepts only predefined values, listed by hand or taken from a field.
- Slider input: a number within a predefined range and step.
- Button: runs a set of actions when selected, such as writeback.
-
Arrange the inputs on the sheet. When they are in place, group them: select them, right-click and select Group.
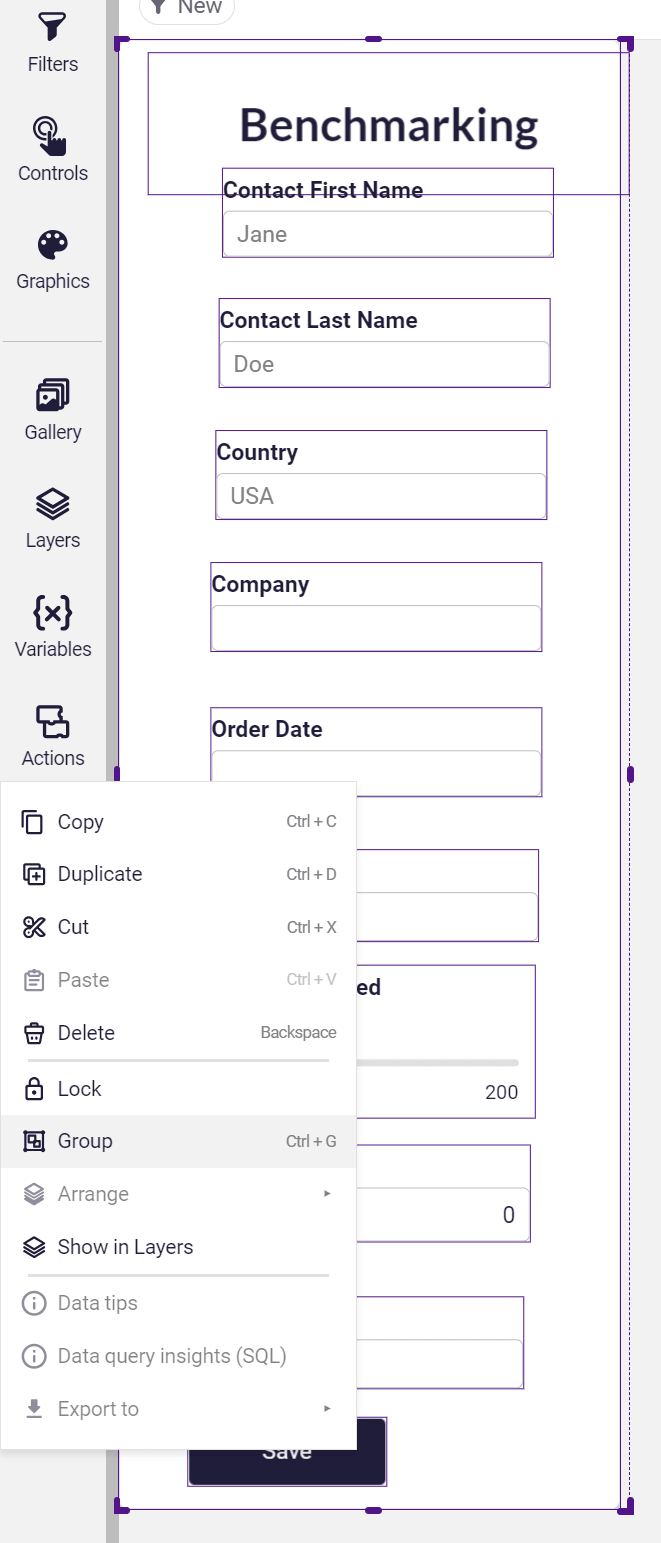
-
Open Actions in the left side toolbar.

-
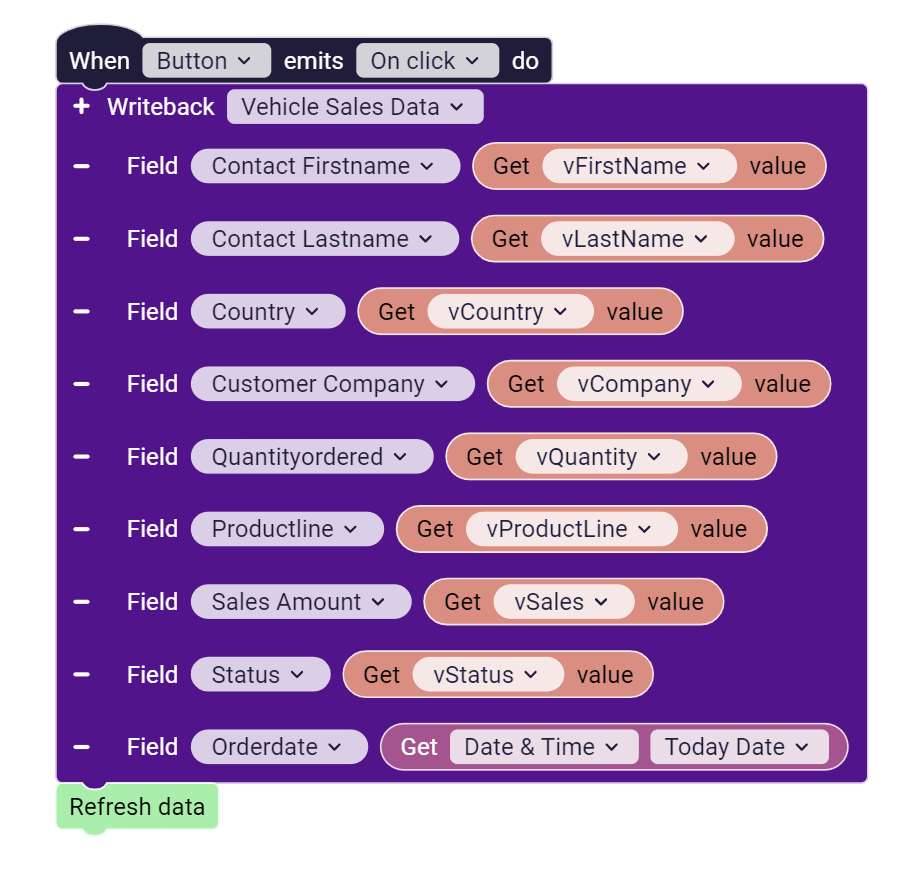
Add an on-click action to the button with a writeback block for the target table, and map each field to its variable. Then add a Refresh data block after it: the writeback block does not refresh the workbook, so without it the new row does not show in the workbook’s charts.
-
Switch to preview mode and test the form.
If the form does not save, see Troubleshooting. For more on building actions, see Action blocks.
Example
Section titled “Example”The dashboard below has an input form on the left that adds a row to the dataset.
Best Practice (Data modeling)
Section titled “Best Practice (Data modeling)”To tell original and new data apart, write back to a separate table with the same structure as the original, and combine (union) the two tables in a view. This keeps the written-back rows traceable.
The SQL in this section is for Snowflake. Other warehouses have equivalent statements under different names. The examples assume a table called Requests and a new table named Requests_manual.
Method 1: Concatenate modified data (easy to maintain)
Section titled “Method 1: Concatenate modified data (easy to maintain)”-
Recreate the structure of the original table. This returns the SQL that created it:
select get_DDL('table', 'Requests'); -
Create the new table, either by running that DDL with the name changed to
Requests_manualor by copying the column definitions directly:create table Requests_manual like Requests; -
Create a view that combines both tables, and use this view in Astrato. The SQL below also adds a flag that shows which table each row came from.
create or replace view VW_REQUESTS_COMBINED asselect *, 0 as Manual_Input from Requestsunion allselect *, 1 as Manual_Input from Requests_manual;
Method 2: Audit trail via auto-increment (fastest to implement)
Section titled “Method 2: Audit trail via auto-increment (fastest to implement)”Another way to tell original data from written-back data is an audit trail, using Snowflake’s auto-incremented columns or sequences.
Create a table with an auto-incremented ID
create table SALES_DATA ( SALES_ID int autoincrement start 1000 increment 1 not null, QUANTITYORDERED double not null, SALES_AMOUNT double not null, ORDERDATE date not null, INSERTED_AT timestamp_ltz default current_timestamp());The ID gives each row its own number, but it is not a record of insertion order. Unless you add ORDER, a new auto-incremented column is created with NOORDER, the default set by Snowflake’s NOORDER_SEQUENCE_AS_DEFAULT parameter, and Snowflake does not guarantee that NOORDER values are in increasing order, or that generated values are free of gaps. A later row can therefore get a lower ID. Use an explicit audit column instead: INSERTED_AT above fills itself with the time of the insert, so order and match rows by that column, and use the query history in Reviewing inputted data to see which user ran each insert.
If your table already exists
Do not replace the existing table. Create the replacement under a different name, copy the rows into it naming the other columns explicitly, check the copy, and only then swap the names. The original stays available until the swap, and the SALES_ID and INSERTED_AT columns fill themselves:
create table SALES_DATA_NEW (  SALES_ID int autoincrement start 1000 increment 1 not null,  QUANTITYORDERED double not null,  SALES_AMOUNT double not null,  ORDERDATE date not null,  INSERTED_AT timestamp_ltz default current_timestamp());
insert into SALES_DATA_NEW (QUANTITYORDERED, SALES_AMOUNT, ORDERDATE)select QUANTITYORDERED, SALES_AMOUNT, ORDERDATE from SALES_DATA;
-- compare the two counts before swappingselect count(*) from SALES_DATA;select count(*) from SALES_DATA_NEW;
alter table SALES_DATA rename to SALES_DATA_OLD;alter table SALES_DATA_NEW rename to SALES_DATA;
Copied rows get the time of the copy in INSERTED_AT. Only rows written back afterwards carry the time of their own insert.
Roles & Permissions
Section titled “Roles & Permissions”Writes run with the credentials of the workbook’s data connection. With a connection that uses a shared service user, every viewer writes as that user; with a connection that signs each person in, such as Sign in with Snowflake, each viewer writes as their own database user. The writeback block lists only the tables the connection’s role can write to. See Role and privileges for the Snowflake grants.
Troubleshooting
Section titled “Troubleshooting”| Issue | Solution |
|---|---|
| A table cannot be written to, or is missing from the list | Grant the connection’s role write privileges on the table in your warehouse. |
| The insert fails because a column requires a value | Map a value to every required column, or relax the column’s requirement. You may need to add another input to the form. |
| Writeback does not work from an external embed link | An administrator turns on Enable Writeback on External Embed Links in system settings. It needs External Embed Links to be on first. |
Reviewing inputted data
Section titled “Reviewing inputted data”In Snowflake, Astrato tags its queries with the query tag Astrato. To see which Snowflake user ran each insert from Astrato, filter Snowflake’s query history to statement type INSERT and a query tag containing Astrato; see Snowflake’s query history documentation.
You can also query the history with SQL. The query_history table function returns only the most recent queries, up to its result_limit, and that limit applies before the where clause: the default is 100 and the maximum is 10,000. Raise it, or the filter only sees the last 100 queries. The function covers the last seven days:
select *from table(information_schema.query_history( end_time_range_start => dateadd('days', -7, current_timestamp()), end_time_range_end => current_timestamp(), result_limit => 10000))where QUERY_TAG = 'Astrato' and QUERY_TEXT like 'INSERT INTO%'order by start_time desc;On a busy account, 10,000 queries can still be fewer than seven days’ worth. For a result that is not capped this way, query the SNOWFLAKE.ACCOUNT_USAGE.QUERY_HISTORY view, which keeps 365 days of history. Rows can take up to 45 minutes to appear, and an account administrator has to grant access to the shared SNOWFLAKE database:
select *from snowflake.account_usage.query_historywhere query_tag = 'Astrato' and query_text like 'INSERT INTO%' and start_time >= dateadd('days', -7, current_timestamp())order by start_time desc;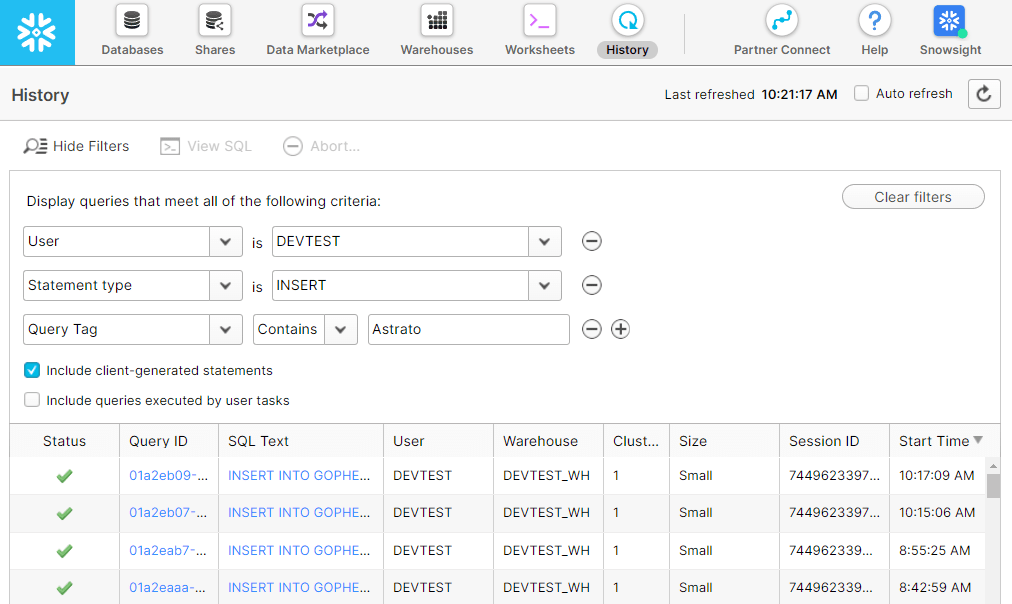
What does “atomic” mean for a write-back form?
The form’s fields are inserted as one row in one statement. Either the row is written with all its fields, or the statement fails and nothing is written.