

Managing Collections
Introduction
Section titled “Introduction”This article teaches you how to manage and work with Astrato collections.
Collection Display | Starred Collections, Open, Manage Workbooks | Options Menu |
You may also want to read: Creating and managing User Groups
Manage collections from a workbook
Section titled “Manage collections from a workbook”In the workspace Workbooks catalogue, open a workbook’s Properties, choose Collections & Access, then Manage collections.
Search by collection name or path. Nested collections appear under their parent folders; search keeps the matching collection’s ancestors visible. Choose a collection to add or remove the workbook. Each change saves immediately, and the check mark changes only after it succeeds. If a change fails, the picker displays the error and offers Try again.
If you can create collections, choose New collection inside the picker. Pick a folder or leave it at the top level, enter a name, then choose Create and add. Forward slashes in the name create additional nesting. The final name needs at least three characters. If creation succeeds but the next step fails, retry finishes adding the workbook without creating another collection.
If you cannot edit the workbook, its collection chips open the corresponding collection; no membership controls are shown.
The following sections describe the legacy collection screens.
Collection Display
Section titled “Collection Display”Collections always display their Name, Description, Creation Date, and the number of items they contain. If you hover the cursor over a collection (Figure 1), the Open button will appear, and there’s also an Options menu, which you opens by clicking the buttons with 3 dots in the top right corner.
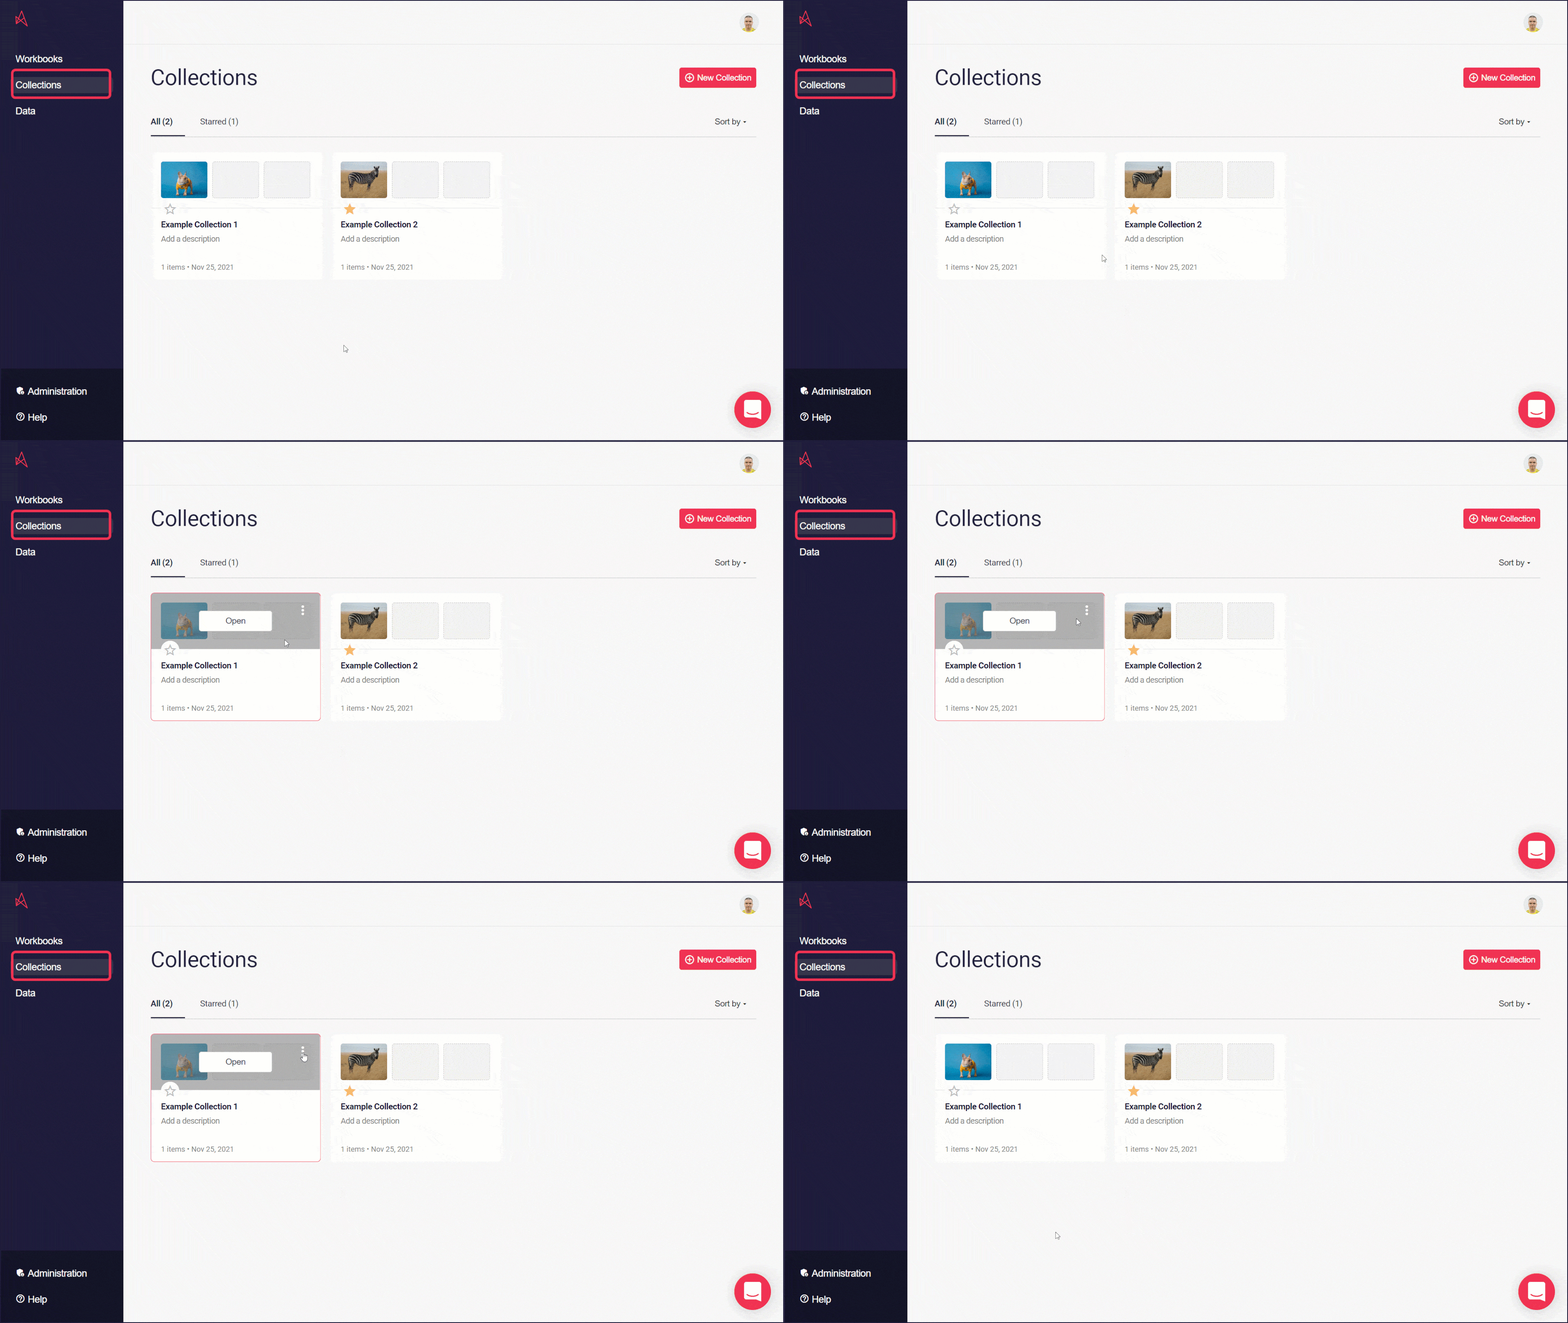
Figure 1: Collection Display
Back to Top
Starred Collections, Open, Manage Workbooks
Section titled “Starred Collections, Open, Manage Workbooks”-
Click the star above the collection name to “star” it, a bit like adding a bookmark for a website (Figure 2).
-
Click Open to display a screen with options to edit the collection name and buttons to help you Manage Workbooks.
-
Click Manage Workbooks and use the add and remove buttons to select the collection’s workbooks. When you’ve made your changes, click Done and use the arrow to return to the collections page.
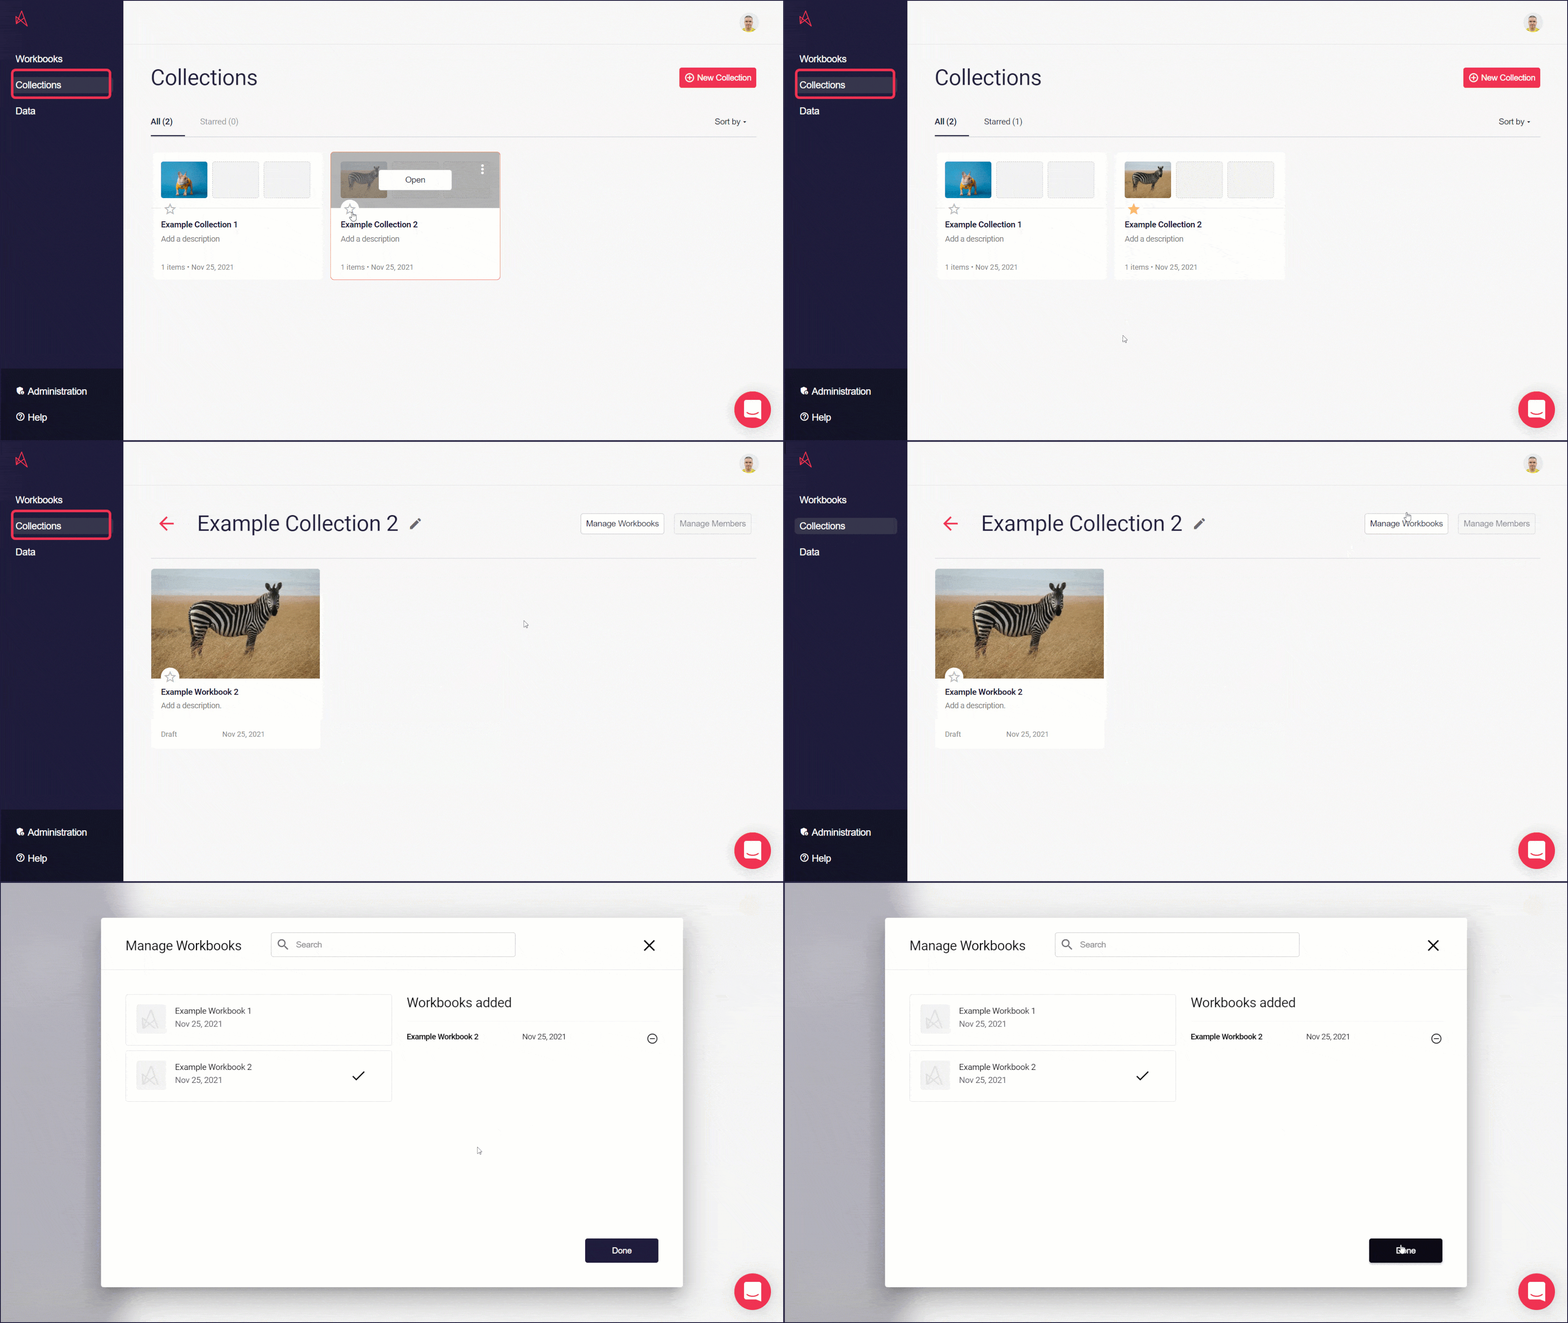
Figure 2: Starred Collections, Open, Manage Workbooks
Back to Top
Options Menu
Section titled “Options Menu”-
Click the 3 dots in the top right, you’ll open the Options menu (Figure 3).
-
Click Edit to make changes to the collection name and description.
-
Click Delete to delete the collection. Once you confirm, the deleted collection will no longer be displayed.
Figure 3: Options Menu
Multi-Level Collections
Section titled “Multi-Level Collections”Multi-Level Collections allow you to organise workbooks into logical hierarchies using forward slashes (/) in the collection name.
How it works
Collections remain the same underlying object as before.
Folders are virtual and are generated automatically based on the collection naming convention.
For example:
Collection Name | Visible Structure |
Marketing/Advertising | Marketing → Advertising |
Marketing/Email-CRM | Marketing → Email-CRM |
Marketing/Advertising/Performance | Marketing → Advertising → Performance |
No separate folder creation step is required.
Creating Multi-level / Hierarchical Collections
Section titled “Creating Multi-level / Hierarchical Collections”When creating or renaming a collection, enter a path using forward slashes.
Examples
Marketing/AdvertisingMarketing/Advertising/PerformanceSales/EMEAThe hierarchy will be created automatically.
Collection Creation Helper
Section titled “Collection Creation Helper”A helper message is displayed beneath the collection name field:
To have nested collections, simply use a slash e.g. Collection/Sub-Collection
Permissions
Section titled “Permissions”Important
Permissions are applied to collections, not folders.
Virtual folders exist only for organisation and do not have their own security settings.
Permission Behaviour
Section titled “Permission Behaviour”Permissions are:
-
Set per collection
-
Managed independently
-
Not inherited from parent collections
-
Not inherited by child collections
Example
Collection | Members |
Marketing/Advertising | Marketing Team |
Marketing/Email-CRM | CRM Team |
Marketing/Advertising/Performance | Performance Team |
Each collection can have completely different permissions.
Having access to one collection does not automatically provide access to another collection within the same folder structure.
Visual Example
Section titled “Visual Example”Marketing├── Advertising│ └── Performance└── Email-CRMBehind the scenes:
Marketing/AdvertisingMarketing/Advertising/PerformanceMarketing/Email-CRMOnly the collections above exist.
The Marketing folder is a virtual organisational container and does not have its own permissions or access controls.
Best Practices
Section titled “Best Practices”Organise by Team
Section titled “Organise by Team”Marketing/AdvertisingMarketing/Email-CRMMarketing/BrandOrganise by Geography
Section titled “Organise by Geography”Sales/EMEASales/APACSales/North AmericaOrganise by Business Function
Section titled “Organise by Business Function”Finance/Board ReportingFinance/ForecastingFinance/Budget PlanningOrganise OEM Content
Section titled “Organise OEM Content”Customers/Acme CorpCustomers/Global RetailCustomers/Healthcare GroupThis helps keep large workbook libraries organised while maintaining independent access control for each collection.
Back to Top
Astrato Collections Articles
Section titled “Astrato Collections Articles”You can find more articles about Astrato Collections in the Astrato Help Center.
Back to Top