Notifications- Integration Setup- (BETA)
Introduction
Section titled “Introduction”* This feature is in BETA status; some settings might change over time*
Astrato Notification allows users to share notifications and information through Slack and Teams.
This article will cover the integration setup process with Slack and Microsoft Teams.
-
Introduction
-
Manage Integrations
-
Setup a Teams integration
-
Setup slack integration
Manage Integrations
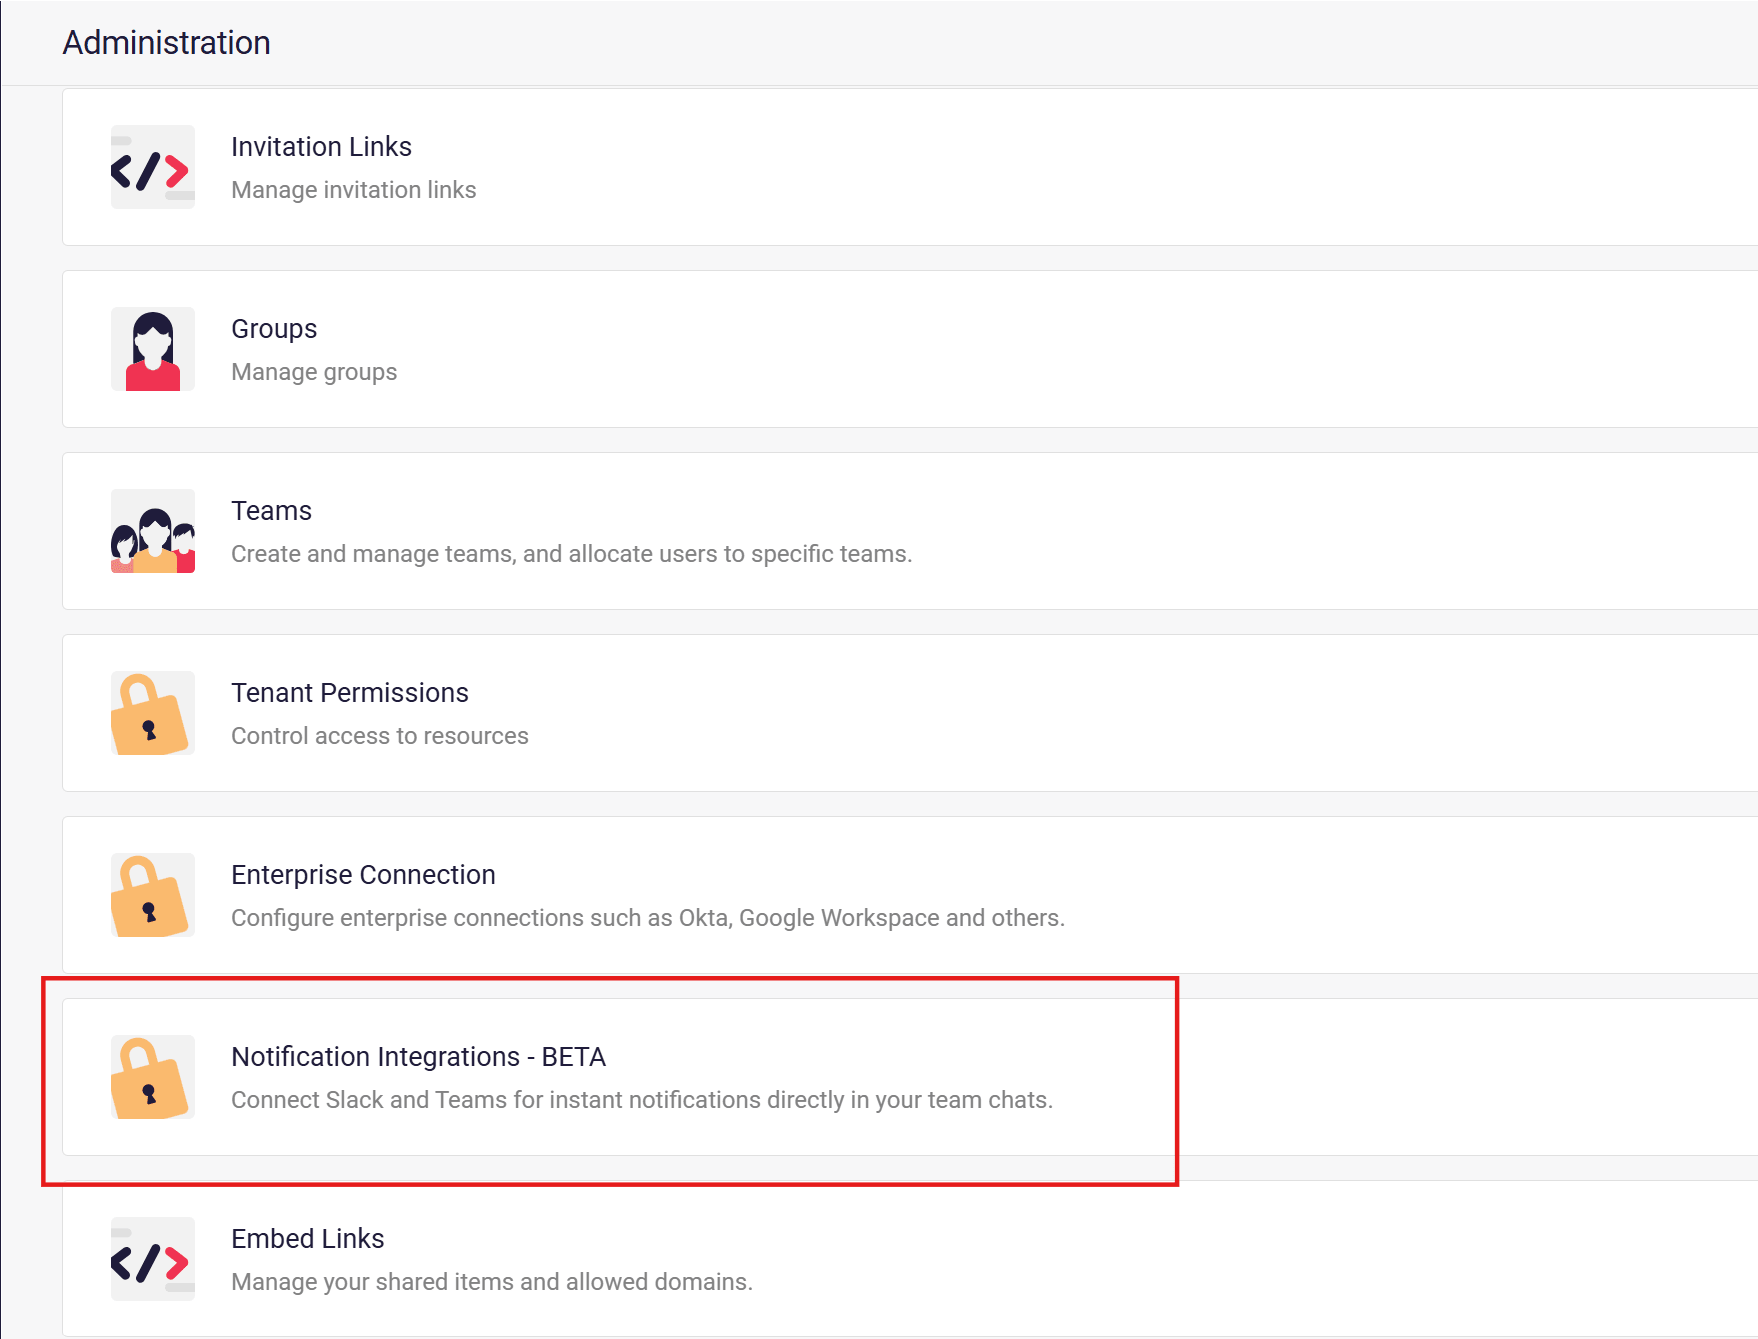
Section titled “Manage Integrations”Notification Integrations are managed in the administration of the Astrato tenant.
In this section, existing integrations are displayed, and new integrations are created.
Setup a Microsoft Teams integration
Section titled “Setup a Microsoft Teams integration”-
Create a Webhook in Microsoft Teams.
-
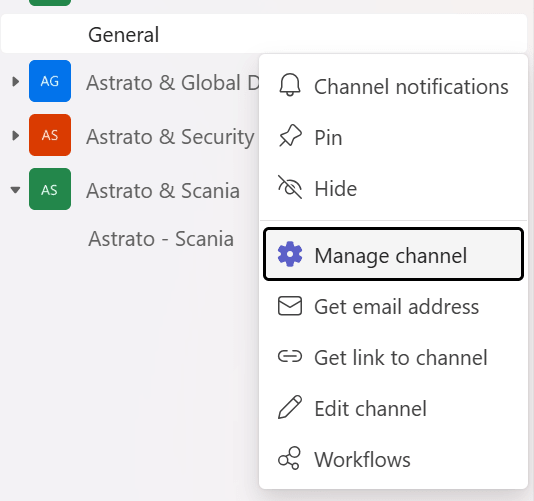
Open Microsoft Teams, select a channel, and click on the three dots.
-
Select manage channel
-
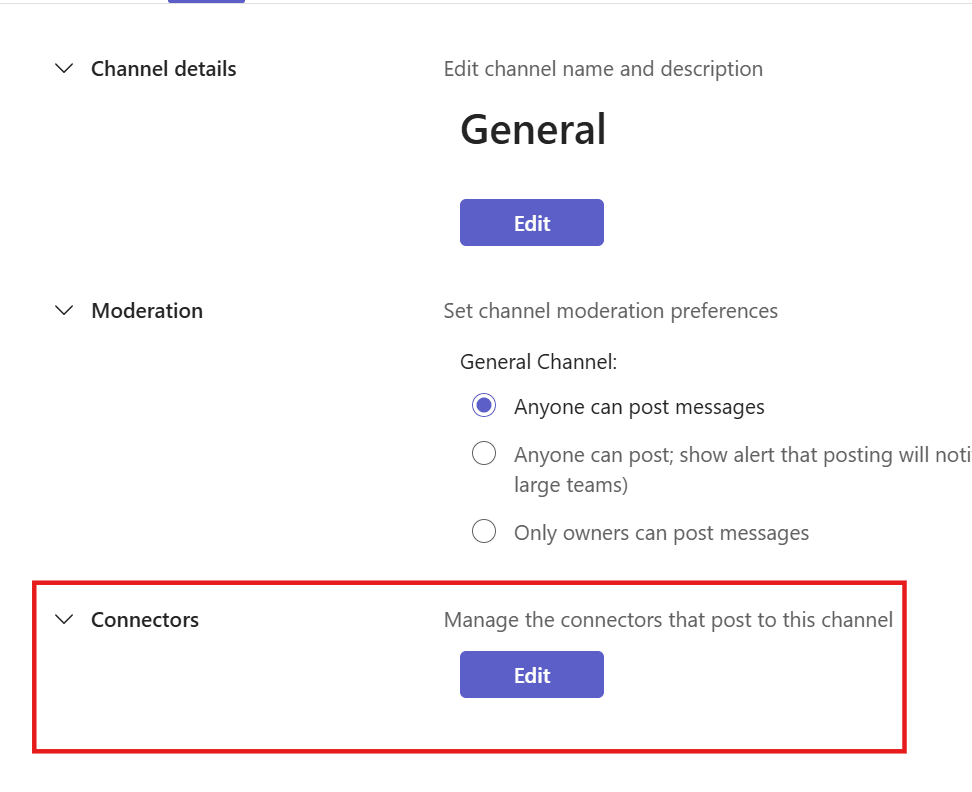
Click on the Edit button in the connectors section.
-
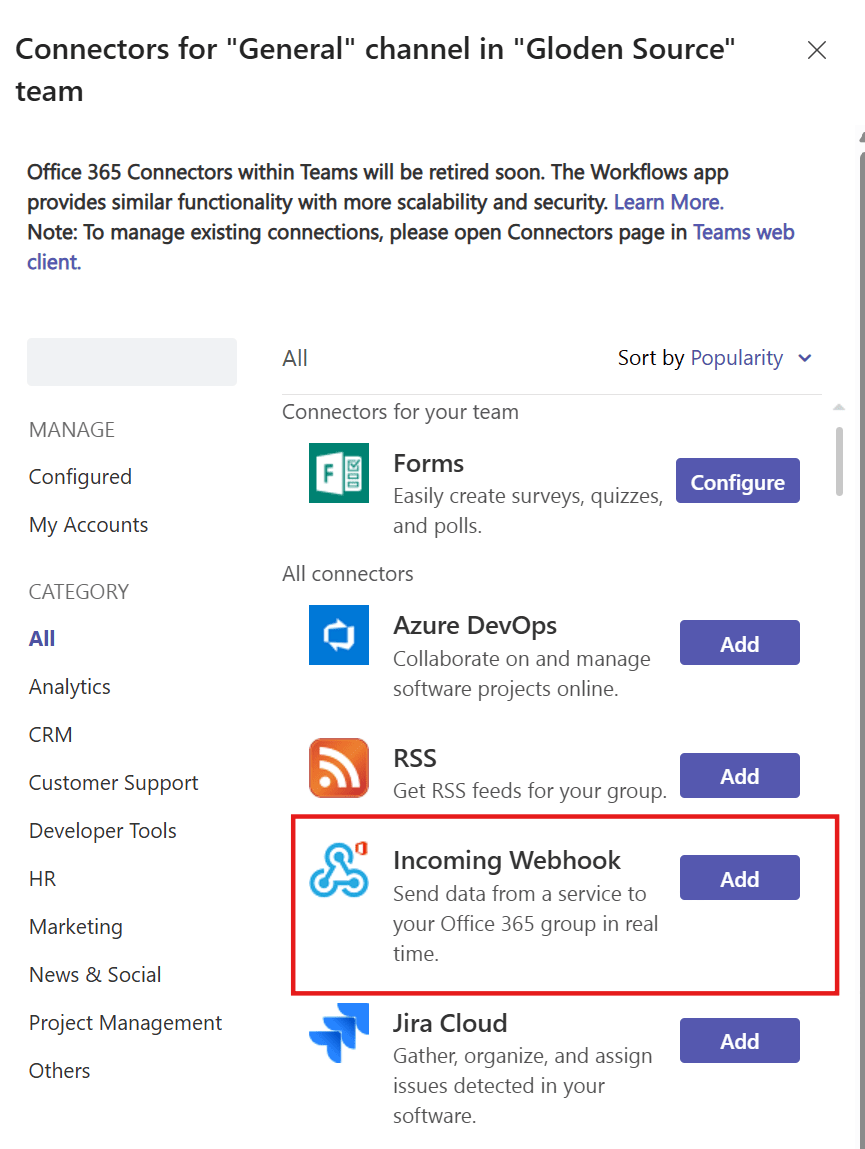
Select the Incoming Webhook Option from the connectors menu and click the Add button.
-
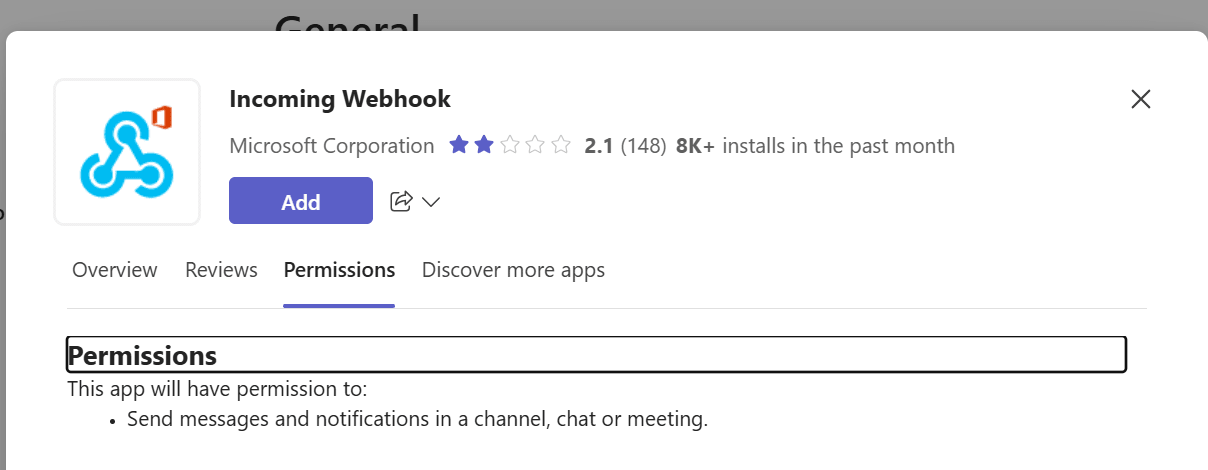
Click the Add button.
-
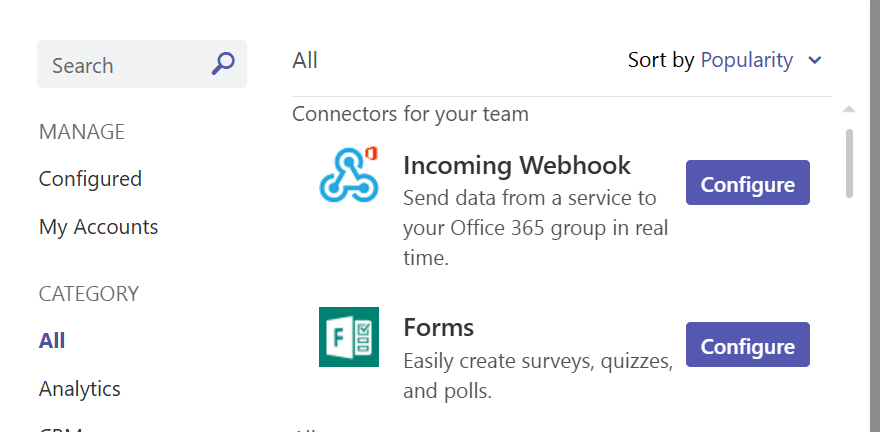
Click the Configure button for the Incoming Webhook connector.
-
Give the connector a Name.
Optionally update the logo for the integration.
Click Create.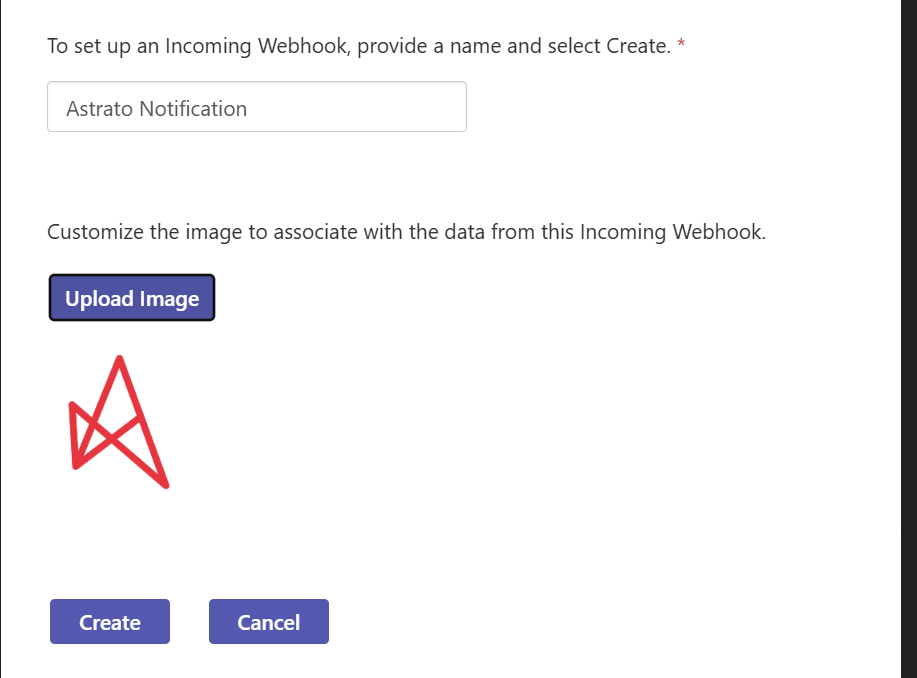
-
Copy the URL
(You’ll need in the Astrato configuration step.)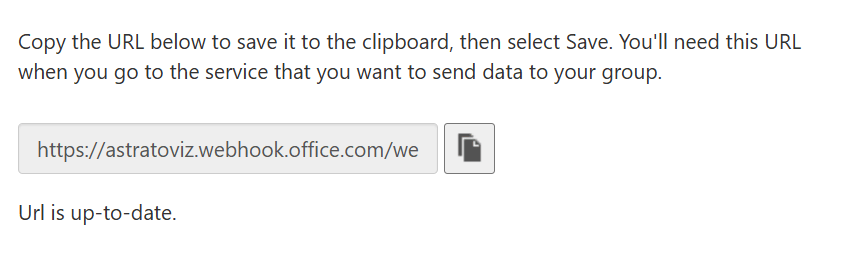
-
-
In Astrato, Click on Add Integration at the top right corner.
-
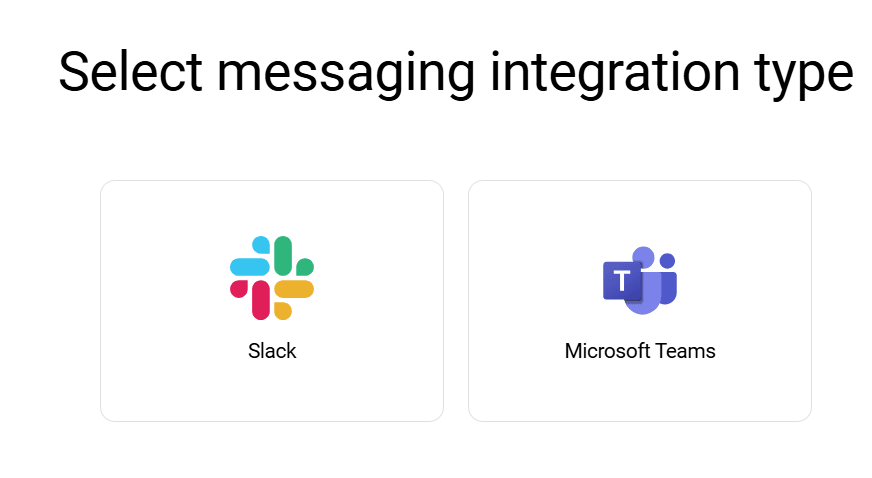
Select Microsoft Teams.
-
Name the integration and paste the webhook created in the Microsoft Teams step.
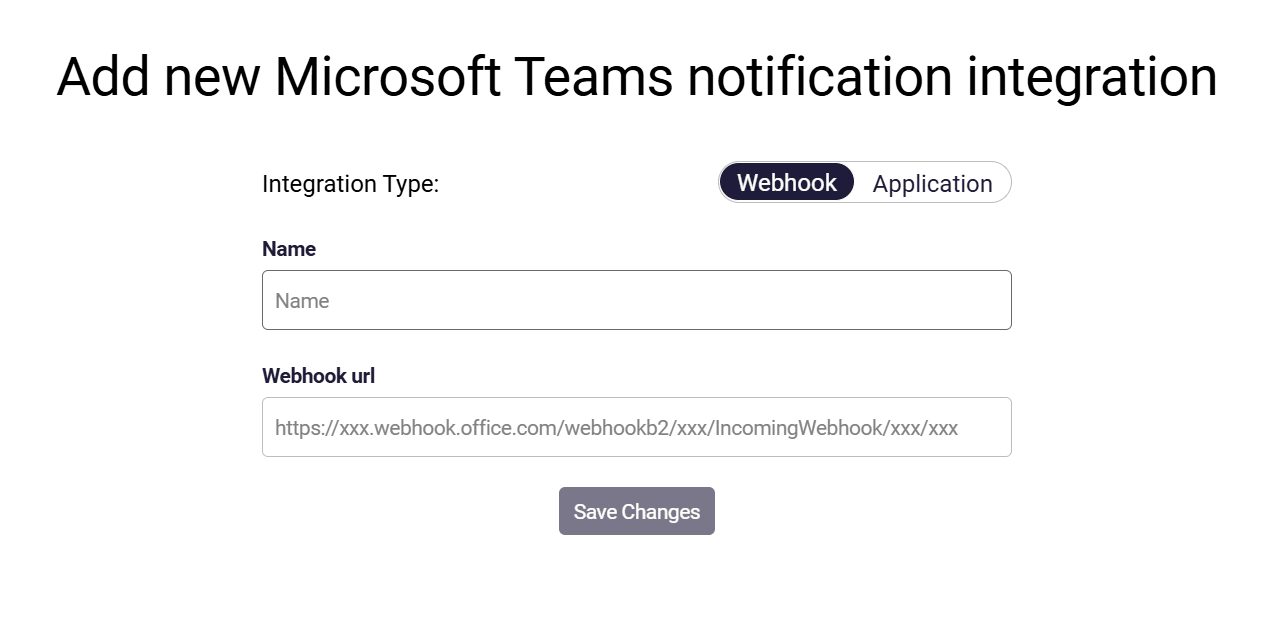
Click save changes.
-
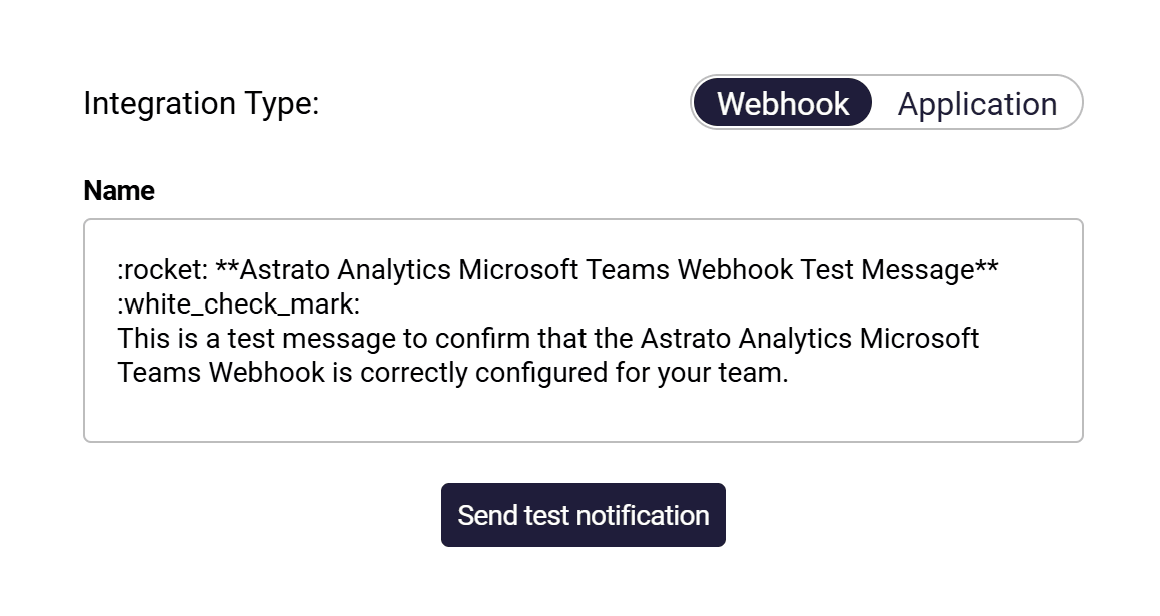
Send a test notification by clicking on the Send test notification button
-
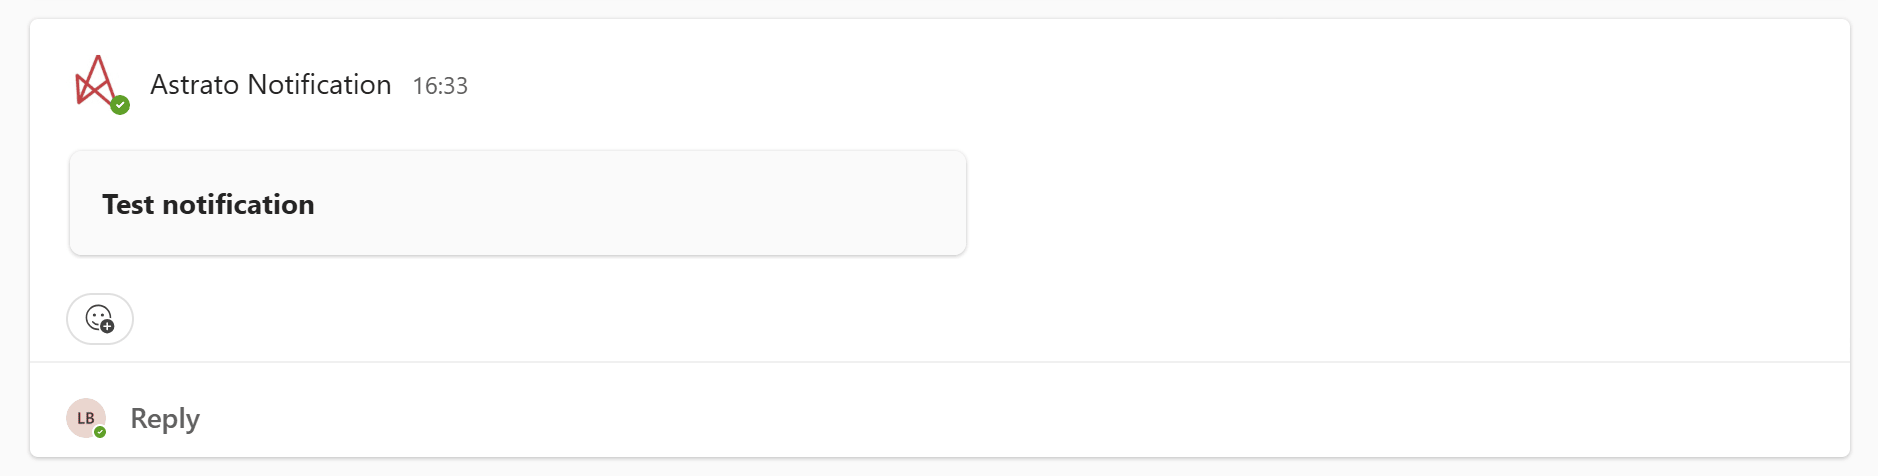
Confirm the notification was received in the Teams channel.
-
The integration is ready.
Setup a Slack integration
Section titled “Setup a Slack integration”-
Create an incoming webhook for a Slack channel.
-
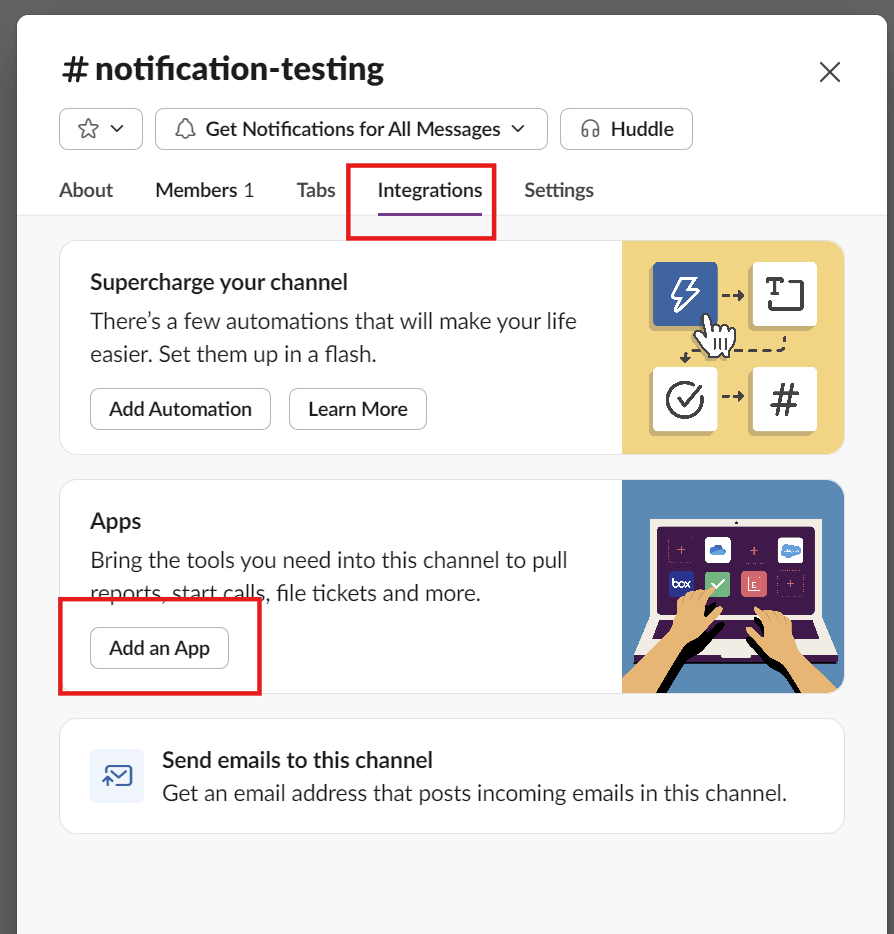
Click on the channel details.
-
Select the Integrations tab and click the Add an App button.
-
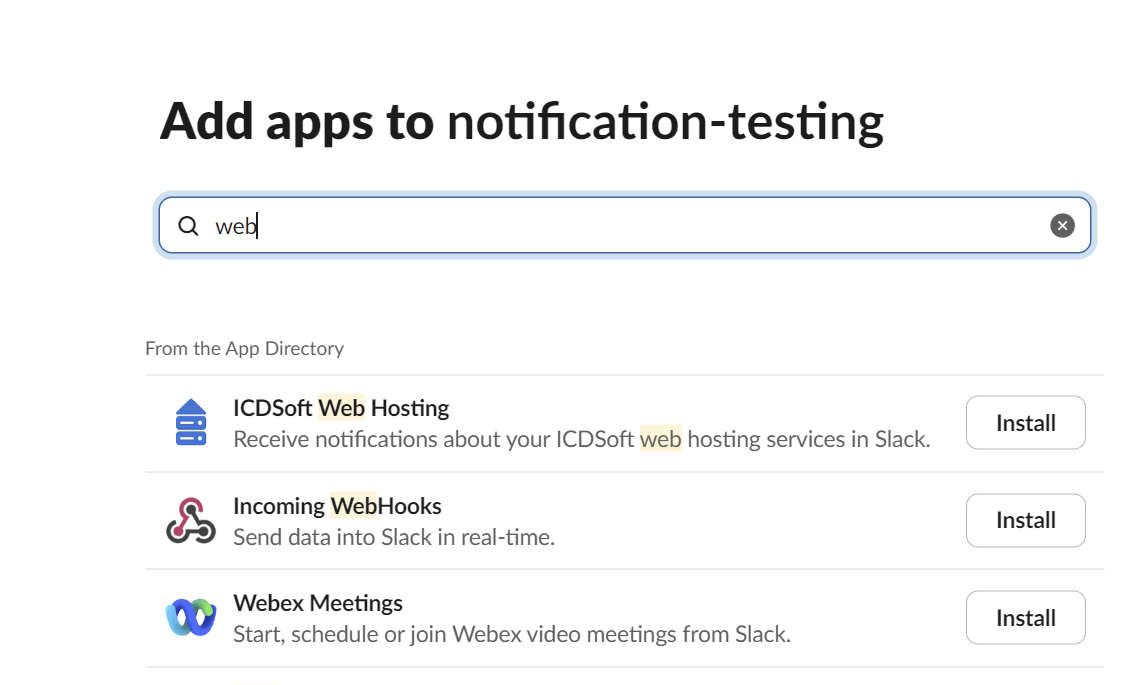
Click the Install button for the Incoming WebHooks app.
-
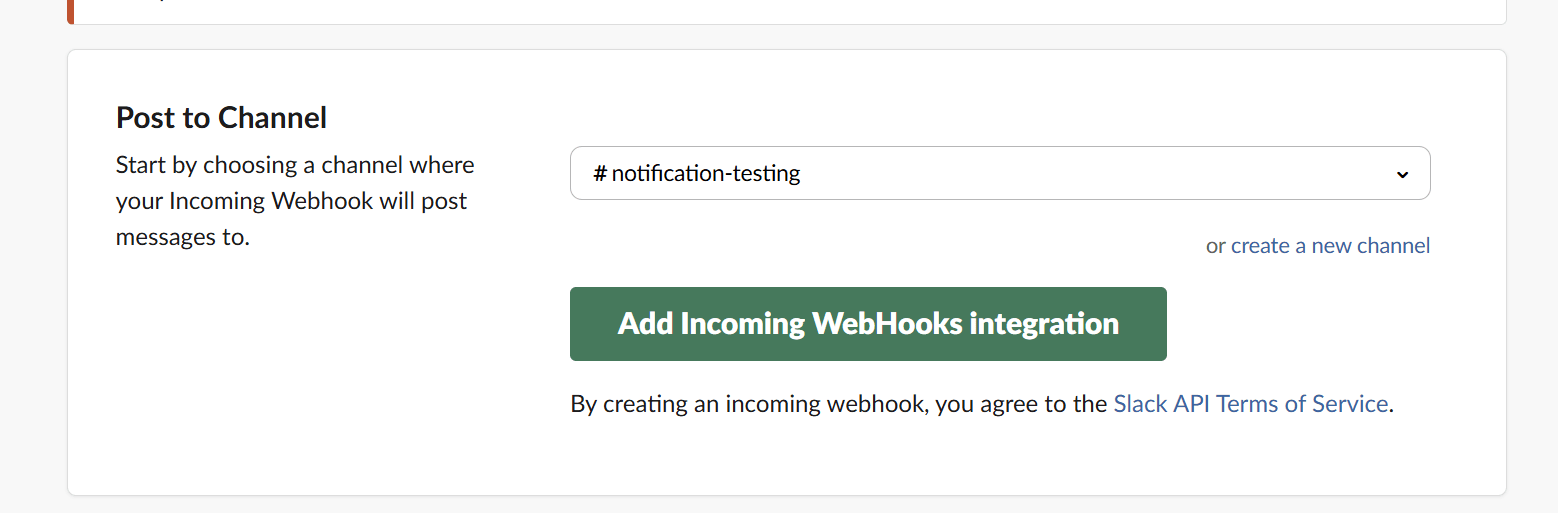
On the next screen, click the Add to Slack Button, select the channel, and click the Add Incoming WebHooks Integration button**.**
-
Copy the WebHook URL.
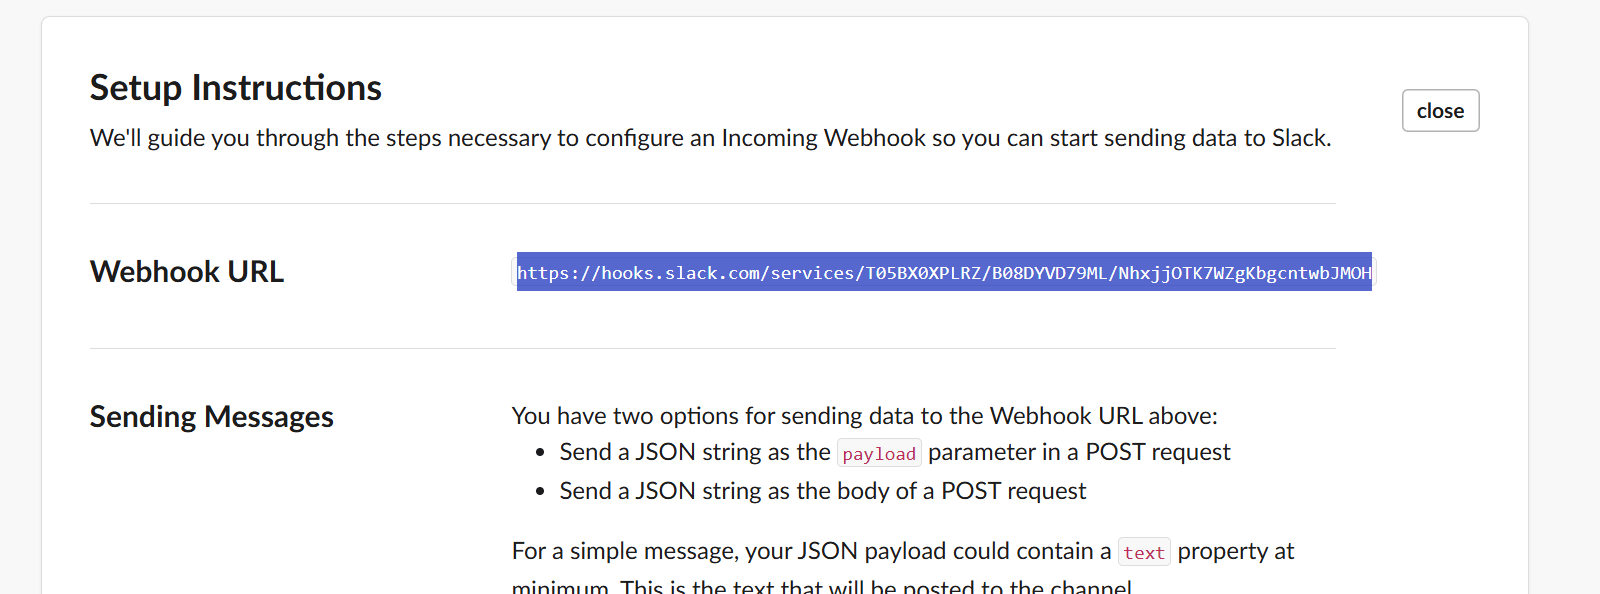
-
-
In Astrato, Click on Add Integration at the top right corner.
-
Select Slack.
-
Name the integration, paste the webhook created in the previous step, and click the Save Changes button.
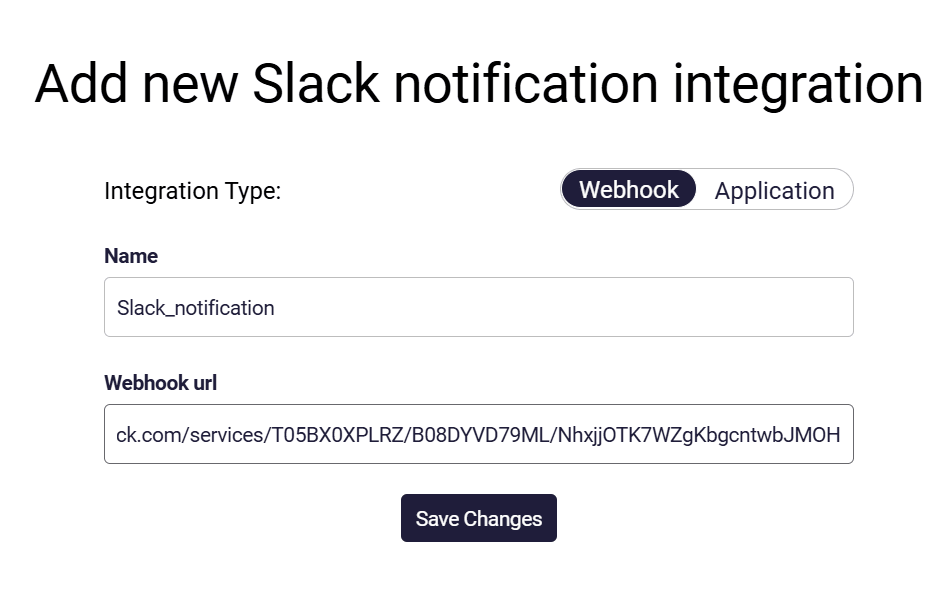
-
Click the Send test notification button**.**
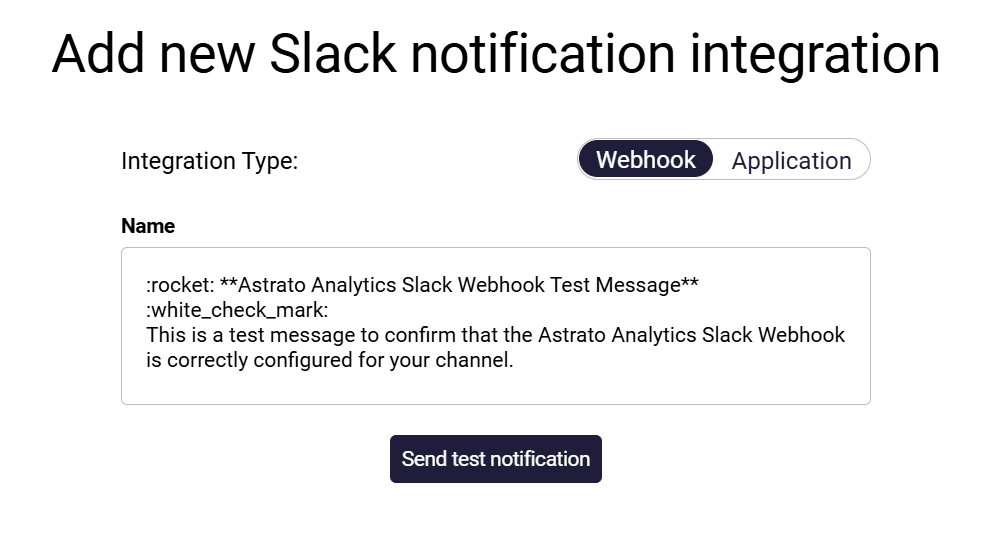
-
Confirm that the test notification was sent.

Setup a Gmail integration
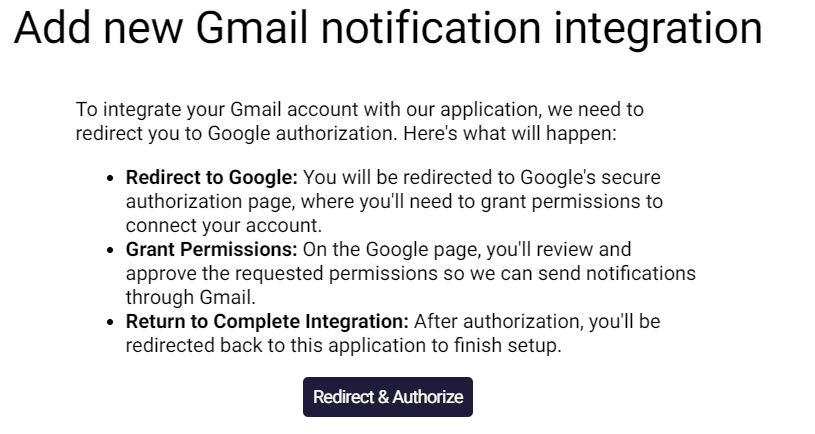
Section titled “Setup a Gmail integration”Gmail uses Google OAuth. No manual credentials needed.
Steps
-
In Astrato, click Add Integration
-
Select Gmail
-
Click Redirect & Authorize
-
Sign in to your Google account
-
Review and approve permissions
-
You’ll be redirected back to Astrato
Validate
-
Click Send test notification
-
Confirm email is received
Notes
-
Permissions are required to send emails on your behalf
-
Access can be revoked anytime from your Google account
Setup an Office365 integration
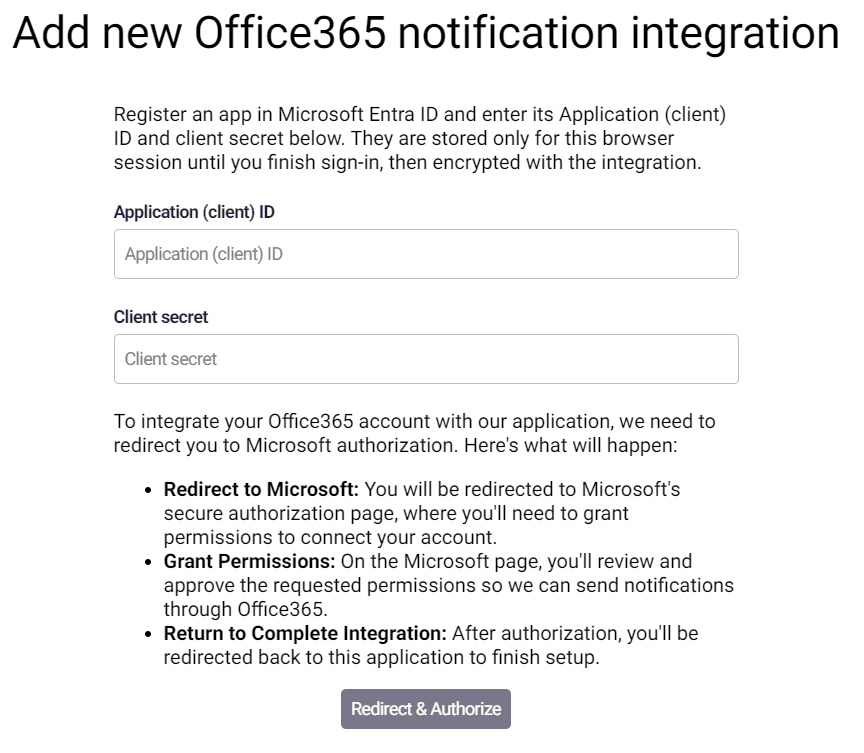
Section titled “Setup an Office365 integration”Uses Microsoft OAuth (similar to Teams).
Required fields
-
Application (client) ID
-
Client Secret
Steps
-
Register an app in Microsoft Entra ID
-
Add required API permissions (e.g. Mail.Send)
-
Copy Application ID and Client Secret
-
In Astrato, click Add Integration → Office365
-
Enter credentials
-
Click Redirect & Authorize
-
Sign in and approve permissions
Validate
-
Send a test notification
-
Confirm delivery via Office365
Notes
-
Credentials are encrypted after setup
-
OAuth is required to complete integration
Setup a SharePoint integration
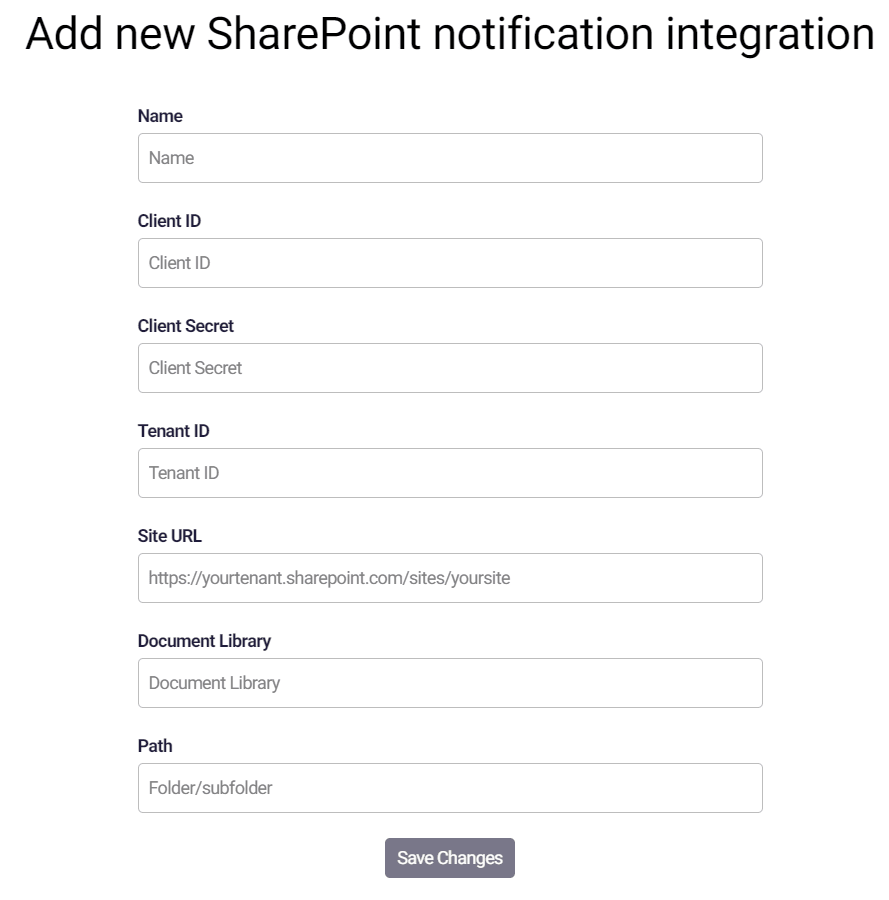
Section titled “Setup a SharePoint integration”Used to send notifications/files to a SharePoint document library.
Required fields
-
Name: Friendly name for the integration
-
Client ID: From Microsoft Entra app registration
-
Client Secret: From the same app
-
Tenant ID: Your Azure tenant
-
Site URL: e.g.
https://yourtenant.sharepoint.com/sites/yoursite -
Document Library: Target library name
-
Path: Folder path inside the library
Steps
-
Register an app in Microsoft Entra ID
-
Grant permissions for SharePoint (e.g. Sites.ReadWrite.All)
-
Copy Client ID, Client Secret, Tenant ID
-
In Astrato, click Add Integration → SharePoint
-
Fill in all fields
-
Click Save Changes
Validate
-
Trigger a notification
-
Confirm file/message appears in the correct library + path
Notes
-
Path is optional but recommended for structure
-
Permissions must allow write access to the target library
Setup a Google Drive integration
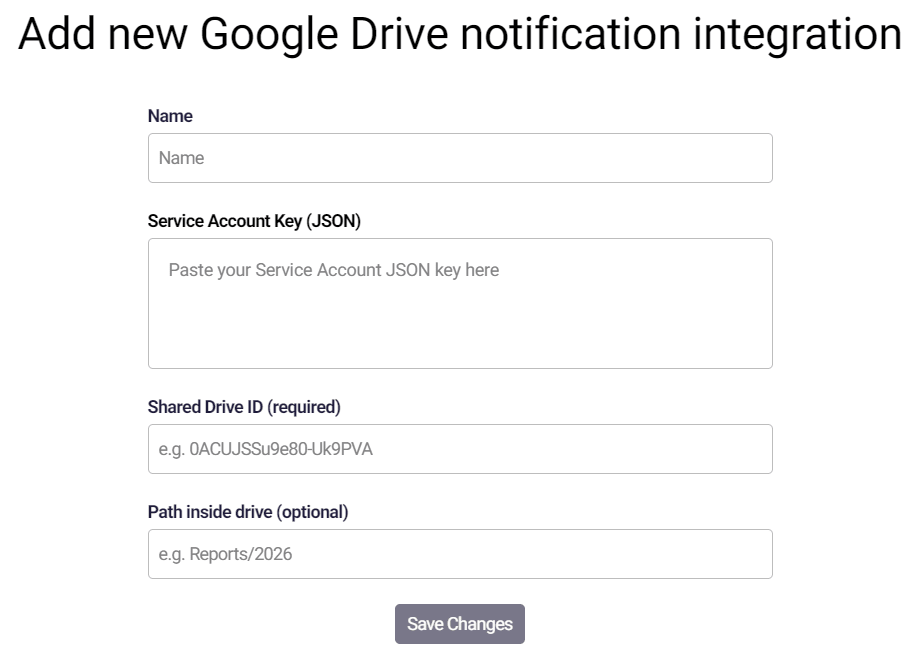
Section titled “Setup a Google Drive integration”Used to write files to a shared drive.
Required fields
-
Name
-
Service Account Key (JSON)
-
Shared Drive ID
-
Path (optional)
Steps
-
Create a Service Account in Google Cloud
-
Generate a JSON key
-
Share the target Drive with the service account email
-
Copy the Shared Drive ID
-
In Astrato, click Add Integration → Google Drive
-
Paste JSON key + Drive ID (+ optional path)
-
Click Save Changes
Validate
-
Trigger a notification/export
-
Confirm file appears in the Drive
Notes
-
Must use Shared Drive, not personal My Drive
-
Ensure service account has access
Setup an S3 integration
Section titled “Setup an S3 integration”Used to send files to S3-compatible storage.
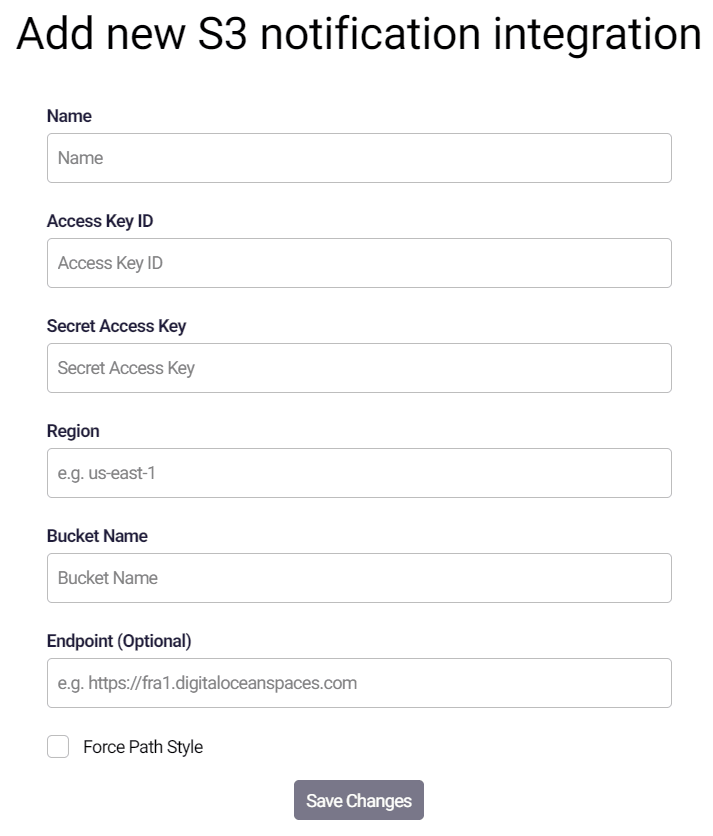
Required fields
-
Name
-
Access Key ID
-
Secret Access Key
-
Region
-
Bucket Name
-
Endpoint (optional)
-
Force Path Style (optional)
Steps
-
Create IAM user with S3 write permissions
-
Generate Access Key ID and Secret Access Key
-
Identify Region and Bucket
-
In Astrato, click Add Integration → S3
-
Enter credentials and details
-
(Optional) Set custom endpoint for S3-compatible storage (e.g. DigitalOcean)
-
Click Save Changes
Validate
-
Trigger a notification/export
-
Confirm file appears in the bucket
Notes
-
Use Force Path Style for some S3-compatible providers
-
Ensure bucket policy allows writes from provided credentials