

Enterprise Authentication
Introduction
Section titled “Introduction”This article provides an overview of the Enterprise Authentication settings in Astrato.
Contents
Create connections in the refreshed lobby
Enterprise Authentication Articles
Overview
Section titled “Overview”Enterprise Authentication features in Astrato have been designed for customers who use a centralized Identity Provider (IdP) for managing their user accounts, and assign their users a single sign-on (SSO) account to access multiple systems. Using a centralized IdP means the organization controls access to all software from a single location, and in some cases they can integrate user account information to extend access control to external systems like Astrato.
Astrato supports a large variety of different IDPs and we also supply a generic OIDC connector that allows you to connect any OIDC compliant iDP.
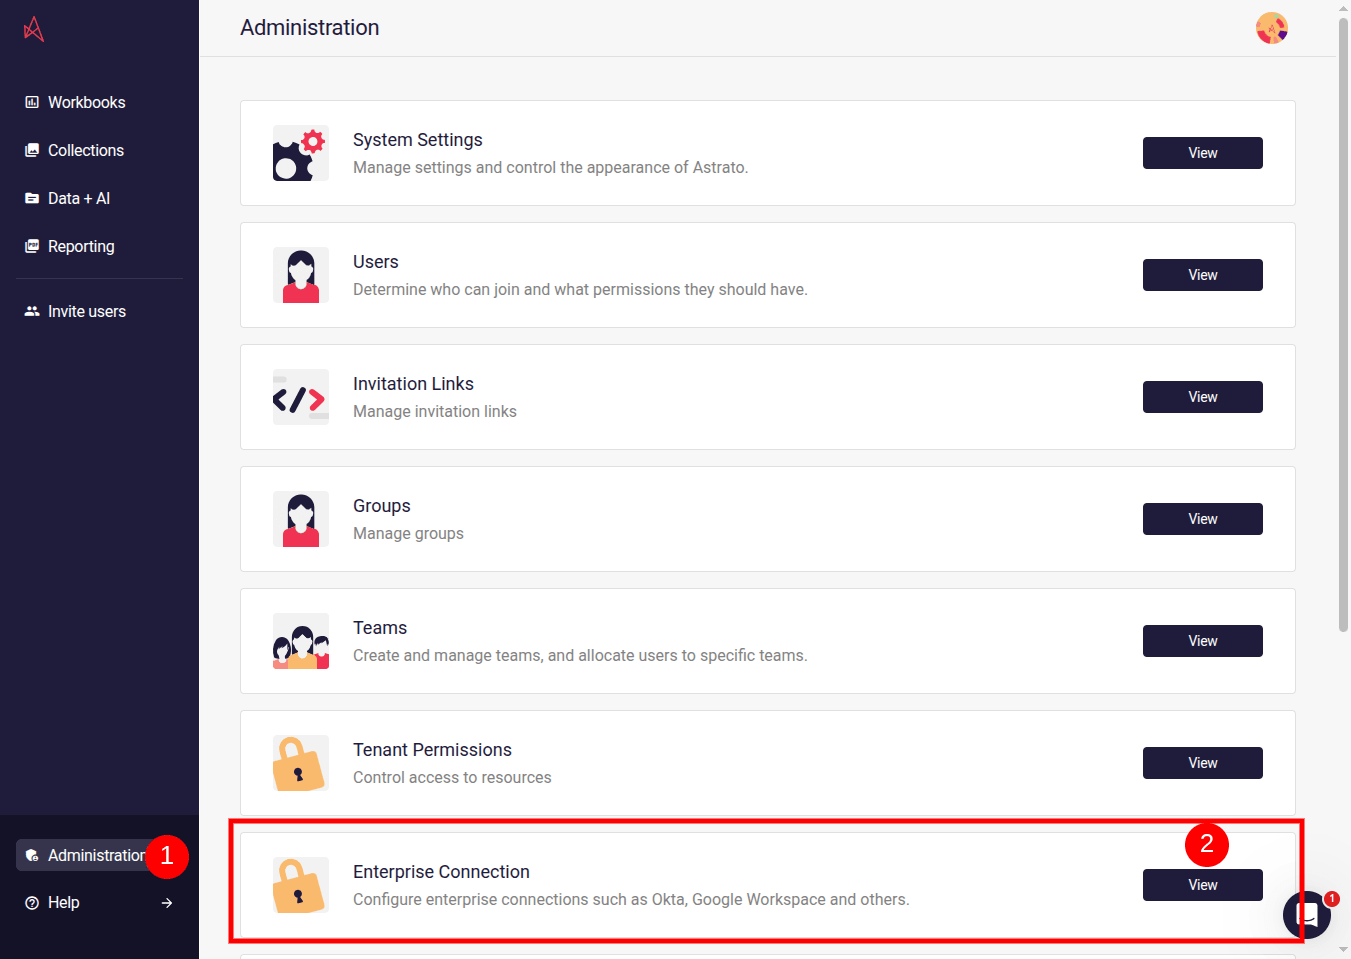
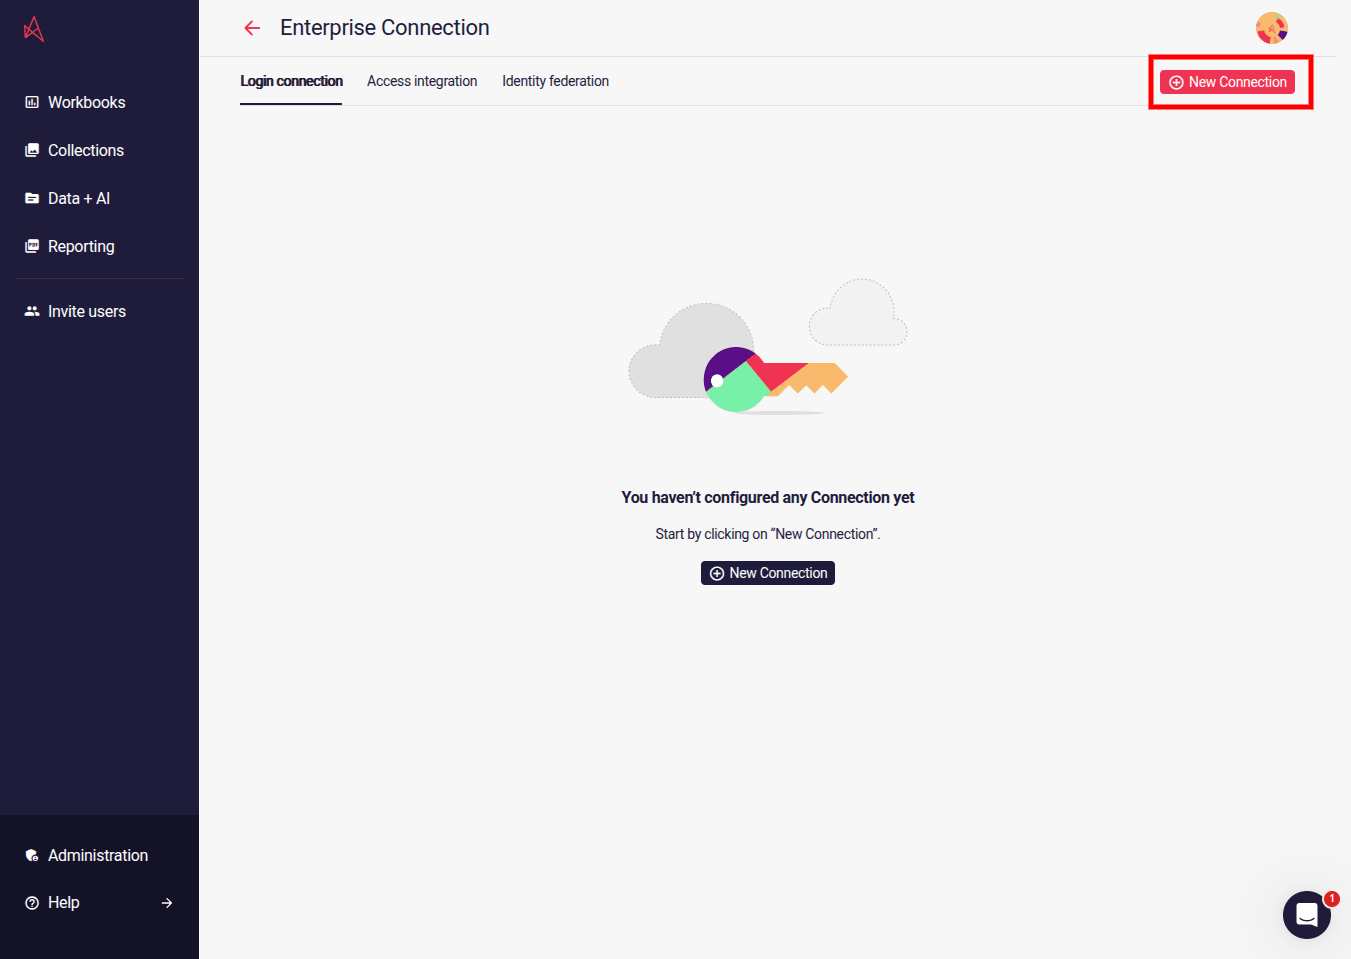
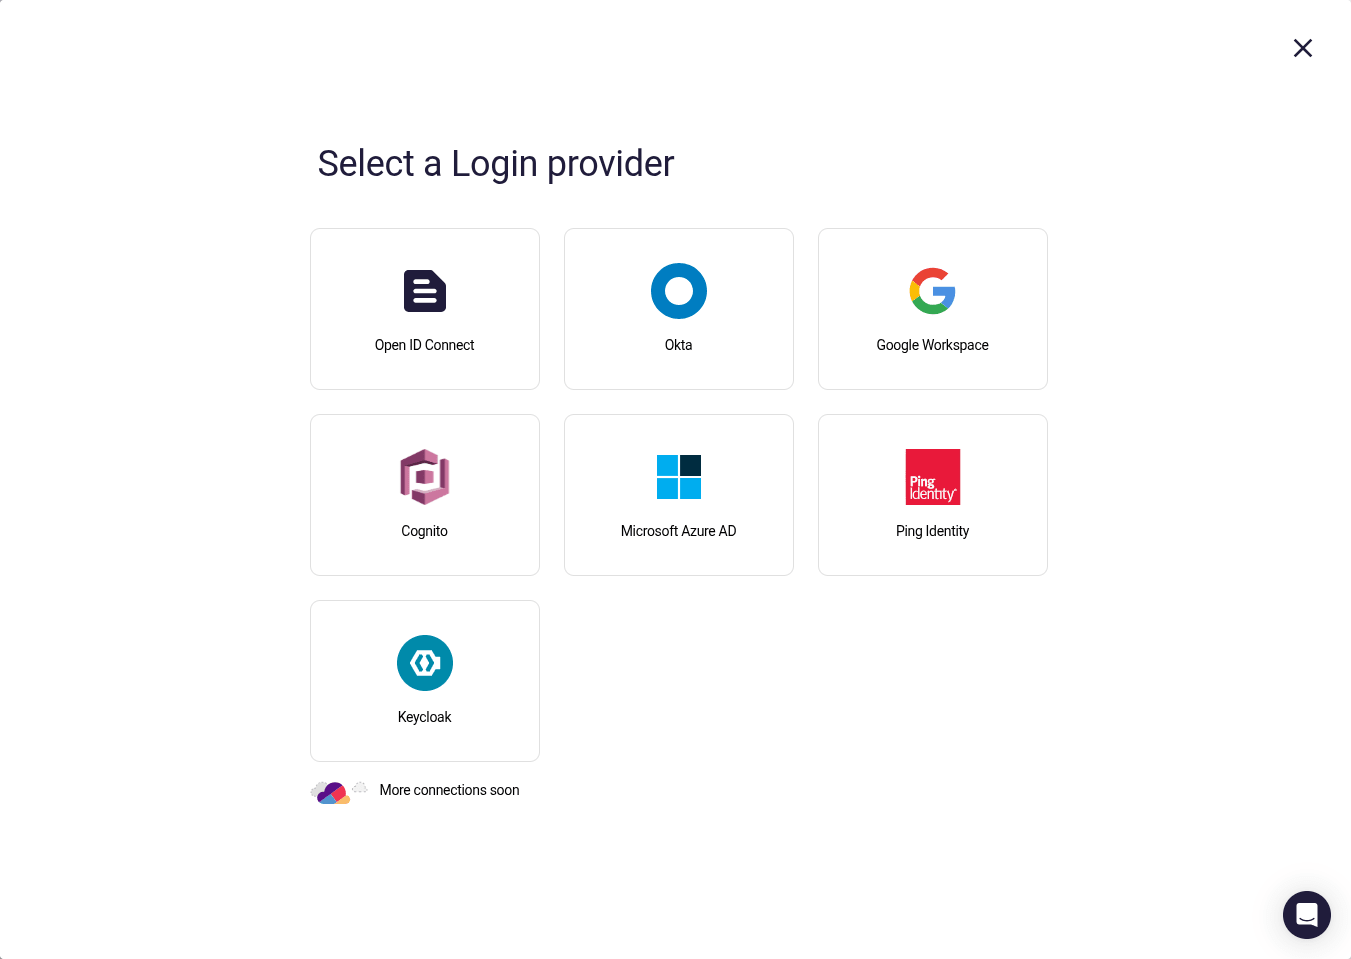
Figure 1: Enterprise Authentication Example
Astrato supports connections between a customer’s enterprise IDP and their Astrato workspace, which gives the customer the advantage of granting user access without managing a separate Astrato account. Figure 1 (above) shows the location of the Enterprise Authentication settings on the Astrato site and the pages you’ll use to set up the connection. You can find setup guides for each connection type in the Administration collection of the Astrato Help Center.
Note: A workspace can have one login connection. To use a different login provider, delete the existing login connection first. Access integrations and identity federation providers are separate.
Back to Top
Create connections in the refreshed lobby
Section titled “Create connections in the refreshed lobby”As a workspace owner or administrator, open Administration → Enterprise Connection. Choose Login connections, Access integrations or Identity federation, then select Add connection, Add integration or Add provider.
Select a provider. Providers that are not released are unavailable. Review its Configuration details and register the displayed callback URLs and scopes with your provider. Choose Continue to Setup, enter the required details and select Create. The new record appears in the list and its properties open. If creation fails, correct the reported error and retry; your entries remain in the form.
For login connections, supply a name, issuer URL, client ID, client secret and identity provider domains. Google Workspace uses its workspace domain instead of an issuer URL. You can allow users outside those domains to sign in without SSO; workspace owners and administrators can always sign in without SSO. Providers other than Google Workspace also offer optional role and group synchronization settings.
In a login connection’s Setup tab, select Allow users outside the identity provider domain to sign in without SSO to allow those users to use other sign-in methods. When editing an existing connection, the checkbox shows its saved value; if no value was previously set, it is unchecked. Select Save to apply a change. You can change this setting without entering the client secret again. This option is only shown for login connections.
For access integrations, supply the account or issuer URL, client ID and client secret shown for your provider. Google BigQuery uses a Google Workspace domain instead of an issuer URL. Credentials are write-only and are not displayed after saving.
A created login connection is not enabled until it is verified. In its properties, open Setup, save any changes, then choose Verify connection. Sign in with the provider in the new window. Keep that window open until verification completes. The lobby updates the connection to Enabled after Astrato confirms success. Access integrations use the same verification action before use. Allow pop-ups if your browser blocks the sign-in window. If verification fails or times out, correct the reported issue and try again. Closing the properties panel stops waiting and closes the provider window.
Unverified connections also show Manage in connection settings when original settings are available. This separate link opens the connection’s original settings for additional management; use Verify connection to verify directly from the refreshed lobby.
For identity federation, choose Snowflake, enter a display name and service account URL,
and create the provider. Its properties show the public key and JWKS URL to configure in
Snowflake. The default scope is session:role-any, with scp for scope mapping and sub for
user mapping; the signing algorithm is RS512.
Entra ID Token Exchange is available when the workspace has an Entra ID login connection.
Enter a display name, Snowflake service account URL, the SSO connection and Token audience.
This provider uses the same scope, with email for user mapping, and does not generate a signing key.
Preparation
Section titled “Preparation”The Configuration tab for your iDP in Astrato contains the information you will need to configure your iDP for Astrato. Please refer to your vendors documentation on how to configure external applications.
Back to Top
Enterprise Authentication
Section titled “Enterprise Authentication”If you click Enterprise Authentication in the Administration section, you’ll open a page containing the list of connection types (Figure 2). Any connection types we’re currently developing to use with Astrato are listed, but greyed out. In this article we’ll be using Google Workspace as an example. Click Connect to open the connection type you need to set up.
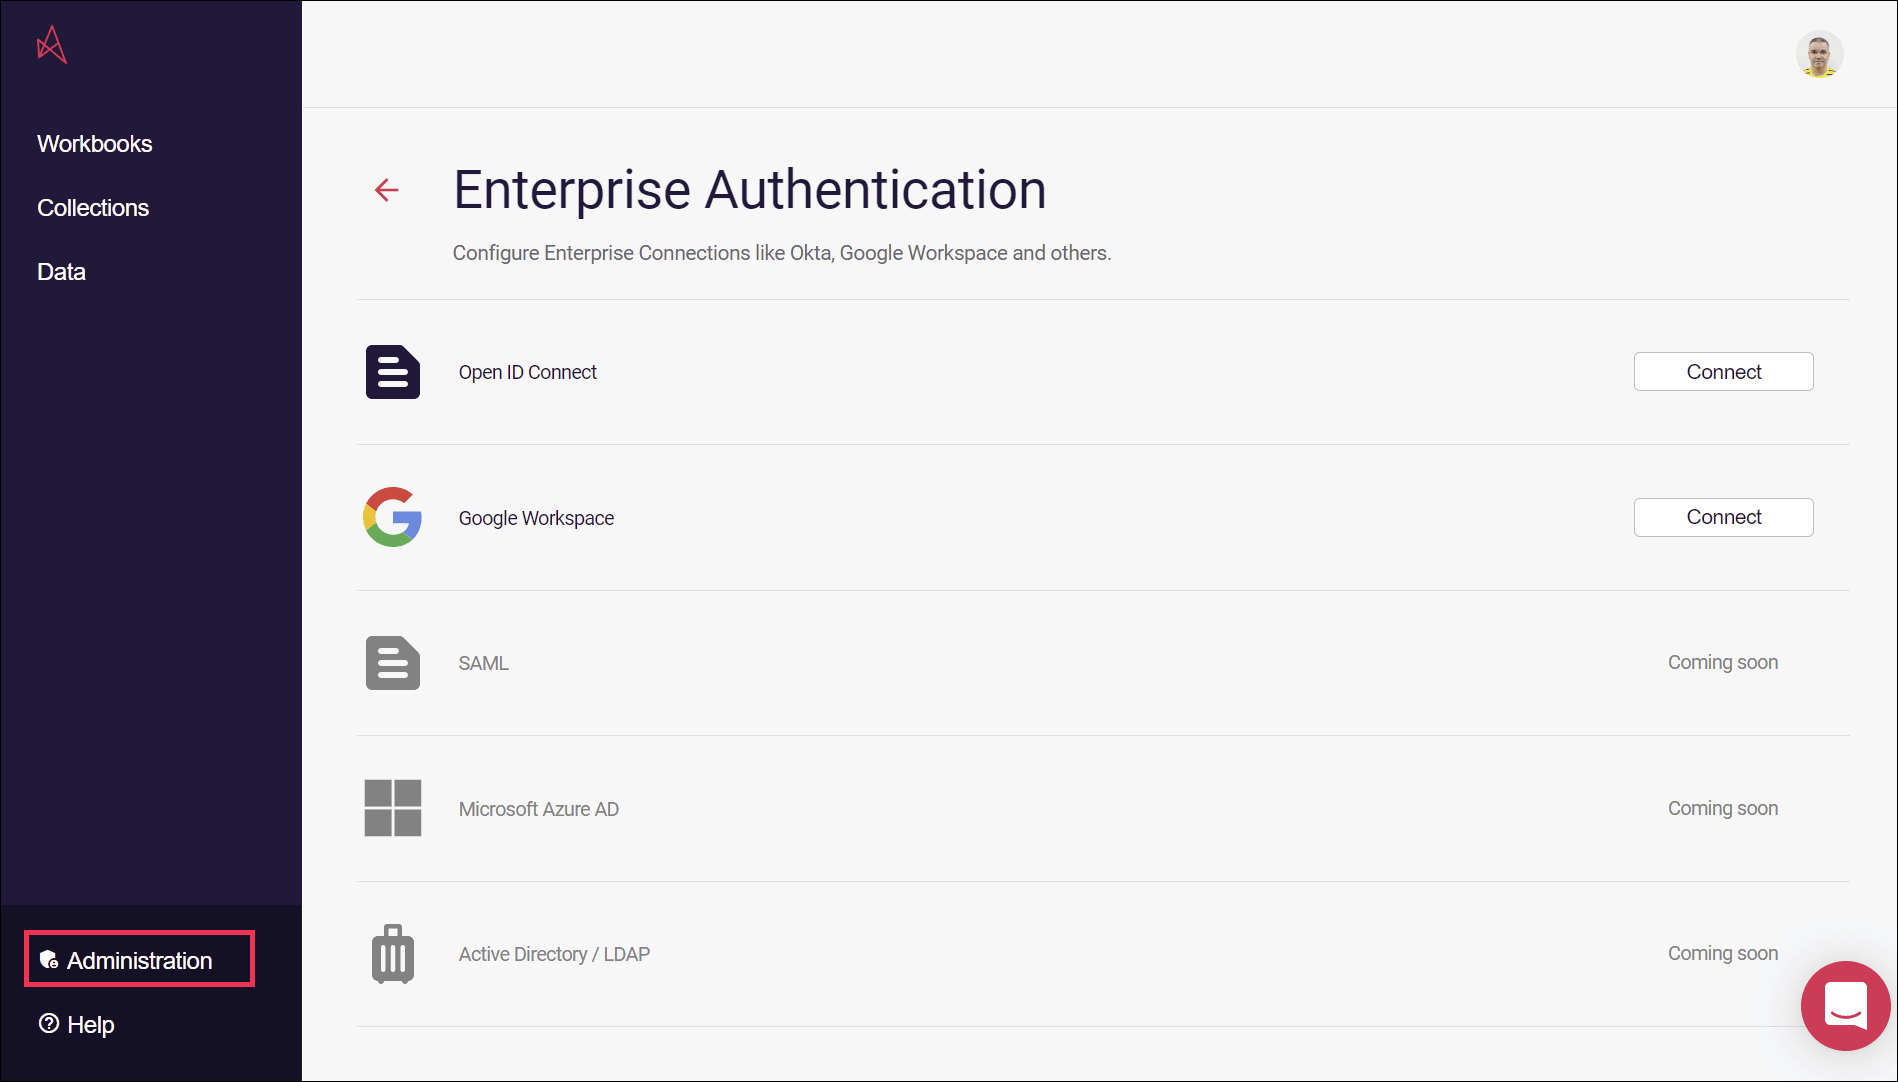
Figure 2: Enterprise Authentication
Back to Top
Configuration
Section titled “Configuration”Once you’ve chosen a connection type, you’ll open the connection Configuration page (Figure 3), which contains the information you’ll use to integrate with Astrato.
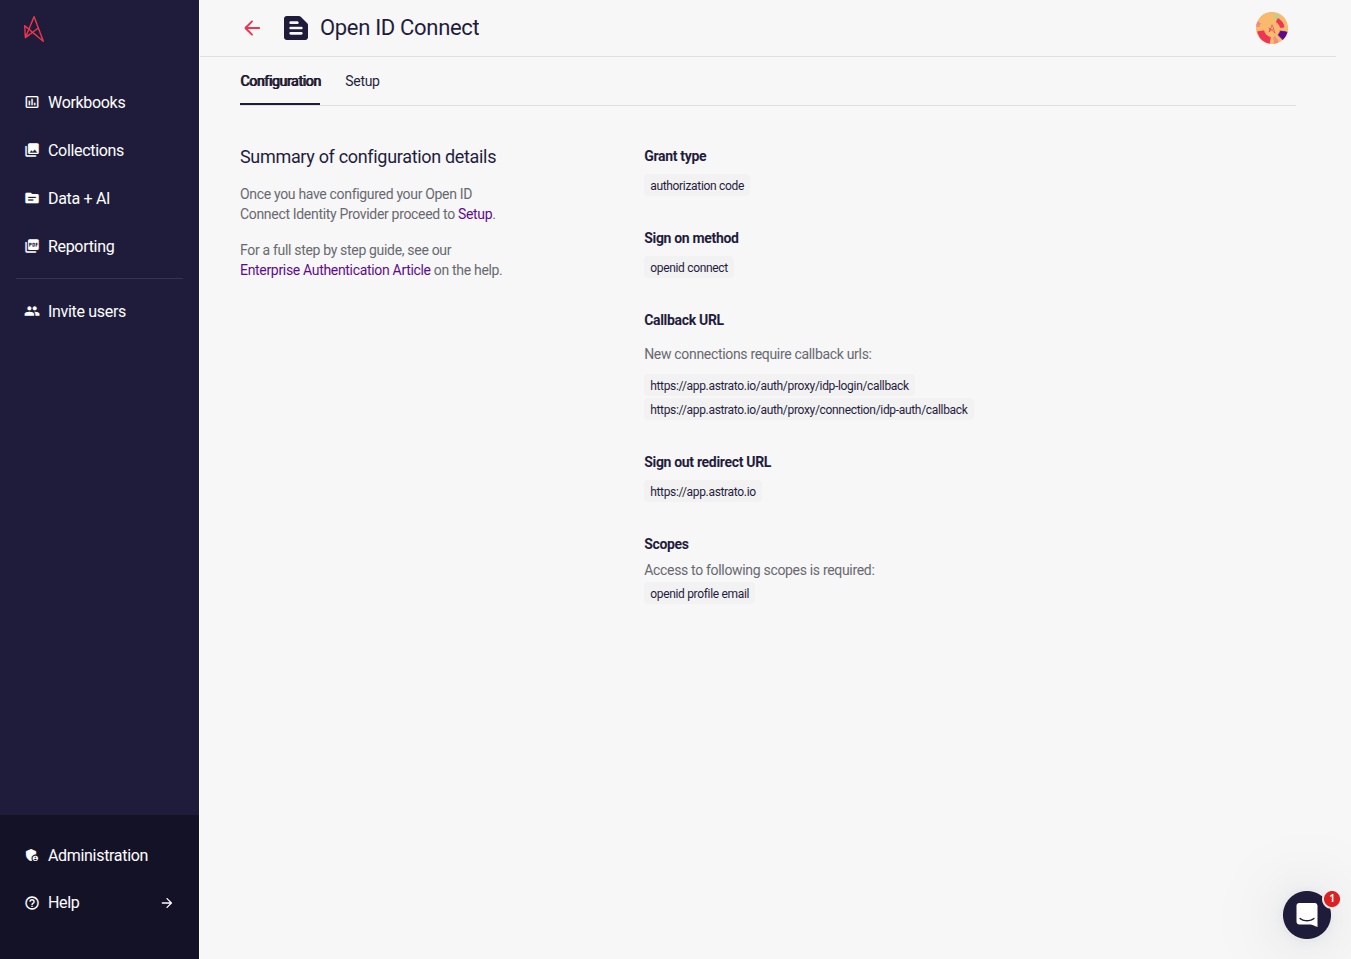
Figure 3: Configuration
Back to Top
When you open the Setup screen (Figure 4) you’ll see a list of fields where you’ll enter information about your data connection and click Create to complete the setup.
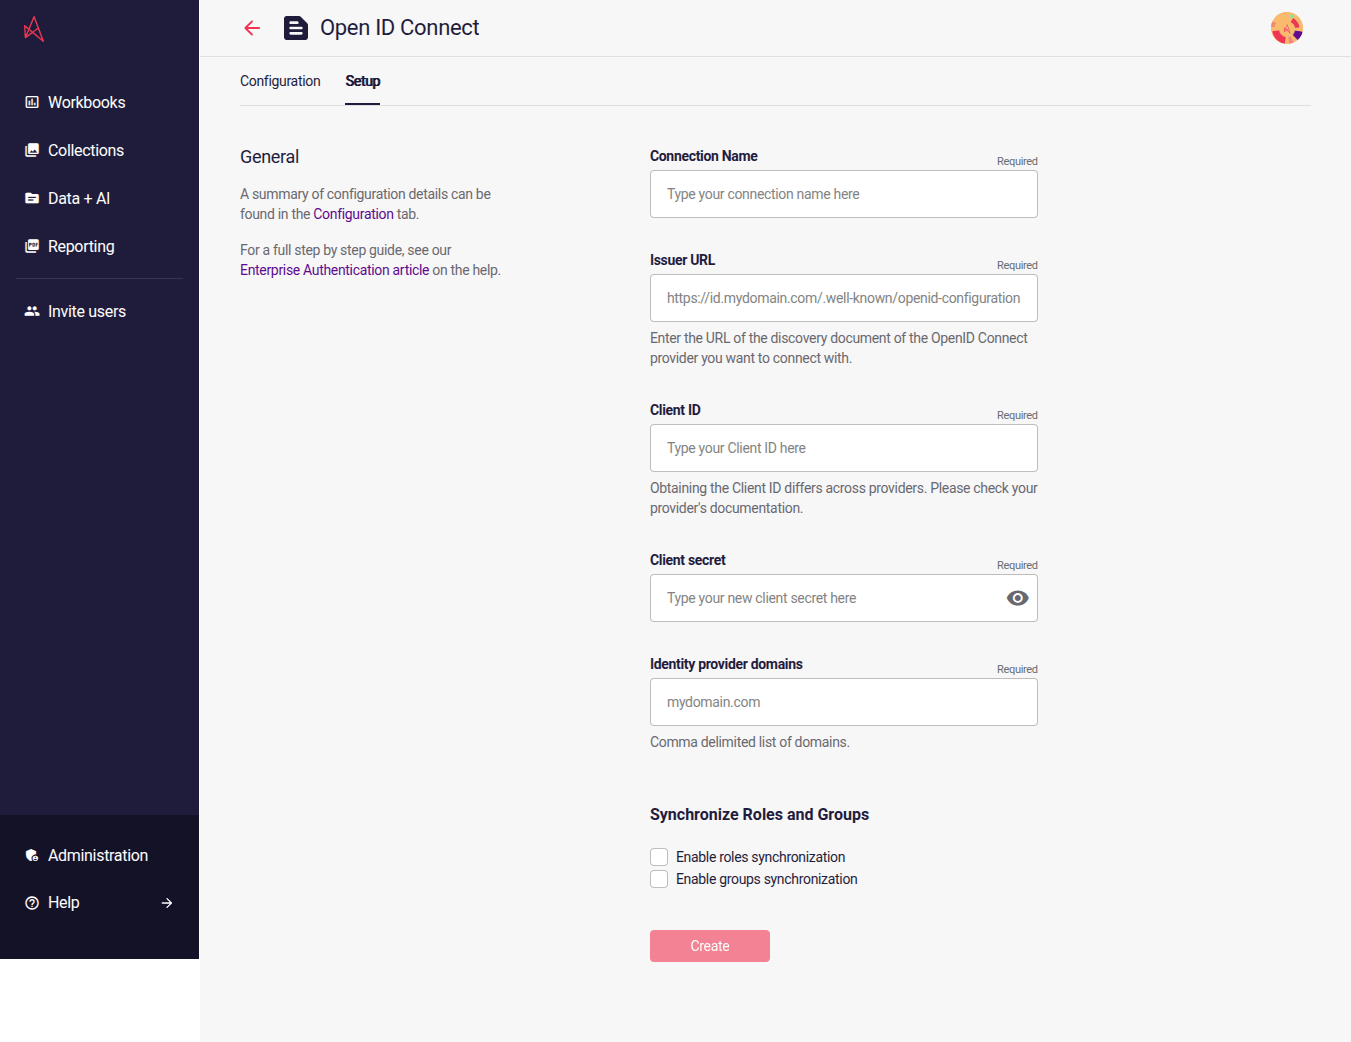
Figure 4: Setup
Back to Top
Enterprise Authentication Articles
Section titled “Enterprise Authentication Articles”You can find more articles on enterprise authentication (including a setup guide for each supported connection type), in the Administration collection of the Astrato Help Center.
Back to Top
Redirect users after login - Customize Return to URL
Section titled “Redirect users after login - Customize Return to URL”Astrato supports the use of returnTo as a URL parameter. This method is particularly useful if you want a direct redirect to a specific URL using an SSO provider. The paths must be part of app.astrato.io, for example, /workbooks.
When a user logs in, they can be immediately sent to a workbook, which could be a dashboard or even a personalized landing page that links to other workbooks.
Step 1: Copy your login URL
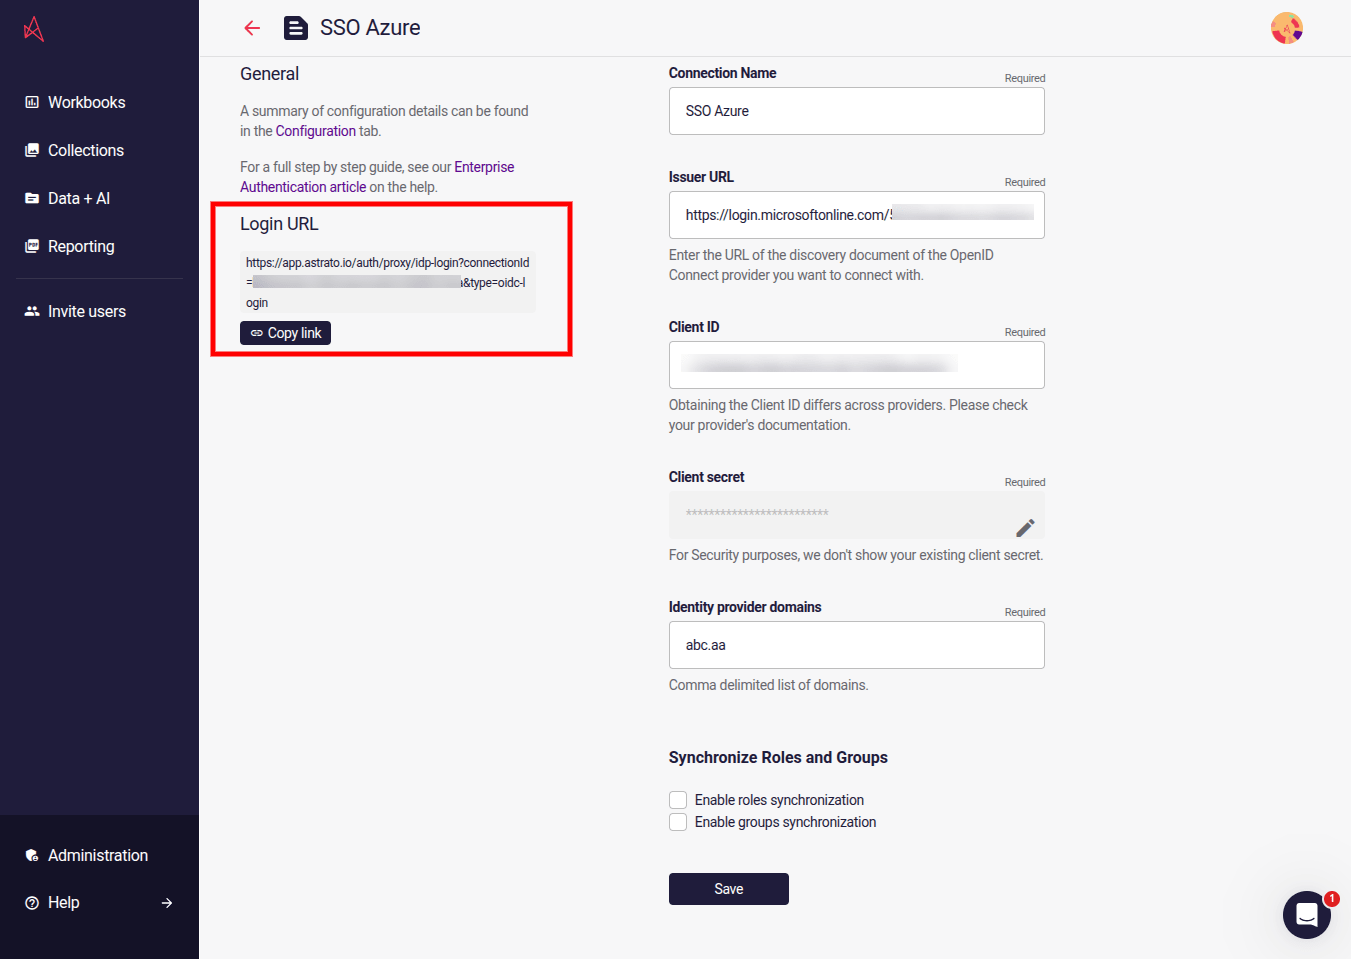
Step 2: Append your path address
See the best practice guidance below for creating the path in the correct format.
✅ Best Practice
When creating your
returnTostring, do not include the domain (app.astrato.io).Include the first slash like this:
/collectionsthen encode the url%2Fcollections. The result will look like this&returnTo=%2Fcollections.
ℹ️ Remember to encode URLs - https://www.urlencoder.org/
Step 3: Start using your new login URL
Use the new login URL with the path address appended, start sending it to users.
Examples
Section titled “Examples”Astrato supports returning to custom URLs. These
Return to sheet
&returnTo=%2Fobject%3FobjectId%3D04bedf08-9d08-450d-9e8f-3d8dab5d143e%26tenantId%3D988d4ffe-3a80-48c4-8527-5afecf0bb41b%26workbookId%3Db9ba6ab6-ae6e-48de-8fab-39554ef082a3%26databaseId%3D1651020e-726a-4738-9ef2-ec6e40c3b1b1%23sheetId%3Ded849664-e011-4954-a4cd-d5fde39c5f1fReturn to collections
&returnTo=%2Fcollections