

Administrator or above
Invite someone and share one app view-only
This recipe takes a new teammate from no account to opening one published Data App and nothing else that you have not shared. It combines two jobs that live on different pages: inviting the person, and sharing the app and its data.
Stability: preview. Data Apps are available only in enabled Astrato environments. To check yours, open Analytics and the type filter beside the sort order in the Library: if it offers Data Apps, they are enabled. If it offers only Workbooks (and Pinboards), there is no app to share yet; ask your Astrato contact to enable Data Apps. See Manage Data Apps.
Before you start
Section titled “Before you start”- You can invite people only as an Owner or Administrator. The Invite users icon does not appear for anyone else.
- The app must be published. Unpublished apps appear in the Library but have no hosted link to open.
- You need Manage access permission on the app. Without it, the Manage access action is not in the row’s menu and the Manage Access tab is not in the property panel.
- The app reads its data through a semantic layer and a data connection. The person needs access to both as well, or they can open the app and see no data. Step 3 covers this.
What the Viewer role can do
Section titled “What the Viewer role can do”Viewer is the lowest workspace role. It is a ceiling, not a grant: it caps what the person can be given. A Viewer can open what has been shared with them, but only owners, administrators and creators can be given more than View on a semantic layer or data connection. Designers can also create and edit workbooks, which Viewers cannot. See role and Home and navigation.
A Viewer role plus a View grant on one app is therefore the intended view-only setup: the role stops them being given more, and the grant says what they can open.
Step 1: Invite the person as a Viewer
Section titled “Step 1: Invite the person as a Viewer”-
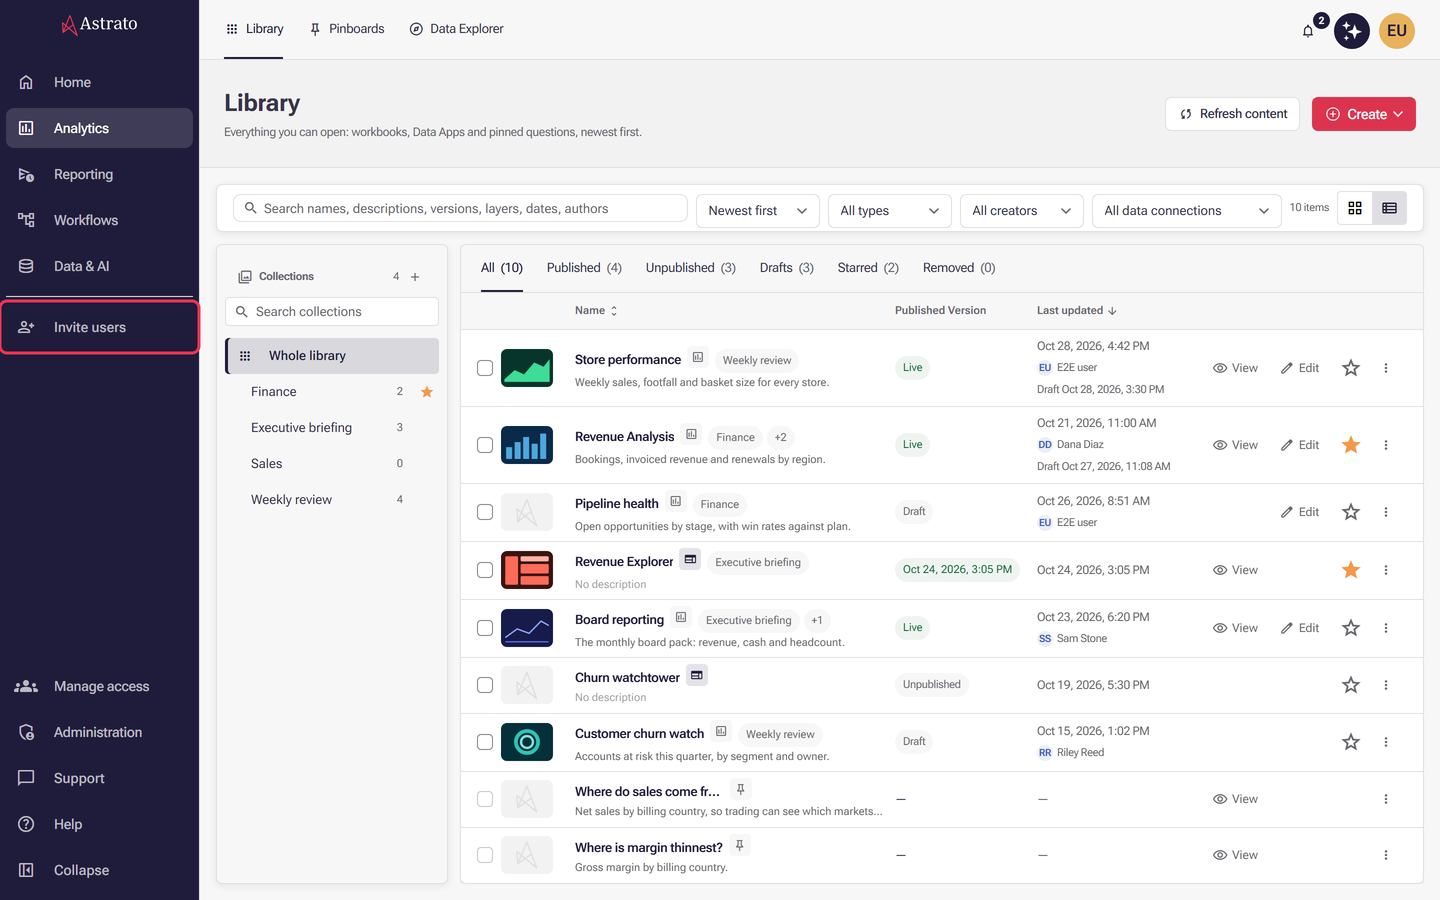
Select Invite users in the left rail. It sits below Data & AI, under the dividing line.
-
Enter their address in Email addresses.
-
Set Role to Viewer.
-
Leave Groups empty unless you want them to inherit other shared content. Every group you tick applies to the person and may open more than the one app.
-
Leave License team as it is unless your organization counts seats by team. It starts on your first license team and only decides which team the person’s seat is counted against; it does not change what they can open or do. The dialog cannot send until a team is chosen, so a workspace whose field reads No teams available needs a team in License teams first.
-
Select Send invitation.
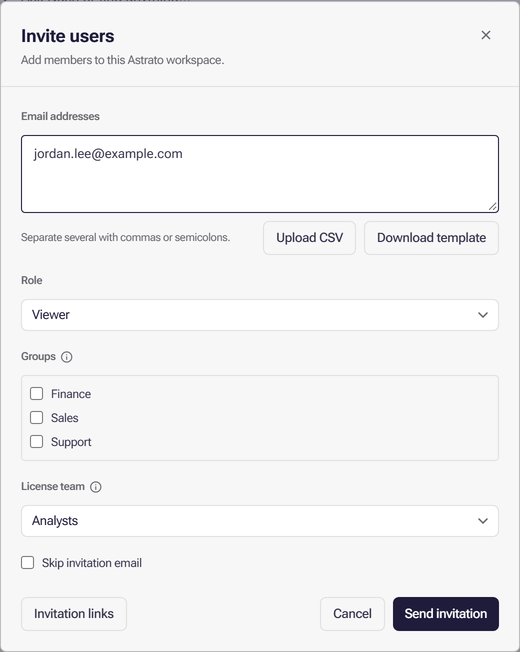
The person appears with the status Pending in Administration → Users until they accept. For CSV invitations and skipping the email, see Invite users.
Step 2: Give them View on the app
Section titled “Step 2: Give them View on the app”-
Open Analytics. The Library is its first tab.
-
Find the Data App. Choose Data Apps in the type filter to see Data Apps alone, or use the Published tab to see published items only.
-
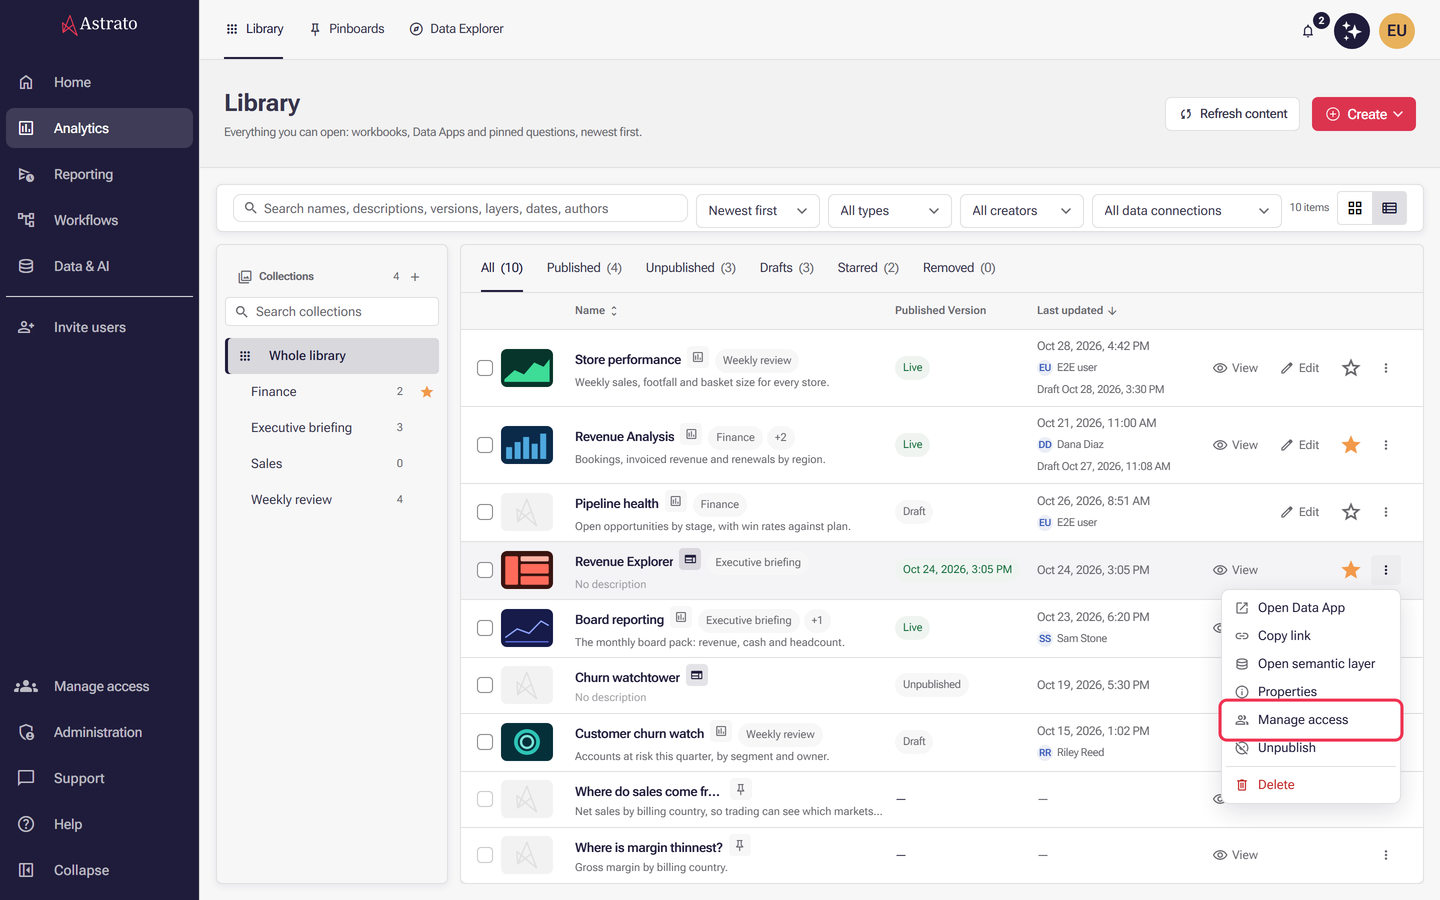
Open the three-dot menu at the end of the row and select Manage access. The property panel opens on its Manage Access tab.
-
Use Add access, choose Users, search for the person and add them.
-
In Who has access, check that their row shows View. New grants start with View.
-
Select Update.
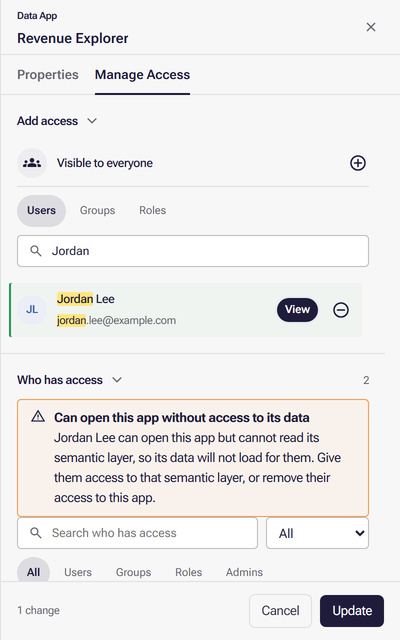
Until you also share the app’s semantic layer, the panel warns that the person can open the app without access to its data. Step 3 clears that warning.
Changes take effect only when you select Update; Cancel discards them. If the update fails, your draft stays so you can retry.
The profiles are View, Edit and Full access; choose View and leave the rest. Edit grants metadata updates, and Full access adds Publish, Delete and Manage access. Access Overview shows the same Full access level as Full control. In this panel and in the layer and connection panels, a Viewer can be given only View, whether you add them by name or through their role. Groups are not capped this way, so check any group you add them to. The panel behaves as described in Manage resource access.
Which access model this recipe assumes. The steps are written for explicit resource access, where the semantic layer and data connection panels offer Full access. Older workspaces use legacy resource access instead: the semantic layer panel offers only View and Edit, and the data connection panel View, Create and Edit. The recipe works the same way under either model, because every grant it makes is View. See Manage resource access for how to tell which model you have.
Step 3: Give them the data the app reads
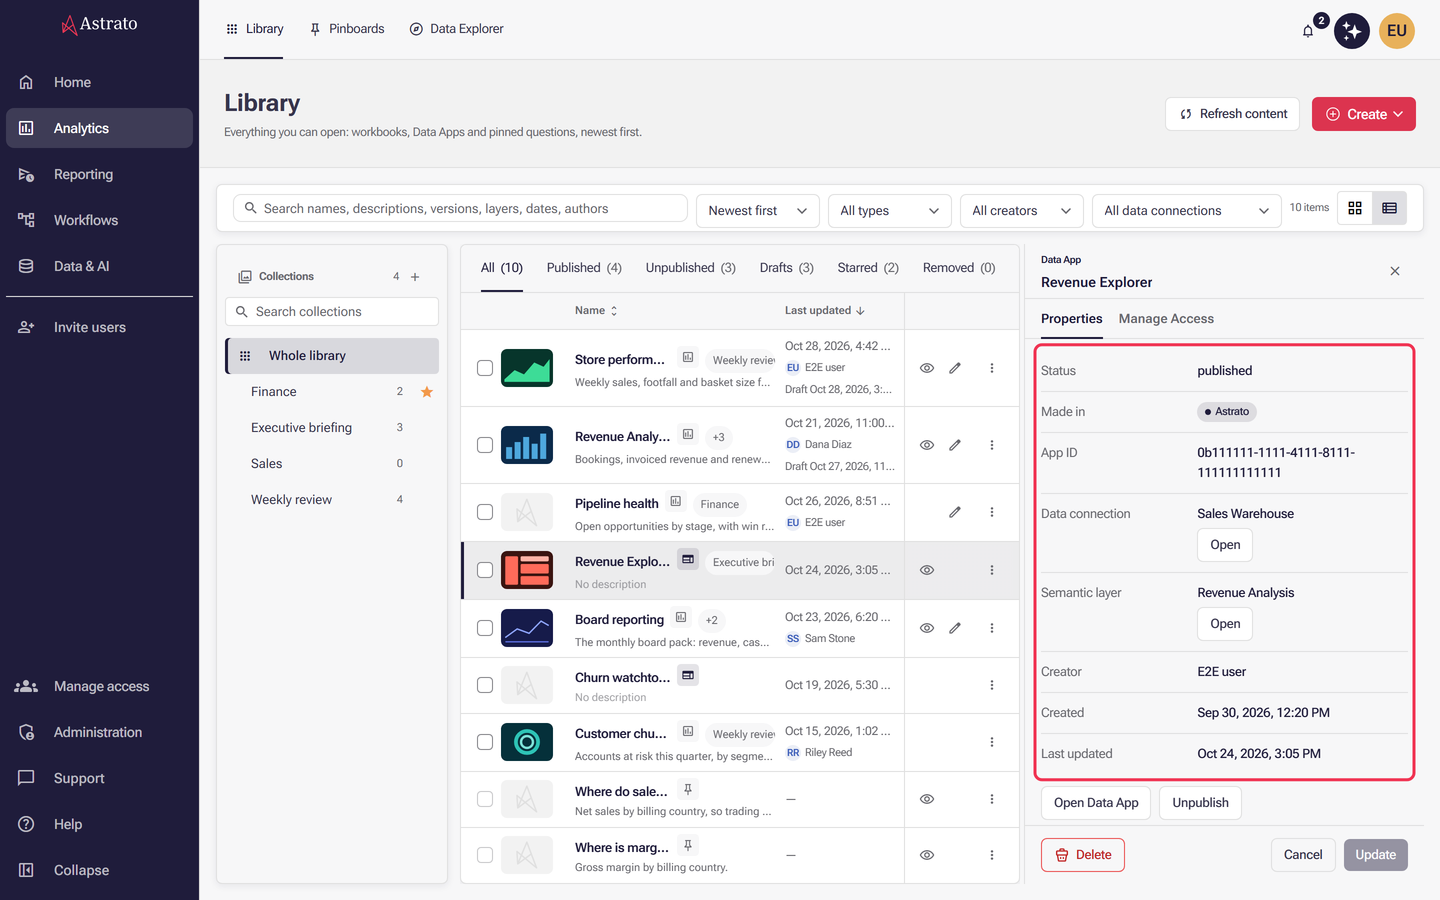
Section titled “Step 3: Give them the data the app reads”Access to the app does not carry access to the data underneath, so the person needs two more View grants: one on the app’s semantic layer and one on the data connection that layer reads through.
Find the layer and the connection.
- In the same property panel, select the Properties tab.
- Under Details, read Semantic layer and Data connection. Each names the resource and has an Open button that takes you to it.
Share the semantic layer.
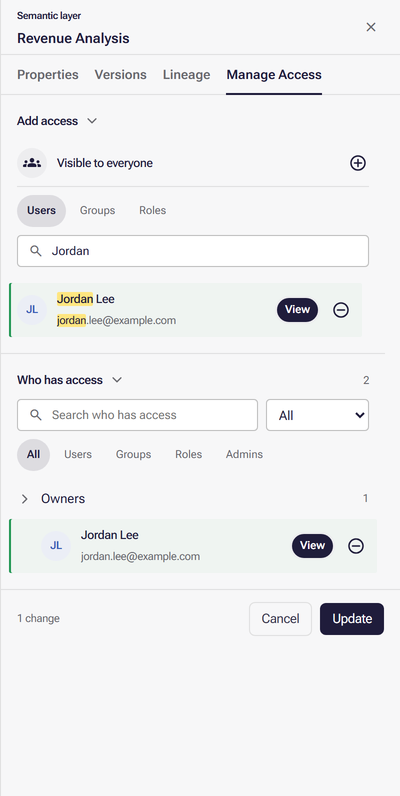
- Open Data & AI. The Semantic Layers tab lists the layers.
- Open the three-dot menu on the layer named in Details and select Properties. (Someone who can manage the layer’s access but not edit it sees Manage access there instead.)
- Select the Manage Access tab.
- Use Add access, choose Users, search for the person and add them at View.
- Select Update.
Share the data connection.
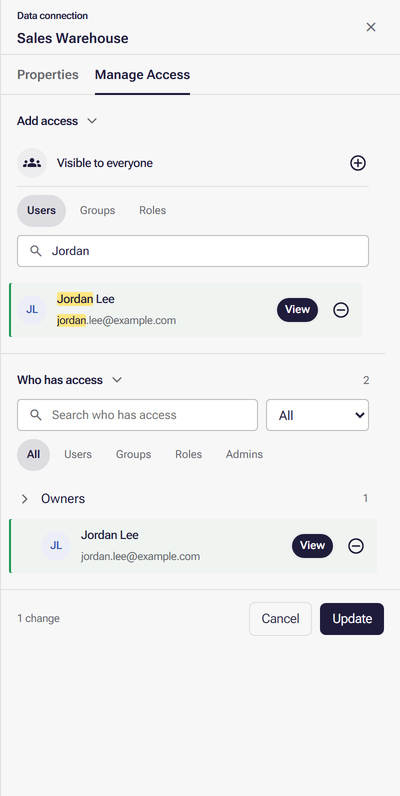
- In Data & AI, select the Data Connections tab.
- Open the three-dot menu on the connection named in Details and select Properties, then the Manage Access tab. (As with the layer, someone who can manage the connection’s access but not edit it sees Manage access in the menu instead.)
- Add the person at View the same way, and select Update.
Both panels work as described in Manage resource access.
Step 4: Confirm the share yourself
Section titled “Step 4: Confirm the share yourself”You can check every grant before the person signs in.
-
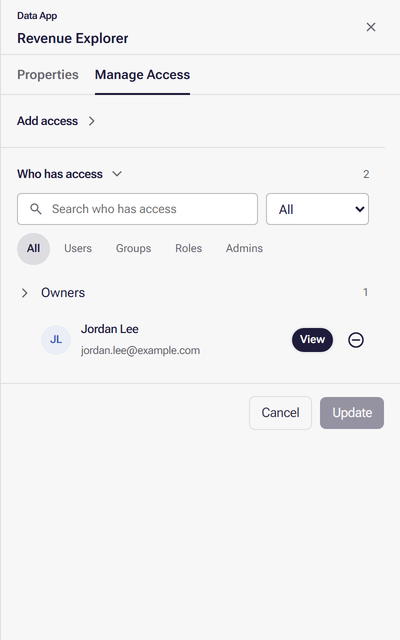
The app. Open the app’s Manage Access tab again. The person is listed under Who has access with View, and the warning that they can open the app without access to its data has gone. That warning checks the semantic layer only, so check the connection next.
-
The layer and the connection. Open Administration → Access Overview, select People and choose the person in the list. The semantic layer and the data connection both appear with View; a grant you made yourself reads Direct grant. Access Overview does not list Data App grants, which is why the app is checked in its own tab. See Review access across the workspace.
-
The invitation. In Administration → Users, the person’s Status changes from Pending to Active once they accept.
Step 5: Send them the link
Section titled “Step 5: Send them the link”The invitation brings the person into the workspace; it does not point them at the app. Send them the app’s hosted link yourself.
- In Analytics → Library, open the three-dot menu at the end of the app’s row and select Copy link. The entry appears only for a published app with a web address.
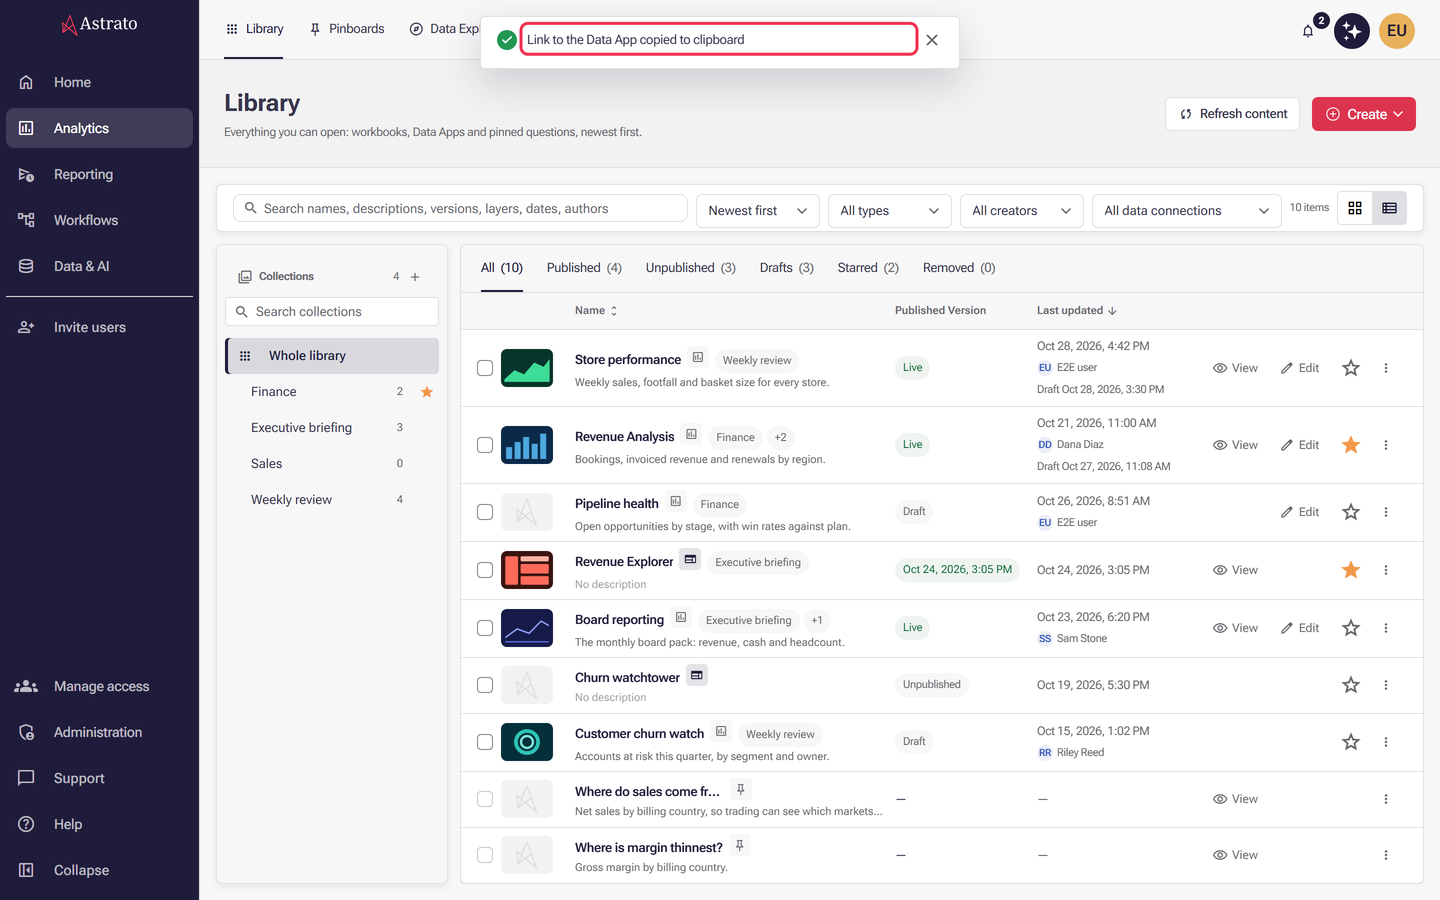
- A toast reads Link to the Data App copied to clipboard. If it reads Could not copy the link to the Data App instead, your browser blocked the clipboard; open the app with Open Data App and copy the address from the new tab.
- Paste the link into your message to them, with a note that they should accept the invitation first.
The link has the form https://<App ID>.<your apps domain>/, where the App ID is the one under
Details in the app’s properties. It is the hosted app, not the Library or the Builder.
What the person sees
Section titled “What the person sees”- Unless you ticked Skip invitation email, they receive an email invitation to the workspace. They accept it and sign in, which moves their row in Administration → Users to Active.
- The link you sent asks them to sign in to Astrato first, because the app is open only to signed-in people. Once they are signed in, it opens the app.
- The app is also listed in their Library under Analytics, so they can find it again without the link.
What success looks like
Section titled “What success looks like”- The person accepts the invitation and signs in.
- The app is in their Library, and the link you sent opens it.
- Its charts show data rather than errors or empty results.
- They have no Edit Data App, Unpublish or Manage access actions, because they hold none of those permissions.
If it does not work
Section titled “If it does not work”- No Manage access action: you lack Manage access permission on the app. Ask an owner, an administrator, or someone with Full access to it.
- The invitation never arrived: check that the address in Administration → Users is right and that the row is still Pending, and ask the person to look in their spam folder. There is no resend button. To send a fresh invitation, open their row, select Revoke invite under Security, then invite the address again as in Step 1; the dialog leaves out anyone who still has a pending invitation, so revoke first. To let them join without an email, use an invitation link.
- The person does not appear when you search: check Administration → Users that the invitation went out, and search by their name or email address again.
- The app opens but shows no data: the person is missing View on the semantic layer or the data connection. Repeat Step 3 and check both in Access Overview.
- The person can see more than you intended: a group, workspace role or Everyone may be granting it. Removing a direct grant does not remove access that arrives another way, and Access Overview shows which route applies.
- They are blocked from the data and want access: they can ask for it, and you answer in Review permission requests.
What next
Section titled “What next”- Invite users — CSV upload, groups and license teams.
- Manage Data Apps — publishing, public access and embedding.
- Manage resource access — the profiles and rules behind the access panel.
- Review access across the workspace — verify every grant in one table.