Write-back 101: add comments to a workbook
Writeback lets people enter data in a workbook and save it to a table in your warehouse. This page builds the simplest case: a comment box. Viewers type a comment, select Add comment, and the comment is inserted into a Snowflake table together with the email address of the person who wrote it. The table then shows the new comment.
Before you start: you need to be able to create tables and grant privileges in Snowflake, and to add a table to a workbook’s data model.
Step 1: Create the table
Section titled “Step 1: Create the table”Create a table to receive the comments. This example creates it in the WRITE_BACK_101 schema,
which the grants in Step 2 use. Run the statements in this step in the database that holds, or
will hold, that schema. If the schema does not exist, create it first. This needs the
CREATE SCHEMA privilege on the database:
CREATE SCHEMA IF NOT EXISTS WRITE_BACK_101;To use another schema, replace WRITE_BACK_101 in this step and in Step 2. Then create the table:
CREATE TABLE WRITE_BACK_101.COMMENTS_WRITE_BACK ( ID INT IDENTITY(1,1), COMMENT VARCHAR, CREATED_BY VARCHAR(320), CREATED_AT TIMESTAMP DEFAULT CURRENT_TIMESTAMP());If a table with that name already exists, the statement fails rather than replacing it. Choose another name, and use it in the steps that follow.
| Column | Purpose |
|---|---|
ID |
Optional here, but useful if you later update or delete comments. IDENTITY(1,1) starts at 1 and adds 1 for each row. Leave it out of the writeback so Snowflake fills it. |
COMMENT |
The text of the comment. |
CREATED_BY |
The email address of the person who wrote the comment. |
CREATED_AT |
Defaults to the time the row is inserted. Leave it out of the writeback so Snowflake fills it. |
It is an ordinary table: writeback needs no special schema or object type.
Step 2: Grant the privileges
Section titled “Step 2: Grant the privileges”Writes reach Snowflake through the workbook’s data connection, so the Snowflake role that
connection uses needs INSERT on the table. Permissions are managed in Snowflake, not in Astrato.
In the examples below, WRITE_BACK_101 is the schema and ANALYST stands for your connection’s
role.
To grant INSERT on every existing table in the schema:
GRANT INSERT ON ALL TABLES IN SCHEMA WRITE_BACK_101 TO ROLE ANALYST;To grant it on the comments table only:
GRANT INSERT ON TABLE WRITE_BACK_101.COMMENTS_WRITE_BACK TO ROLE ANALYST;The role also needs USAGE on the database and schema, and SELECT on the table to show the
comments. See Snowflake’s GRANT privileges
reference for the full list.
Step 3: Build the workbook
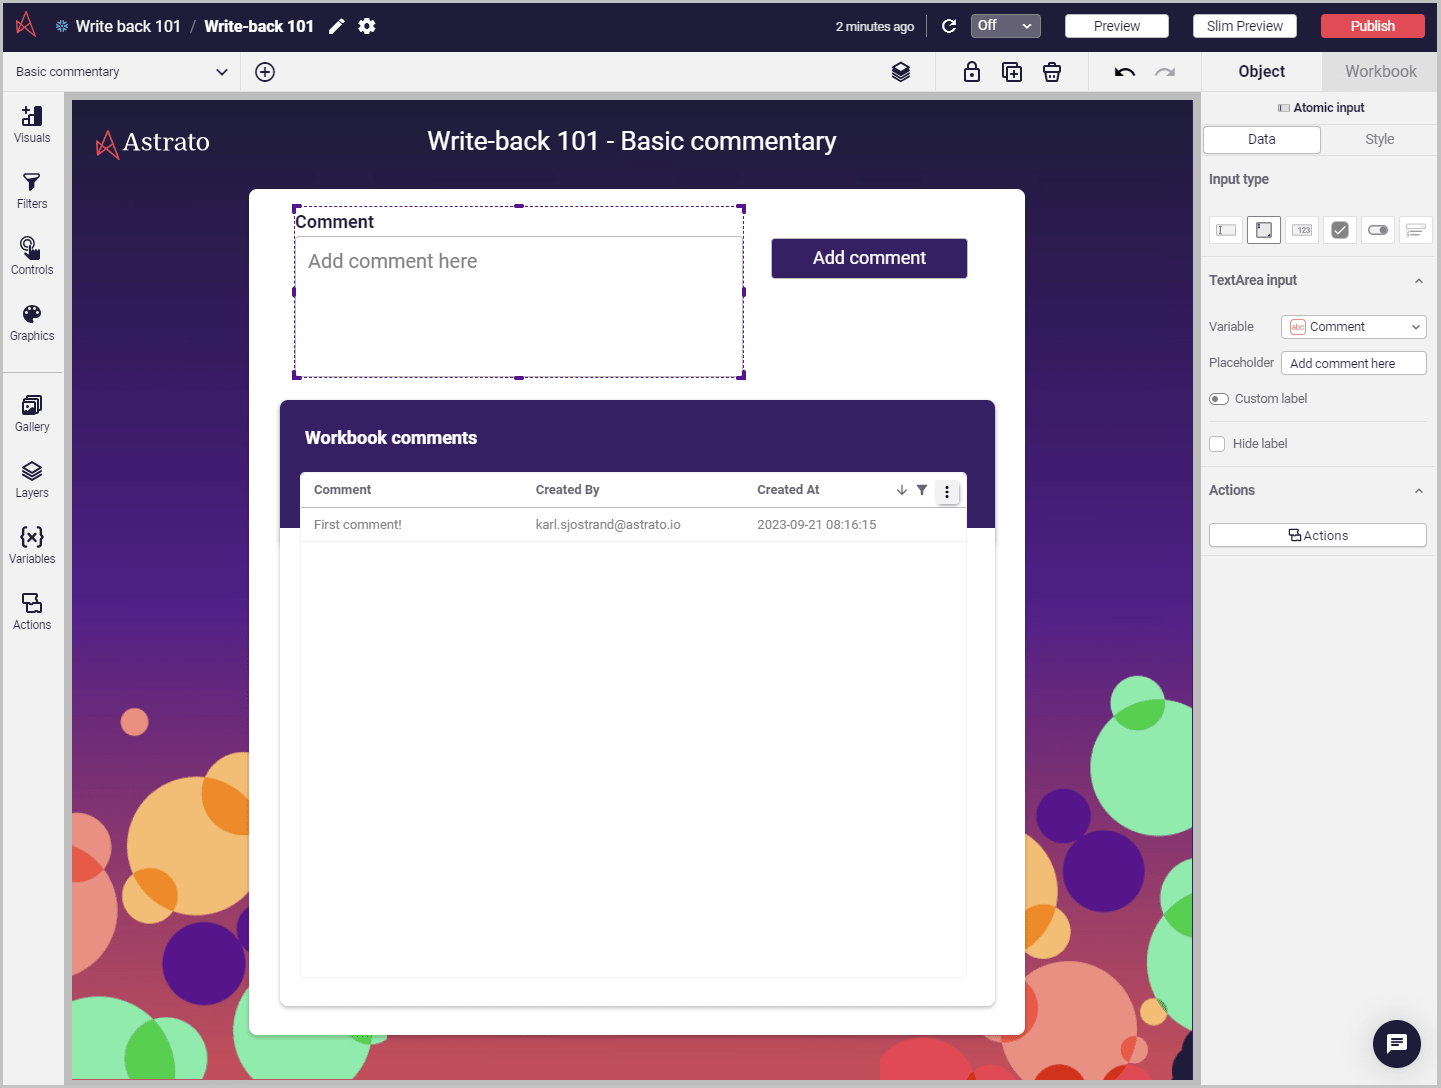
Section titled “Step 3: Build the workbook”Add COMMENTS_WRITE_BACK to the workbook’s data model, then add:
- a table that shows the comments
- a text area for typing a new comment
- a button labelled Add comment
Create a variable
Section titled “Create a variable”A variable holds the comment until it is written back. Create a text variable named Comment:
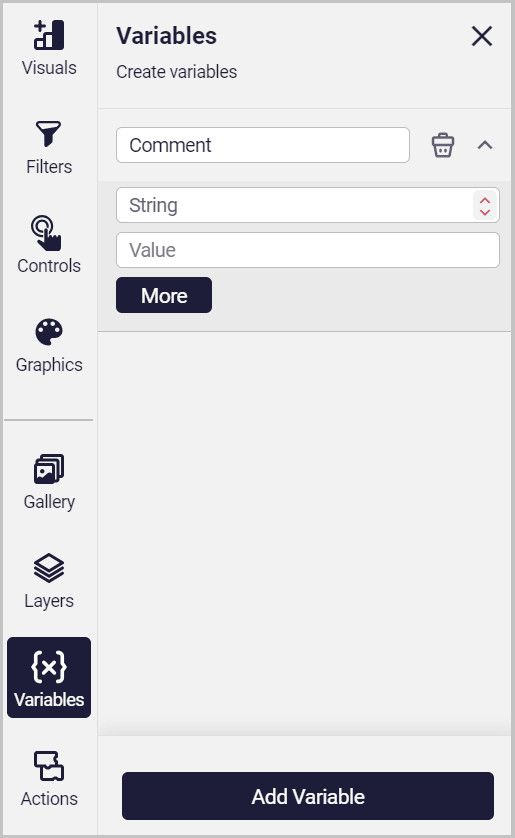
Link the variable to the text area, so that whatever is typed is stored in Comment. The workbook now looks like this:
Open Actions
Section titled “Open Actions”Actions connect the button, the variable and the table. Open them in either of two ways:
-
Select Actions at the bottom of the editor’s left toolbar.

-
Select Actions at the bottom of the Data tab in a control’s property panel.
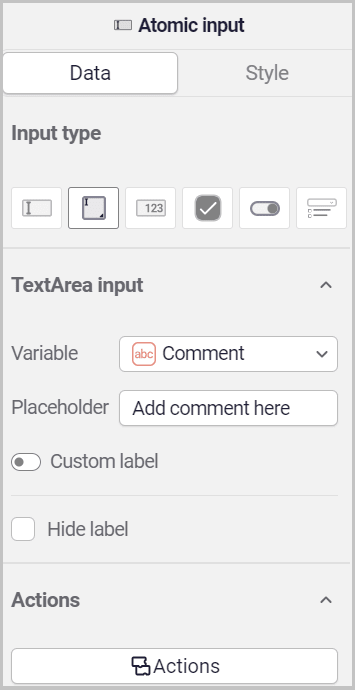
Actions opens full screen, with the block categories on the left and an empty canvas:
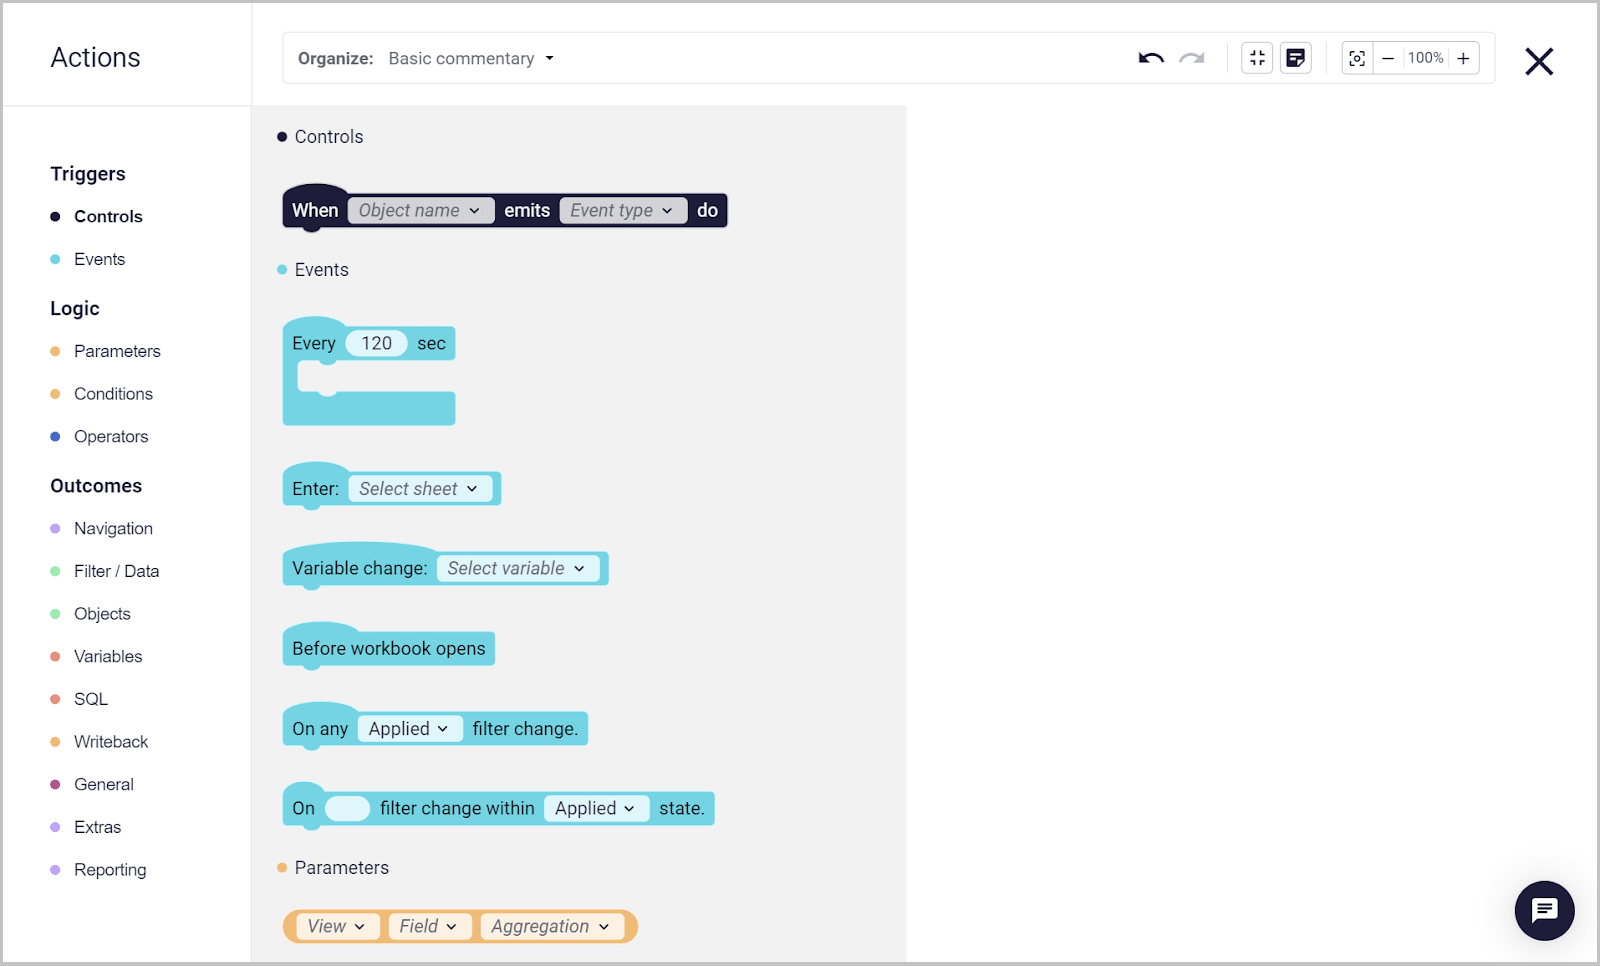
Add the blocks
Section titled “Add the blocks”Start with a When block for the Add comment button’s On click event, then add:
- An if block that checks that the length of Comment is greater than 0, so empty comments are not saved.
- Inside it, a writeback block that inserts Comment into the
COMMENTcolumn and the current user’s email intoCREATED_BYof Comments Write Back. The email comes from the Current User context values. - A block that sets Comment back to empty, which clears the text area.
- A Refresh data block, so the table shows the new comment.
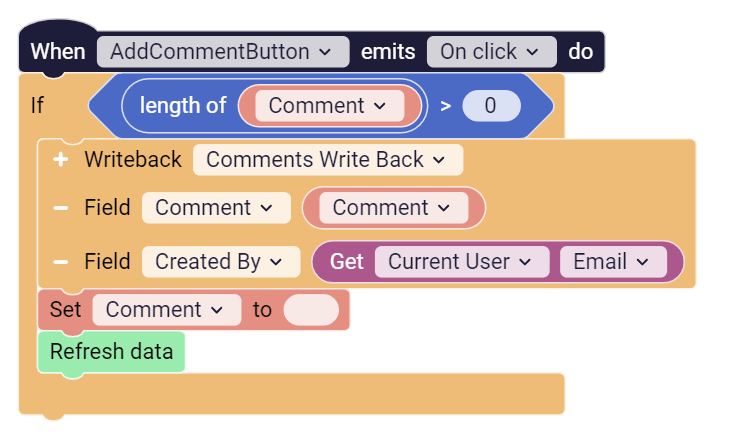
The writeback blocks are in the Writeback & SQL category.
Step 4: Try it
Section titled “Step 4: Try it”Select Preview, type a comment and select Add comment. The comment appears in the table:
Next steps
Section titled “Next steps”- Let users edit rows in a table in Using the Table’s writeback/edit capability.
- Show writeback controls only to some users in Writeback and Actions.
- Start other processes when data changes with Events (Triggers) and Action Blocks.