

Getting Started with Workbooks and Collections
Introducing Astrato Workbooks and Collections
Section titled “Introducing Astrato Workbooks and Collections”On the left navigation bar in Astrato, the Workbooks and Collections links help you manage the data visualizations you create.
You can organize your data visualizations for a specific topic or report within a workbook.
Add worksheets and layers to organize all the elements in your workbook. Each worksheet can have multiple layers to organize the elements you want to display or have people interact with when you publish your workbook.
From anywhere in Astrato, you can click the Astrato icon in the top left to return to the Workbooks page.
In the new Lobby, use Grid view or List view above the workbooks to choose their presentation. Your choice is remembered for your account and tenant in the same browser when you reload or return to Workbooks. It does not sync across browsers. If browser storage is blocked or cleared, the page uses its default view; you can still switch views during your visit.
The new Lobby loads your whole accessible workbook catalogue, including removed workbooks. Tabs, collections, data-connection filters and text searches cover the whole catalogue. Tab counts reflect the current collection and search filters; (…) means the catalogue is still loading. Collection counts reflect the workbook search (including a selected search field) and data-connection filter across all tabs, not just the active tab. Collections remain selectable when their count is zero. Use Refresh content to read the catalogue again. Sort by name, creation date, update date or semantic-layer name in either direction.
Opening options are the same in All workbooks and within a collection, in both grid and list views, including workbooks on Analytics → All. View opens the published version. With edit access, Preview opens your own draft where one exists, and Edit opens your draft or starts one from the published version. An unpublished workbook has no View option.
Error notices in the new Lobby and Semantic Layer Editor show diagnostic information immediately below the message, without opening a dialog or expanding the notice. Where an operation supports retrying, the notice includes Try again. Other repair actions remain available. The notice shows the diagnostic information available for that operation, including the Correlation ID when there is one. Use Copy details to include the diagnostic information when reporting the error to support. Local validation errors do not have a request identifier unless a server request produced one.
When static published applications are enabled, open a workbook’s Properties → Advanced and choose Refresh static app to clear its published snapshot. The action requires edit access and a published version and is not available for removed workbooks. A success message confirms that the cache was cleared; the application rebuilds on the next visit, not immediately. Refreshing does not publish a draft or change the published version. When Analytics cannot load several sources, its notice shows the diagnostics for each failed source separately.
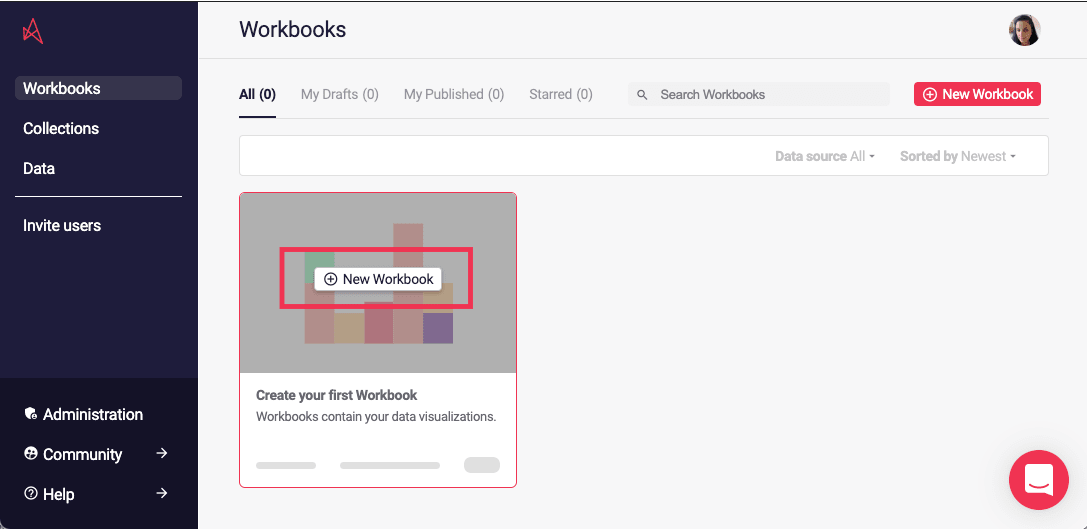
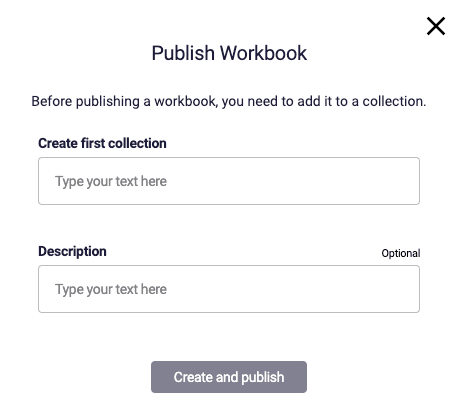
When you create your first workbook, you are prompted to assign it to a Collection.
Collections are used to organize your workbooks.
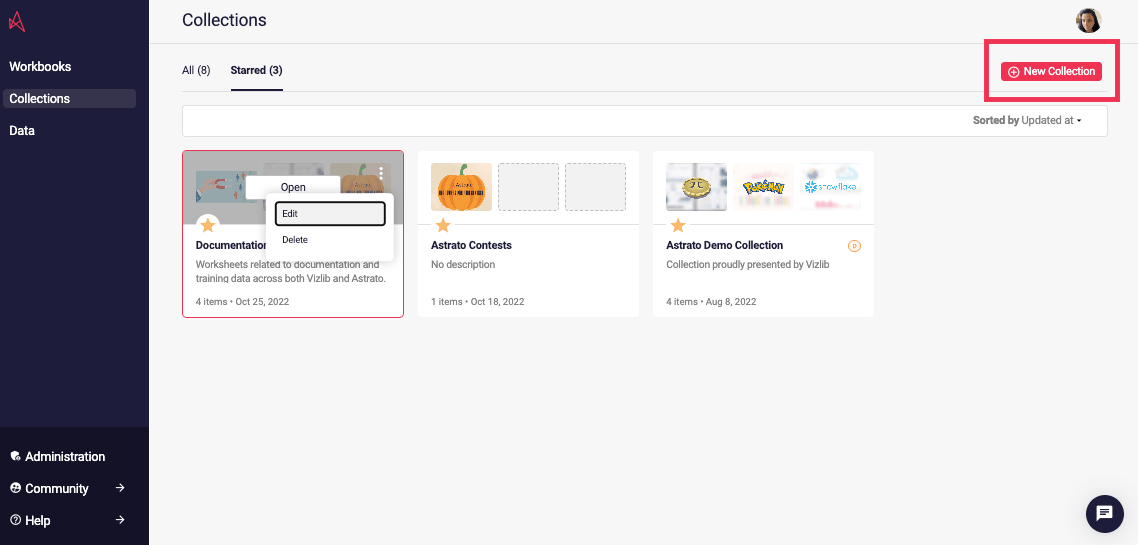
In addition to the name and description, all workbooks and collections tiles display their creation date. Workbooks also display the last modified date, and Collections show the number of items/workbooks in that collection.
-
Introducing Astrato Workbooks
Creating a workbook
Section titled “Creating a workbook”-
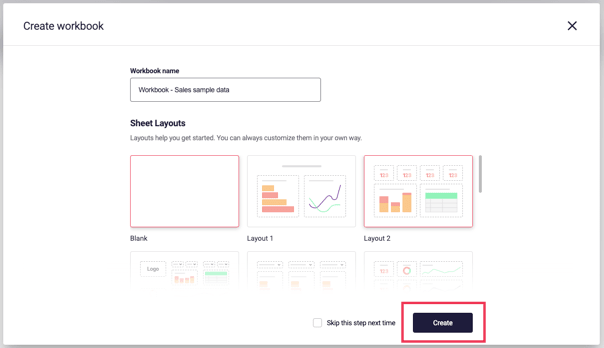
From the Astrato Lobby (Home), click the button (+) New workbook.
-
Type in a workbook name.
-
Select one of the worksheet template layouts or click Blank.
-
Click Create.
Workbook menu options
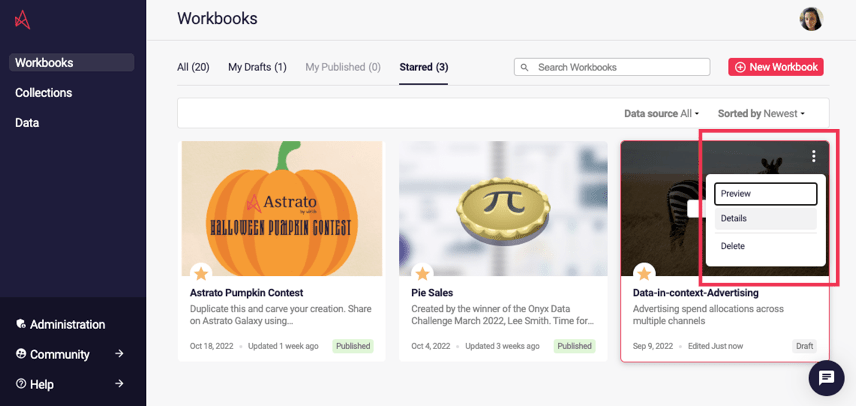
Section titled “Workbook menu options”Click the context menu (three dots in the top right) of the workbook tile to view the workbook menu options. If it’s your workbook, the options displayed for a:
-
draft workbook are: Preview, Details, and Delete.
-
published workbook are: Duplicate as draft, Manage collections, and Delete.
If it’s someone else’s published workbook, the option Duplicate as draft displays.
Please note: There is no ‘archive’ - if you delete your workbook, you cannot restore your work. Clicking delete does not affect your data connection.
Adding or editing your Workbook details
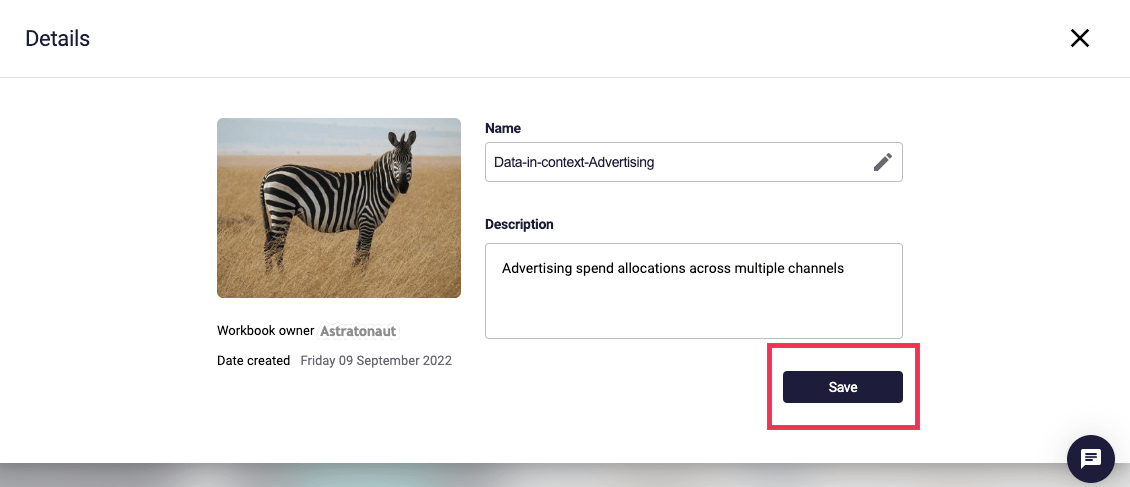
Section titled “Adding or editing your Workbook details”Click Details from the context menu to edit your workbook’s details (its name, description, and image). To add or edit your workbook details:
-
Click the context menu in the top right.
-
Click Details to view the workbook’s current content.
-
Click the pencil icon to edit the field.
-
After making your edits, click Save.
Workbook status types
Section titled “Workbook status types”The status of all workbooks is draft until you publish them. Published workbooks are assigned a link to share with others outside your Astrato tenant.
Please note: all viewers of your published workbook must have permission to view the data that’s displayed in your charts. An error displays in place of the chart if the user does not have permission to view the underlying data.
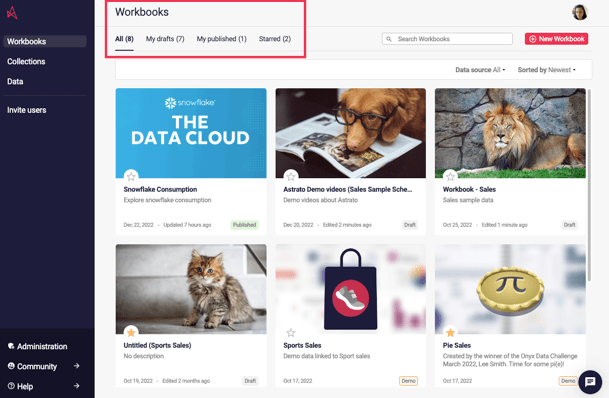
The status of all your workbooks is listed on tabs at the top of the Lobby. They’re split into:
All, My drafts, My published, and Starred (your favorites).
Click on the tab name to view the workbooks in each section.
When you have a draft workbook, the My drafts tab becomes the default tab in the Astrato lobby to access your content faster.
Sorting the list of workbooks
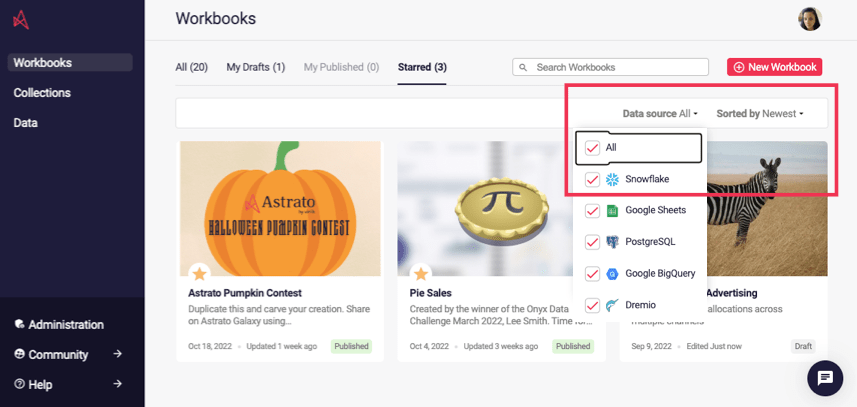
Section titled “Sorting the list of workbooks”In the original Astrato lobby, the sorting options for workbooks are below the (+) New Workbook button. The sorting options include:
-
data source
-
currency - Newest, oldest, last modified
-
alphabetically - A-Z or Z-A
Viewing or Editing a workbook
Section titled “Viewing or Editing a workbook”-
Mouse over the image your workbook to view the option to Edit. If it’s not your workbook, the option to View displays.
-
Click Edit to open your workbook.
-
Click View to see the contents of other published workbooks.
Please note: you may be prompted to ask permission to view the workbook if you do not have permission to view the data source. Click Cancel or click Confirm to request access to the external data connection. The data connection (for example, Snowflake) confirms your ability to access the connection (for example, by using SSO); however, if you don’t have permission to view that dataset, only an error ‘invalid query’ displays.
Back to Top
Organizing workbooks into Collections
Section titled “Organizing workbooks into Collections”Collections are used to manage, organize and decide on the visibility of a group of Astrato workbooks. You can add and remove users using the options to Manage Members and Manage Workbooks.
From the Manage Members view, slide the toggle to the right to make your collection visible to all users (current and future). If you keep the toggle on the left, you can hide the collection from users that aren’t members.
Click Collections in the left sidebar to open the Collections homepage. You’ll see your existing collections and two tabs in the Lobby.
-
All displays all the collections created in your Astrato tenant.
-
Starred shows the collections you’ve marked as your favorites.
Creating a Collection
Section titled “Creating a Collection”-
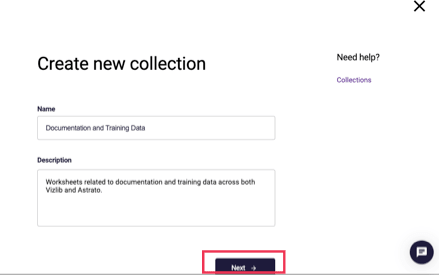
From the Collections home, click the button (+) New collection.
-
Type in a name for your collection.
-
Add a description (optional).
-
Click Next.
ℹ️ You can create Multi-Level Collections using forward slashes (
/) in the collection name. They allow you to organise workbooks into logical hierarchiese.g.
Marketing/Advertising = Marketing → Advertising
Adding Members
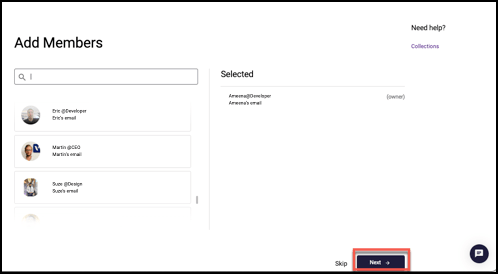
Section titled “Adding Members”You can add members to work on collections with specific team members; this also makes the collection only visible to those users. If you don’t need to do this now, click Skip.
-
Use the search field to filter names or scroll through the list.
-
Mouse over the name, and a checkmark displays beside the name.
-
Click the (+) to add them as a member of the collection. Their names display in the Selected list.
-
Click Next.
Adding Workbooks
Section titled “Adding Workbooks”-
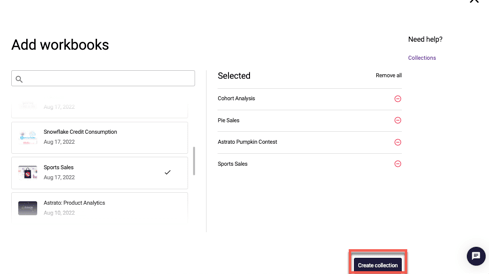
Use the search field to filter names or scroll through the list.
-
Mouse over the name, and a (+) plus icon displays.
-
Click the (+) to add them, and a checkmark displays beside the name. Their name displays in the Selected list.
-
Click the Create collection button.
Managing members or workbooks in your Collection
Section titled “Managing members or workbooks in your Collection”From the Collections page, click a collection, then click either Manage Workbooks or Manage Members to add or remove workbooks or members from your Collection.
-
Mouse over the name, and a (+) icon displays.
-
Click the (+) to add them to the collection. Their names displays in the Selected list.
-
Remove Members by clicking the (-) icon beside their name. Or click the words Remove all to remove all members from your collection.
Collection menu options
Section titled “Collection menu options”Click the context menu (three dots in the top right) of the Collection tile to view the menu options. If it’s your collection, the options are Edit and Delete.
If it’s someone else’s collection, there are no menu options; the only option displayed is Open. Clicking Open shows all the workbooks in that collection.
Please note: There is no ‘archive’ - if you delete your collection, you cannot restore the work on the visualizations. This does not affect your data connection.
Next topic >> Workbook Editor - Getting Started or Data Connections - Getting Started in Astrato
Back to Top