

Data Connections - Getting Started in Astrato
Introduction
Section titled “Introduction”At Astrato, we try to make your data journey as smooth as possible. This article contains an overview of creating connections to a data source and a feature support matrix for the data sources that Astrato can connect to.
We also provide the steps to create a Semantic Layer link to a Data Source. Using a Semantic Layer of a data source is more efficient than having users create and manage copies of the data source.
-
Data Connection Access Control
- Managing Data Connection Access List
-
-
Adding a Semantic Layer
Connecting to a data source
Section titled “Connecting to a data source”From the Astrato homepage, click Data on the sidebar to create a new data source connection or a new data view from a source already added.
ℹ️ Allow / Whitelisting Astrato IPs to query your data
Section titled “ℹ️ Allow / Whitelisting Astrato IPs to query your data”If you need to add Astrato IPs to an allowlist/whitelist, please use the IP addresses below
34.142.11.11
34.142.68.232
-
34.142.11.11
-
34.142.68.232
-
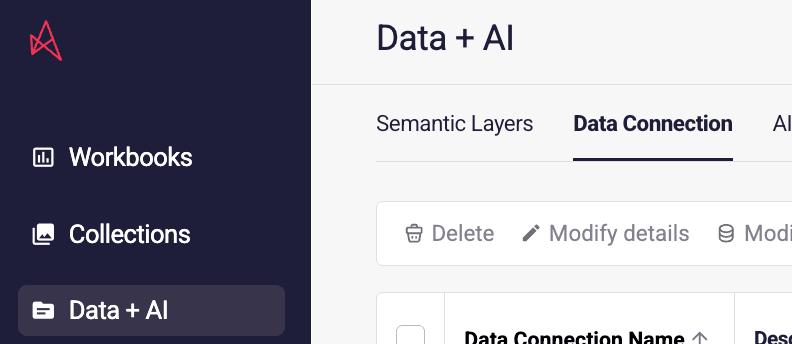
Click on the Data Source tab, and click the button (+) New Data Source. The list of data connection options displays.
-
Click the button of the data source you want to connect to.
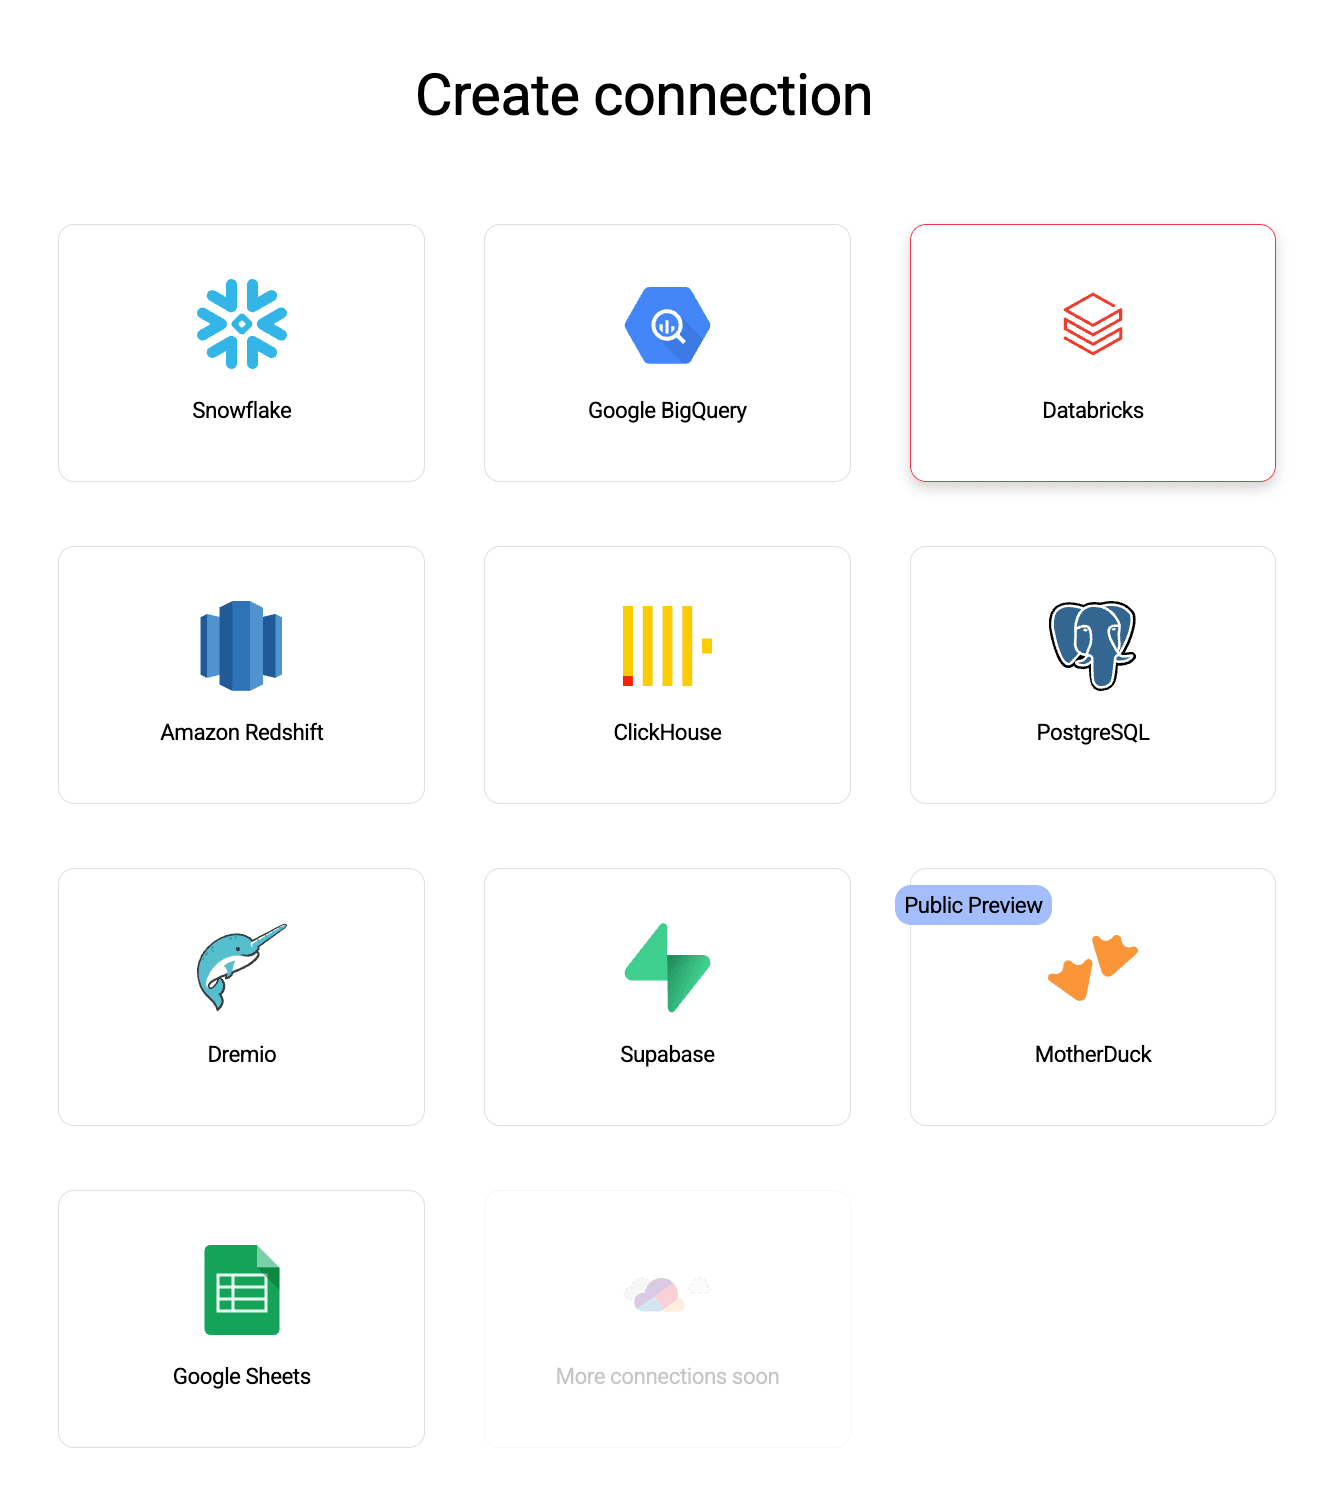
The data sources you can connect to include:
-
Snowflake
-
Supabase
-
PostgreSQL; Clickhouse via PostgreSQL interface
-
Google BigQuery
-
Dremio Cloud
-
Amazon Redshift
-
Databricks
-
Clickhouse
-
MotherDuck
-
Google Sheets
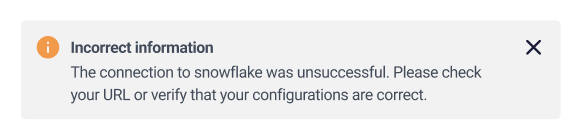
If there’s a connection error, a message displays that there’s incorrect information in the connection dialog.
Back to Top
Data Connection Access Control (ACL)
Section titled “Data Connection Access Control (ACL)”Data connection access control allows the data connection owner to define the level of access each user will have to the data connection.
Three different levels of access can be granted to users:
-
View
-
Only allowed to use the data connection when using a dashboard
-
won’t be able to create semantic layers with the data connection
-
-
Create
-
all of the above
-
allowed to create new semantic layers with the data connection
-
-
Edit
-
all of the above
-
allowed to modify the data connection
-
Permissions are granted to Roles, Groups, or Individual Users.
The data connection permissions overwrite the semantic layers permissions.
For example, suppose a user has View permission in a data connection and Edit permission in a semantic layer connected to the data connection. In that case, they won’t be able to edit the semantic layer.
-
Managing the Data Connection Access List
Section titled “Managing the Data Connection Access List”The Access control list of a data connection is defined as part of the data connection creation.
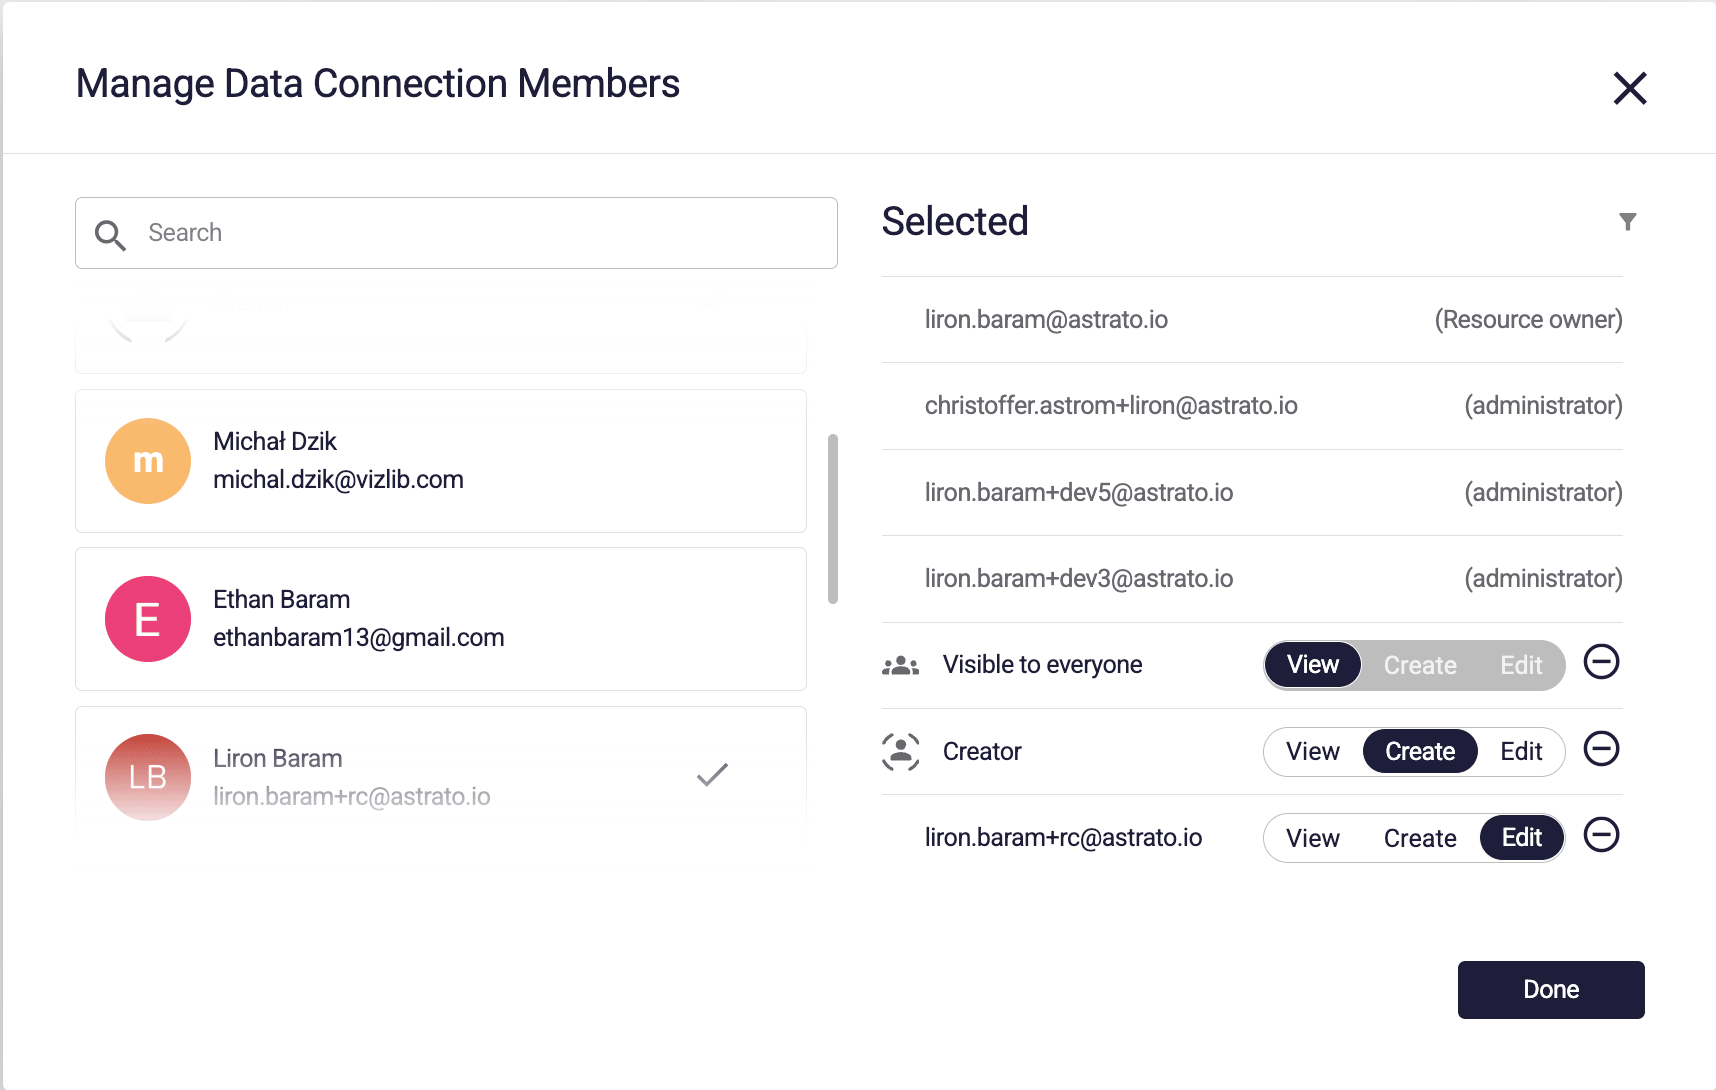
Editing the data connection Access Control List is done by selecting a data connection and clicking the Members button in the toolbar.
The permissions are managed in the modal below.
Back to Top
Editing an existing Data Connection
Section titled “Editing an existing Data Connection”In Data & AI → Data Connections, choose the pencil button or ⋮ → Edit connection. Your connection permissions determine whether you can edit a connection.
Saved warehouse, role, database and schema values appear immediately. Role and warehouse choices load using the saved connection. (Default) uses the account default, with its name shown when the source reports it. Loading choices does not validate unsaved edits.
Credentials remain masked. To rename a connection, change Connection name and select Save changes, without entering a credential. For Snowflake, role, warehouse, source and Deployment Region changes also keep the saved credential: make your selections and select Save changes. If the changes cannot be saved, the form shows an error. If the save cannot be confirmed, check the connection’s saved values before retrying.
To change only the credential, select Replace password or Replace private key and enter the new credential. Cancel replacement discards the entered credential. Changing the account or username also requires a credential; Save changes opens an empty credential input if needed. Choosing a different authentication method shows its required fields.
Select Save changes to validate and save your edits. Missing values appear as errors beside the fields, and the first invalid field receives focus. Validation and server failures appear separately above the form. Validate Connection also lets you test changed credentials before saving.
In the older lobby, on the data sources page:
-
Select the connection that you want to update, using the checkbox
-
Click on Modify Connection
- If this option is not available, create a new connection and switch the connection of data views.
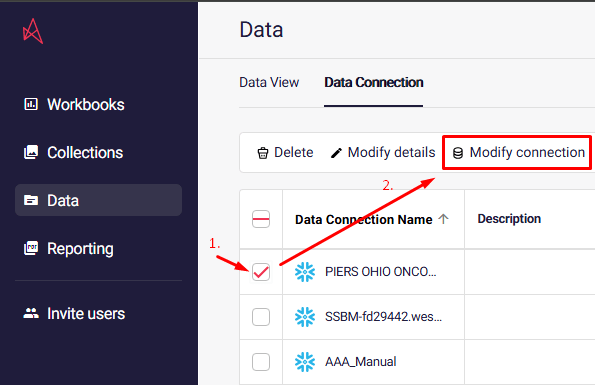
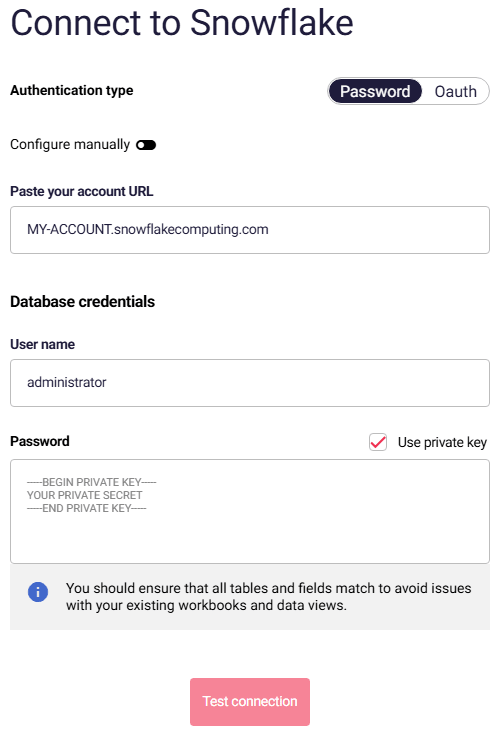
You will be met with this screen, which includes your existing account URL. Ensure you choose the same database and role, to provide access to the same data.
Back to Top
Semantic Layers
Section titled “Semantic Layers”Semantic Layers allow users to create a link to a Data Source without copying the data. This is more efficient than creating and needing to manage copies of a data source.
Click on Data in the sidebar to view the tabs for Data Source and Semantic Layer.
Filtering or searching your list of data sources
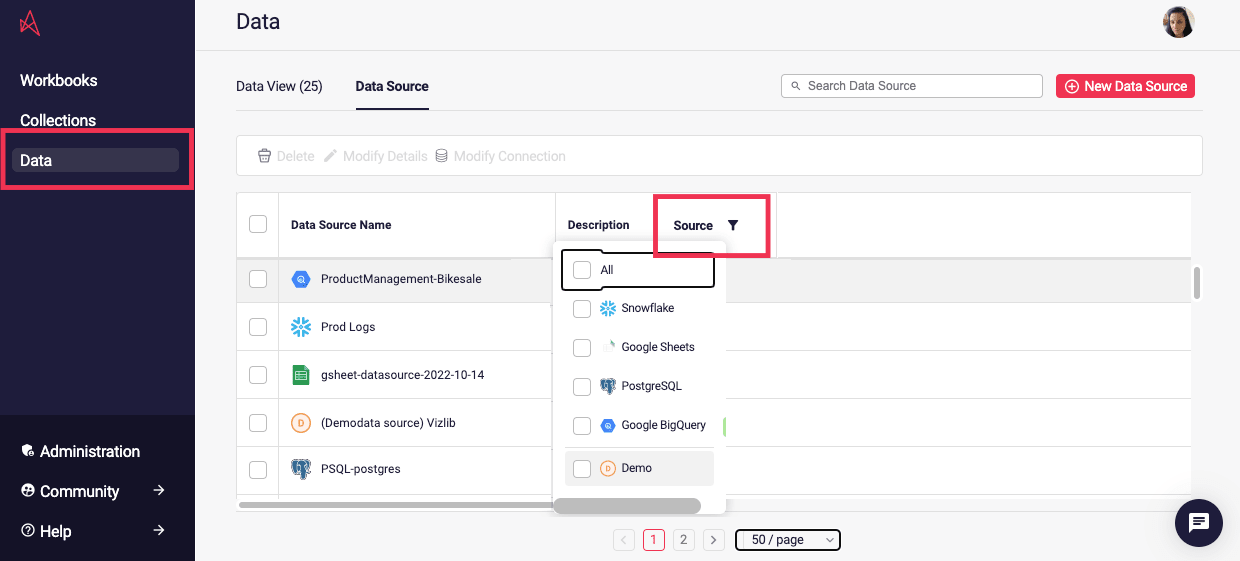
Section titled “Filtering or searching your list of data sources”Click the filter icon on the Source field to view all data views or sources by type, or use the Search field at the top of the page to narrow your search.
Adding a Sematic Layer
Section titled “Adding a Sematic Layer”Data Views allow users to create a link to a Data Source without copying the data. This is more efficient than creating and needing to manage copies of a data source.

-
Click on Data in the sidebar to view the tabs for Data Source and Data View.
-
Click the Data View tab
-
Choose a source from the list of data connections or click the (+) New Data Connection button on the top right
-
The Data View Editor (semantic layer) displays, from the data tree, select the data tables, and click Define Data View. You can edit the joins, create your dimensions and measures now, or complete the creation of your data view and come back to the semantic layer to add those in. Now that you’ve selected your data, you’re ready to create a Workbook.
Back to Top
Feature support matrix for data sources
Section titled “Feature support matrix for data sources”The icons in the matrices are defined as:
-
The check mark ( ✅ ) indicates full support
-
The calendar icon ( 📅 ) indicates it’s planned or possible but not yet implemented.
-
Blank spaces indicate that the option is either not planned or possible.
Authentication
Section titled “Authentication”Snowflake | Databricks | Google BigQuery | Postgres / Supabase / Redshift | Dremio Cloud | ClickHouse | |
UserID / Password | ✅ | ✅ | ✅ | |||
Personal Access Token/JWT | ✅ | ✅ | ✅ | ✅ | ✅ | |
oAuth | ✅ | 📅 | ✅ (with Google Account) | 📅 | ||
Pass-through Authenti-cation | ✅ | 📅 | 📅 | 📅 | ✅ |
Analytics
Section titled “Analytics”Snowflake | Databricks | Google BigQuery | Postgres / Supabase / Redshift | Dremio Cloud | ClickHouse | |
Advanced Measures | ✅ | ✅ | ✅ | ✅ | ✅ | ✅ |
Aggregat-ion functions | ✅ | ✅ | ✅ (excluding median/ mode) | ✅ | ✅ | ✅ |
Data Explorer | ✅ | ✅ | ✅ | ✅ | ✅ | ✅ |
Pivot Table / Expandable Table | ✅ | ✅ | ✅ | ✅ | ✅ | ✅ (using new analyzer) |
Timetravel | ✅ (90 days) | ✅ (90 days) | ✅ (7 days) |
Data Apps
Section titled “Data Apps”Snowflake | Databricks | Google BigQuery | Postgres / Supabase / Redshift | Dremio Cloud | ClickHouse | |
Native AI ✨ | ✅ 20+ LLMs via Cortex & Fine tuning | ✅ Available via multiple methods | ✅ Available via SQL using Vertex | (✔️) Connect to OpenAI/Gemini using Supabase edge function | (✔️) Available by using UDF | |
Stored Procs and/or External Function calling | ✅ | ✅ | ✅ | ✅ (without network access) | ||
Public Embeds | ✅ | ✅ | 📅 | ✅ | ✅ | ✅ |
Restricted Embeds | ✅ | ✅ | ✅ | ✅ | ✅ | ✅ |
Writeback | ✅ | ✅ | ✅ | ✅ | ✅ |
Data Modelling / Loading
Section titled “Data Modelling / Loading”Snowflake | Databricks | Google BigQuery | Postgres / Supabase / Redshift | Dremio Cloud | Click-house | |
CSV Upload | ✅ | 📅 | 📅 | ✅ | ||
Date grouping | ✅ | ✅ | ✅ | ✅ | ✅ | ✅ |
Table Joins | ✅ | ✅ | ✅ | ✅ | ✅ | ✅ |
Back to Top